Customer ServiceTroubleshooting Tips
Operating InstructionsSafety Instructions
Installation Instructions
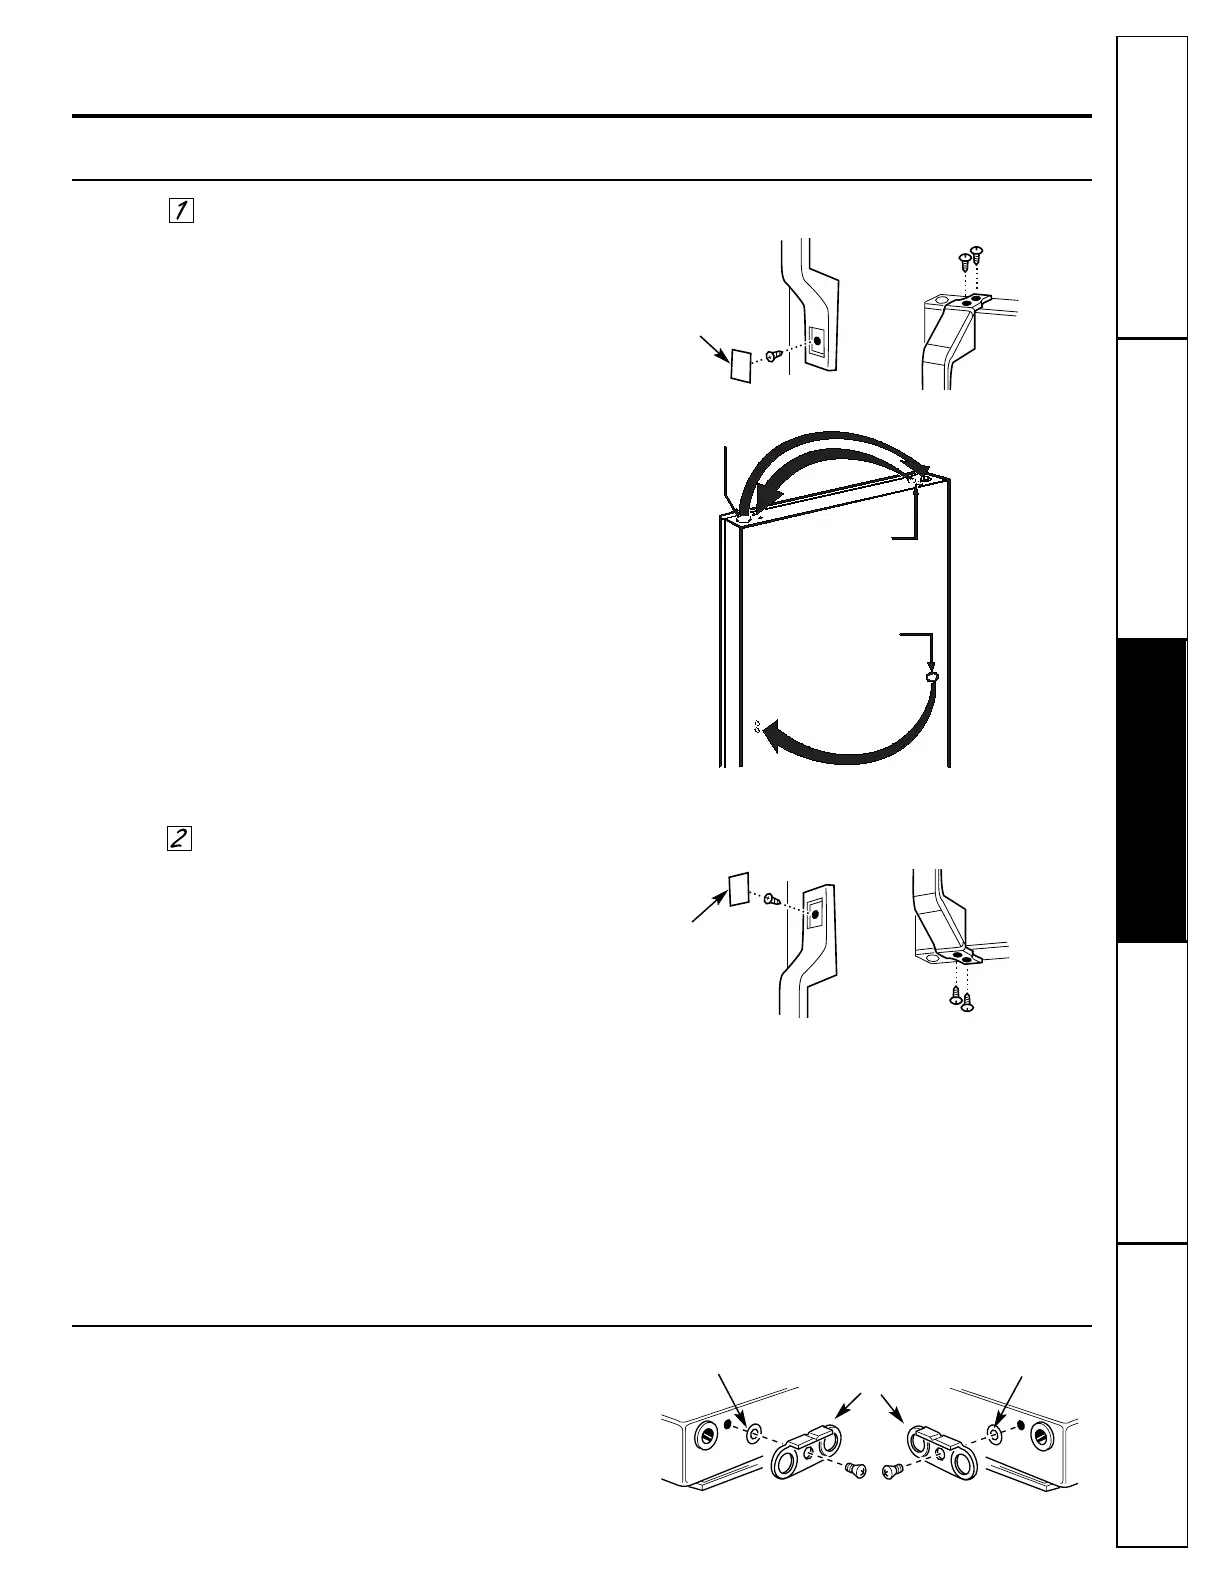
Transfer Fresh Food Door Handle to the Right
To remove the handle:
■ Remove the plug button by carefully prying
under the edge with a putty knife.
■ Remove the exposed screw holding the handle.
■ Remove the two screws holding the handle to the
top of the door.
After removing the handle:
■ Remove the screws from the right edge of the
door top and insert them into the handle screw
holes on the left side.
■ Remove the plug button from the left edge of the
door and insert it into the hole on the opposite
side.
■ Transfer the button on the door to the opposite
side.
Reinstalling the handle:
■ Attach the handle to the right side of the door,
reversing the above procedure.
Reverse Door Handles
Transfer Door Stops
Plug Button
Plug Button
Handle Bottom
Handle Top
Screws for
handle holes
Button
Transfer Freezer Door Handle to the Right
■ Remove the nameplate plug button by carefully
prying under the edge with a putty knife.
■ Remove the exposed screw holding the handle.
■ Remove the two screws holding the handle to the
bottom of the door.
■ Remove the handle.
■ Remove the door stops as shown below.
■ Reverse the buttons and screw on top flange
of door.
■ Transfer the button on door face to
opposite side.
■ Attach the handle to the right side of the door,
reversing the above procedure.
Move the metal door stop on each door from the
right end to the left end.
Door Stop
Left Side Right Side
Washer Washer
11
Nameplate
Plug Button
Handle Bottom
Handle Top