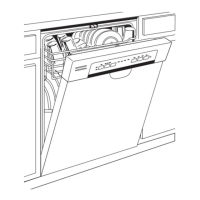
Dishwasher Installation
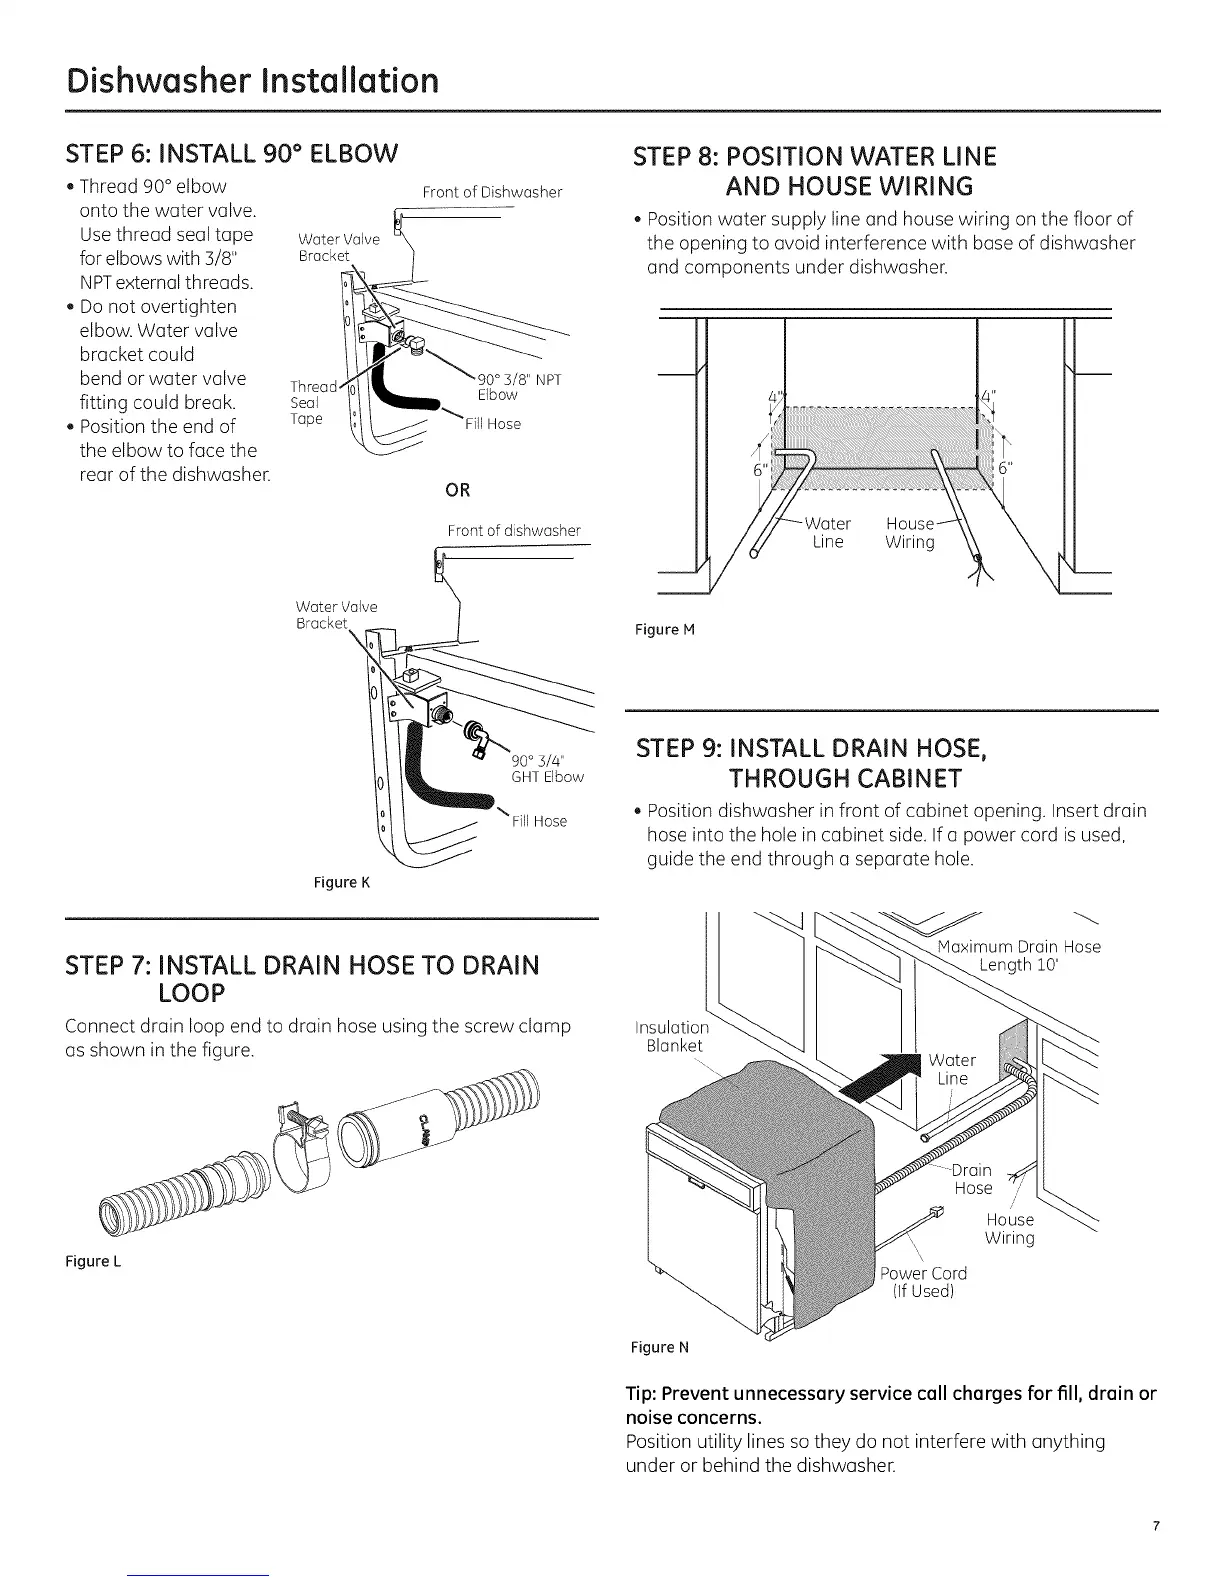
STEP 6: INSTALL 90 ° ELBOW
, Thread 90° elbow
onto the water valve.
Use thread seal tape Water Valve
for elbows with 3/8" Bracket
NPTexternal threads.
, Do not overtighten
elbow. Water valve
bracket could
bend or water valve Thread
fitting could break. Seal
, Position the end of Tape
the elbow to face the
rear of the dishwasher.
Front of Dishwasher
NPT
Elbow
Fill Hose
OR
Frontof dishwasher
STEP 8: POSITION WATER LINE
AND HOUSE WIRING
, Position water supply line and house wiring on the floor of
the opening to avoid interference with base of dishwasher
and components under dishwasher.
Line Wiring
Water Valve
Bracket
\
Figure M
\ Fill Hose
Figure K
STEP 7: INSTALL DRAIN HOSE TO DRAIN
LOOP
Connect drain loop end to drain hose using the screw clamp
as shown in the figure.
Figure L
STEP 9: INSTALL DRAIN HOSE,
THROUGH CABINET
, Position dishwasher in front of cabinet opening. Insert drain
hose into the hole in cabinet side. If a power cord is used,
guide the end through a separate hole.
Maximum Drain Hose
Length 10'
Blanket
Hose
//
House
, Wiring
\
PowerCord
(IfUsed)
Figure N
Tip: Prevent unnecessary service call charges for fill, drain or
noise concerns.
Position utility lines sothey do not interfere with anything
under or behind the dishwasher.