Chapter 2. Installation
16 PanaFlow™ LC User’s Manual
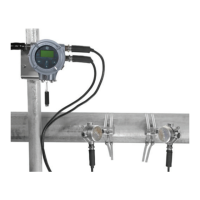
Figure 19: Transducer Mounting, Step 1
2. Apply a thin bead of couplant to one of the transducers. A bead approximately the size of a
toothpaste bead should be placed down the center of the transducer face.
Figure 20: Transducer Mounting, Step 2
BHGE supplies an ultrasonic couplant for your clamp-on installation. The purpose of the couplant is to
provide reliable transmission of ultrasound between two adjacent solid surfaces. Couplants perform this
task by excluding air from the space between the adjacent surfaces. Accordingly, the clamp-on transducers
should be pressed tightly against the pipe, using hand pressure on the set screw to squeeze the couplant to as
thin a film as practical for the given pipe surface.
BHGE provides couplants for both permanent and temporary use as well as for high-temperature and
low-temperature applications. For long-term installations, make sure the couplant does not dry out or
extrude. Standard couplants supplied from BHGE for the PanaFlow™ LC are listed in Table 1 below.
Table 1: Standard BHGE Couplants
Part No. Type Temp. Range Use
CPL-1 Standard -40 to +240°C Semi-Permanent
CPL-8 Solid Sheet -40 to +260°C Permanent
 Loading...
