ge.com
STEP-BY-STEPINSTRUCTIONS(cont.)
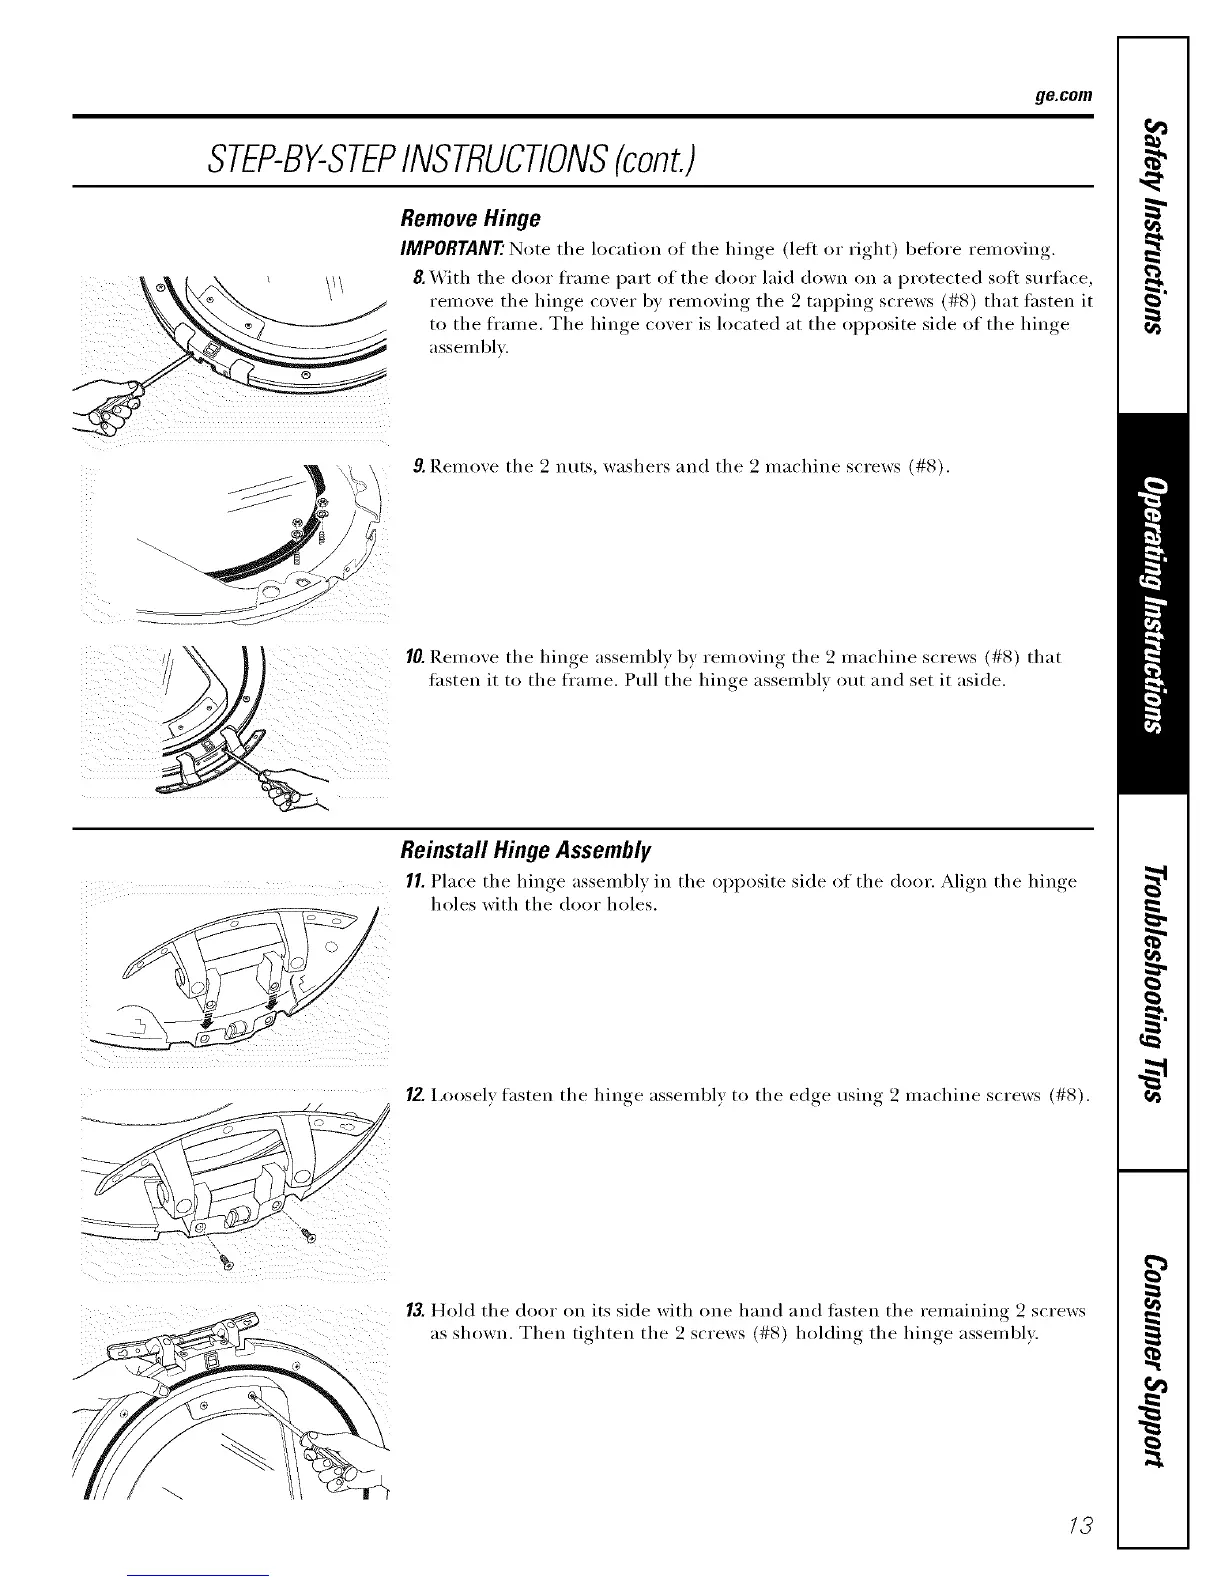
Remove Hinge
IMPORTANT" Note the location ot the hinge (lett or right) before removing.
8.With the door fl'ame part of the door laid down on a protected soft surt,_ce,
renlove tile hinge cover by removing tile 2 tapping screws (#8) that tasten it
to the fl'ame. The hinge cover is located at the opposite side of the hinge
assembly.
9, Remoxe tile 9 nuts, washers and tile 9 machine screws (#8).
7
10.Remoxe tile hinge assembly by remoxing tile 2 machine screws (#8) that
tasten it to the fl'ame. Pull the hiiwe assembly out and set it aside.
Reinstall Hinge Assembly
11.Place tile hinoe_ assembly in tile opposite side of tile door. Align tile hinoe
holes with the door holes.
12. I,ooselx fasten tile hinge assembly to tile edge using 2 machine screws (#8).
13. Hold tile door on its side with one hand and tasten tile remaining 2 screws
as shown. Then tighten tile 2 screws (#8) holding tile hinge assembl_.
13