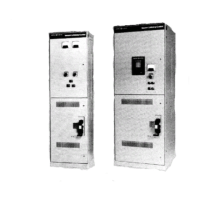
CR194 Two-High Vacuum Limitamp@ Control
NOTE:
If
the two metal barriers that
form
the rear cable
trough (See Figure 3.2) are mounted in the upper compart-
ment, they can be moved to the lower compartment to form the
necessary trough.
Once the motor cables are terminated,
the cable lugs and the complete motor terminal pads
must be taped to maintain necessary electrical clear-
(See “Taping Instructions for 5kV” section).
Figure 32. View of cable trough barriers that mount
in top or bottom compartment
CABLE ENTRY FROM TOP
Step 1.
Cables to the top starter should be run straight into
the motor terminals using the “upper unit” area as
shown in the top view in Figure 50.
Step
2.
Cables to the bottom starter should be run in the mo-
tor cable trough using the “lower unit” area as shown
in the top view in Figure 50. This cable trough is
formed by two metal barriers in the left rear corner of
the upper compartment. Once the cables enter the
lower compartment they can be formed forward to
align with the motor terminals.
NOTE:
If
the two metal bawiers that
form
the rear cable
trough (See Figure 32) are mounted in the lower compart-
ment, they can be moved to the upPer compartment to form
the necessary trough.
WARNING:
Once the motor cables are terminated,
the cable lugs and the complete motor terminal pads
ances. (See “Taping Instructions for 5kV” section).
Cable Termination Guidelines
The following general guidelines apply whether motor
cable or incoming power cable is being terminated in
the Limitamp@ lineup. In any installation, cable should
be prepared for termination in accordance with the in-
structions of the cable manufacturer.
Step 1.
Pull in the cables for maximum clearance between
phase, ground and other cable or wire runs.
Step
2.
Prepare the cable for termination in accordance with
the manufacturer’s instructions. Some possible termi-
nation methods are shown in Figures 33-38.
Step 3.
Bolt the cable terminals to the point of termination.
Step 4.
If contact between the cable and an adjacent bare bus
cannot be avoided, as well may be the case in some in-
coming line situations, tape the bus in the immediate vi-
cinity of the cable contact point so that the surface
creepage distance from the cable to the bare bus bar is at
least three inches. Thus the surface creepage from the
bare bus where the cable terminates to the nearest bare
part of the bus the cable touches will be at least seven
inches. (See “Taping Instructions for 5kV’ section).
TERMINATION OF NON-SHIELDED,
NON-LEAD-COVERED CABLE
This cable is generally run through rigid conduit or
cable raceways and brought into the enclosure by the
use of conventional cable clamps and conduit fittings.
Refer to Figures 33 & 34 for termination details.
GE IRRASILQ
SPLICE TAPE
Figure 33. Termination of rubber-insulated, non-shielded,
non-lead-covered, 5000-volt cable
19
 Loading...