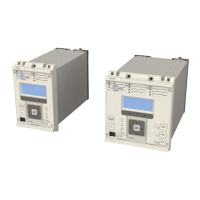
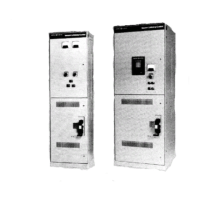
CR194 Two-High Vacuum Limitamp@ Control
Step 6.
Tighten the set screw on the nut to lock the adjust-
ment in position. Use caution to prevent turning the
nut while tightening the set screw.
Step 7.
WARNING:
All power must be removed from the
main bus before attempting to adjust the isolation
switch mechanism.
To adjust the isolation switch blade pressure, follow
the steps below:
Step 1.
With the high-voltage door open, push in the door op-
erated release pin as shown in Figure 39. This is not a
normal operation and should only be used for equip-
ment check out or servicing.
Step 2.
Push in the handle latch release (See Figure 39) and
move the handle up to the “ON” position.
Step 3.
Remove the isolation switch barriers (Figure 49) by
removing the retaining screws that hold these in place.
Place the barriers aside, and retain the hardware
for reassembly.
ISOLATION )
p‘
SWITCH -
BARRIERS
Figure 49. Isolation switch barriers to remove
for switch adjustment
Step 4.
Near the top end of each switch blade assembly, a screw
and adjusting nut are located along with a belleville type
spring washer. To adjust the blade pressure, the nut must
be adjusted. Loosen the small set screw located on each
adjusting nut, then loosen the nut.
Step 5.
When the isolation switch blade adjustment is com-
plete for all three phases, return the isolation switch
handle to the “OFF” position, then apply a thin coat-
ing of Mobil Temp SHC-32 grease to the contact sur-
faces of the male stab portion of the disconnect.
If adjustment of the pivot point belleville type spring
washers are not planned, the adjustment procedure is
complete, so proceed to Step 6 below.
To adjust the pivot point belleville type spring wash-
ers, follow the steps below:
WARNING:
All power must be removed from the
main bus before attempting to adjust the isolation
switch mechanism.
Step 1.
Close the isolation switch by following Steps 1 8c 2 above.
Step 2.
On each phase, loosen the set screw on the lower pivot
point adjusting nut.
Step 3.
Loosen the adjusting nut and then retighten using
your fingers until the nut is just snug and no side play
of the parts is evident.
Step 4.
Using a wrench, tighten the adjusting nut an addi-
tional
%(one-half)
turn and tighten the set screw to
hold the adjustment in place.
Step 5.
Return the isolation switch to the “OFF” position.
Step 6.
Reinstall the isolation switch barriers. If necessary,
the viewing window may be cleaned before reinstalla-
tion of the barrier. Use a soft cloth and a mild soap
and water solution. or a mild commercial cleaner such
as Windex@.
WARNING:
At the conclusion of this procedure, in-
sure that the isolation switch handle is in the “OFF”
position and all barriers have been reinstalled.
With your fingers, retighten the nut until all the
slack is out between the blades, stationary contact,
spring washer and nut, then tighten using a wrench an
additional ‘/(one-eighth) turn. This procedure
provides the necessary 0.005 inch spring compression
of the blades.
29
 Loading...