– 66 –
Lower Ultrasonic Sensor Assembly
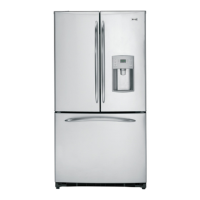
The lower ultrasonic sensor assembly is attached
to the back of the dispenser cavity with 2 tabs (1 on
each side) located behind the front trim.
To remove the lower ultrasonic sensor assembly:
Note: Tabs on the sensor assembly are fragile. Do not
remove unless a replacement sensor is on hand.
1. Remove the actuator paddle and switch. (See To
remove the actuator paddle and switch.)
2. Remove the lower ultrasonic sensor assembly
wires from the retainer in the cavity channel.
Caution: To prevent damage to the lower ultrasonic
sensor assembly and the dispenser recess, in the
following step, use a non-marring tool (plastic
putty knife) to gently pry the sensor tabs out from
the dispenser cavity. Take care not to scratch the
dispenser recess.
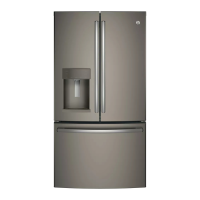
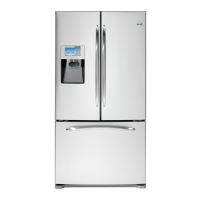
3. Pry out the sensor assembly, then grasp and
pull the sensor assembly out from the dispenser
cavity.
Retainer
Lower Ultrasonic
Sensor Assembly
Tab (1 of 2)
Sensor Assembly (rear view)
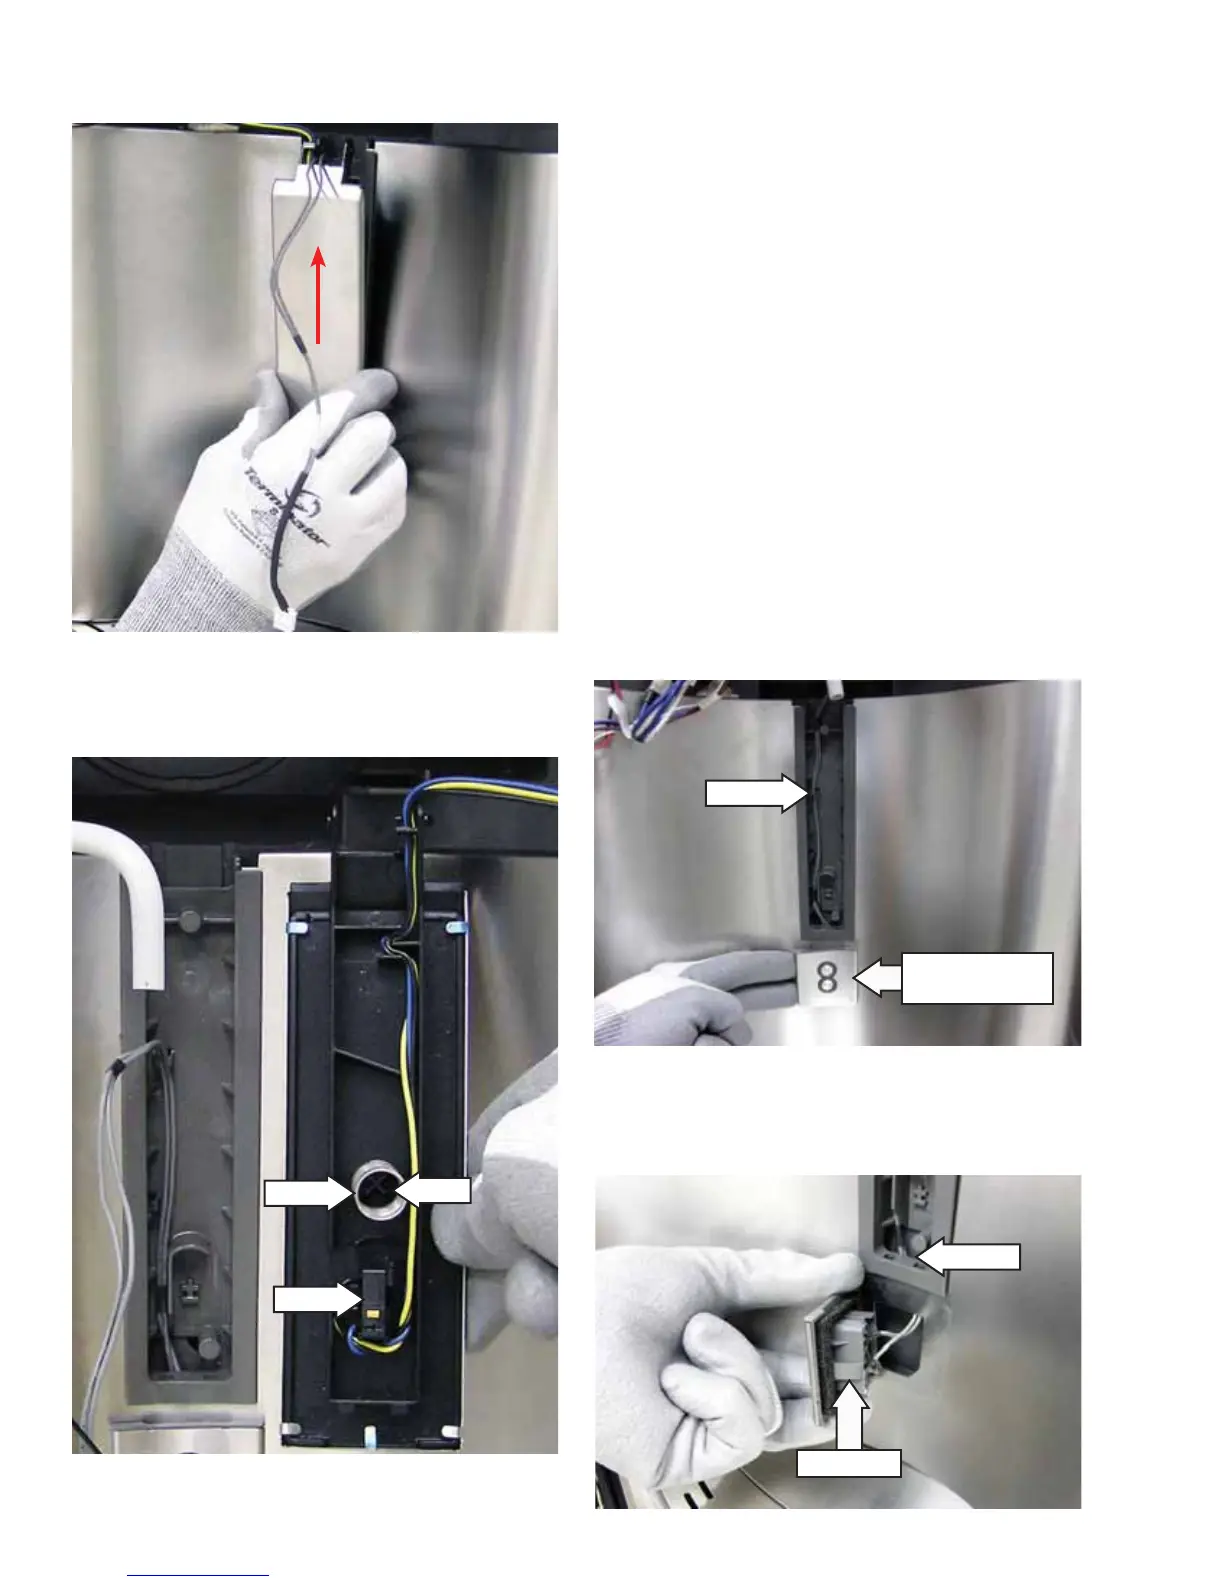
4. Pull sensor wiring thru opening in the bottom of
the dispenser channel.
Opening
4. Tilt the top of the paddle out, then remove it
from the dispenser recess.
Note: The paddle and switch are supplied as an
assembly. The spring is inserted around a post and
is available separately.
Post
Spring
Switch