ing pad as they play. Press SHIFT + SLICER to enter LOOP
SLICER mode. LOOP SLICER mode works almost exactly like
SLICE mode, except that instead of the play marker mov-
ing forward in the song at the end of 8 slices, it sets a loop
when the mode is engaged and returns to the beginning of
the loop when the 8th slice is finished playing.
52. ROLL (KEYPLAY) - This pad mode creates a momen-
tary loop that repeats as long as the pad is held down, and
also engages its own SLIP mode – so that when the loop is
released playback returns to the buered position and not
the position of the play marker at the release of the loop.
Press SHIFT + ROLL to enter KEYPLAY mode. Press each
pad to adjust the playing song by an octave. In this mode,
each of the 8 pads represents a note, with 8 notes making
an octave. There are also 8 scales available to the user in
KEYPLAY mode (through pressing SHIFT + one of the pads)
– Major, Minor, Major Pentatonic, Blues, Mixolydian, Chro-
matic, Dorian, and Lydian.
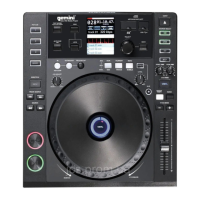
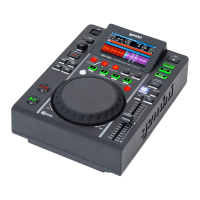
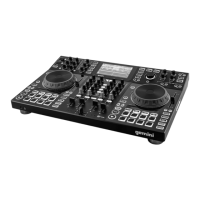
53. PERFORMANCE PADS - The PERFORMANCE PAD sec-
tion is comprised of the 8 large pads and 4 smaller buttons
that are positioned directly underneath the PLATTER in
each deck section. The function of the 8 large pads is de-
termined by the mode the pad section is in, and the modes
are selected by the 4 smaller buttons (and by the SHIFT
button).
54. FAST FX FILTER - The FILTER eect is a typical dual
pole filter eect. When the knob is at the 12 o’clock posi-
tion, there is no eect at all. Turning the knob to the right
engages a hihg-pass filter, which increases the depth of the
filter as well as the cut o frequency as the knob rotates
clockwise. Turning the knob left engages a low-pass filter,
which increases the depth and cuto frequency as the knob
rotates counter clockwise.
55. FAST FX CHOP - When the FX knob moves clockwise,
the eect is CHOP only. The knob eects the time it takes
for the gate to open and close. Turning the knob coun-
terclockwise produces the exact same gater eect as the
clockwise rotation, but also adds a reverb to the gate eect.
56. FAST FX NOISE - The NOISE eect is a noise genera-
tor. When the knob is at the 12 o’clock position, the eect
is not heard. Turning the knob to the right gradually adds
noise to the channel audio, while also increasing the pitch
of the noise. Turning the knob left does the same, adding
noise and increasing the pitch of the noise – but it also adds
reverb after the noise and channel audio.
57. FAST FX FLANGER - A flanger is a modulation eect
where the delayed signal, which is added back to an equal
amount of the dry signal, is modulated by using an LFO.
Turning the knob to the right regulates flanger parameter.
Turning the knob to the left introduces not only a flanger,
but also adds a lowpass filter to the mix.
58. FAST FX - Turn this knob to control the eect selected by
the FAST FX buttons.
59. MAIN FX SOURCE - Use this knob to choose the audio
source you want to apply an FX to.
60. FX SELECT - Use this knob to choose which FX to use.
61. FX PARAMETER - Use this knob to adjust the eect
parameter.
62. FX DRY/WET - Turn this knob to adjust the wet/dry mix
of the eects
63. FX BEAT/TIME - Press either of these buttons to de-
crease or increase the rate of time-based eects on that
deck.
64. FX ON - Press this buttons to enable or disable FX.
65. SHIFT - Press and hold this button to access secondary
functions of other controls.
66. BPM ADJUST - Press these buttons to adjust your BPM
in small increments or press SHIFT to adjust in large incre-
ments.
67. GRID ADJUST - Press these buttons to move our Beat
Grid in small increments or press SHIFT to adjust in large
increments.
68. POWER BUTTON - Press this button to power on. Power
on only after you have connected all of your input devices
and before you power on your amplifiers and loudspeakers.
69. POWER INPUT - Use the included power cable to con-
nect this input to a power outlet.
70. LINK PORT - Use a standard Ethernet cable to connect
this port to a computer, switch or additional SDJ or MDJ
player to share library resourses.
71. MIDI PORT - Use a standard USB cable to connect this
USB port to an available USB port on your computer. This
connection sends and receives MIDI messages.
72. MASTER XLR BALANCED OUTPUT - Use standard
XLR cables to connect these outputs to loudspeakers or an
amplifier system. Use the Master knob on the top panel to
control the volume level.
73. MASTER RCA UNBALANCED OUTPUT - Use stan-
dard RCA cables to connect these outputs to loudspeak-
ers or an amplifier system. Use the Master knob on the top
panel to control the volume level.
74. BOOTH RCA UNBALANCED OUTPUT - Use stan-
dard RCA cables to connect these outputs to loudspeakers
or an amplifier system. Use the Booth knob on the top panel
to control the volume level.
75. CH1/CH2 LINE INPUT - Use standard RCA cables to
connect these line-level inputs to an external audio source.
76. CH3/CH4 PHONO/LINE INPUT - Use standard RCA
cables to connect these line-level or phono-level inputs to
an external audio source.
77. CH4 PHONO/LINE SWITCH & GROUND POST -
Flip the switch to the appropriate postition depending on
what is connected. If using phono-level turntables with a
grounding wire, connect the grounding wire to these ter-
minals. If you experience a low “hum” or “buzz”, this could
mean that your turntables are not grounded.
78. CH3 PHONO/LINE SWITCH & GROUND POST -
Flip the switch to the appropriate postition depending on
what is connected. If using phono-level turntables with a
grounding wire, connect the grounding wire to these ter-
minals. If you experience a low “hum” or “buzz”, this could
mean that your turntables are not grounded.
79. MIC 1 INPUT - Use standard 1/4” (6.35 mm) cables (not
included) to connect standard dynamic microphones to
these inputs. Use the Mic 1 Level knobs on the top panel to
control the volume level.
80. MIC 2 INPUT - Use standard XLR or 1/4” (6.35 mm)
cables (not included) to connect standard dynamic micro-
phones to these inputs. Use the Mic 2 Level knobs on the
top panel to control the volume level.
81. HEADPHONES (NOT SHOWN) - Located on front
of SDJ. Connect your 1/4” or 1/8” (6.35 mm or 3.5 mm)
headphones to this output for cueing and mix monitoring.
The headphone volume is controlled using the Phones Level
knob.
 Loading...