E-2
SAVE THESE INSTRUCTIONS USE AND CARE INSTRUCTIONS
USER SERVICING INSTRUCTIONS
1. Before using and reusing, inspect the product carefully. Discard any products that have cut, damaged or frayed wire
insulation cords, cracks, lamp holders or enclosures, loose connection, or exposed copper wire.
2. When storing the product, carefully remove the product from wherever it is placed, including trees, branches, or bushes,
to avoid any undue strain or stress on the product conductors, connections and wires.
3. When not in use, store neatly in a cool, dry location protected from sunlight.
USER SERVICING INSTRUCTIONS
WARNING: Remove all plastic fasteners and tags. These are part of the packaging and should be discarded.
ASSEMBLY INSTRUCTIONS
1. Gently remove contents from packaging and lay out in a clear
area.
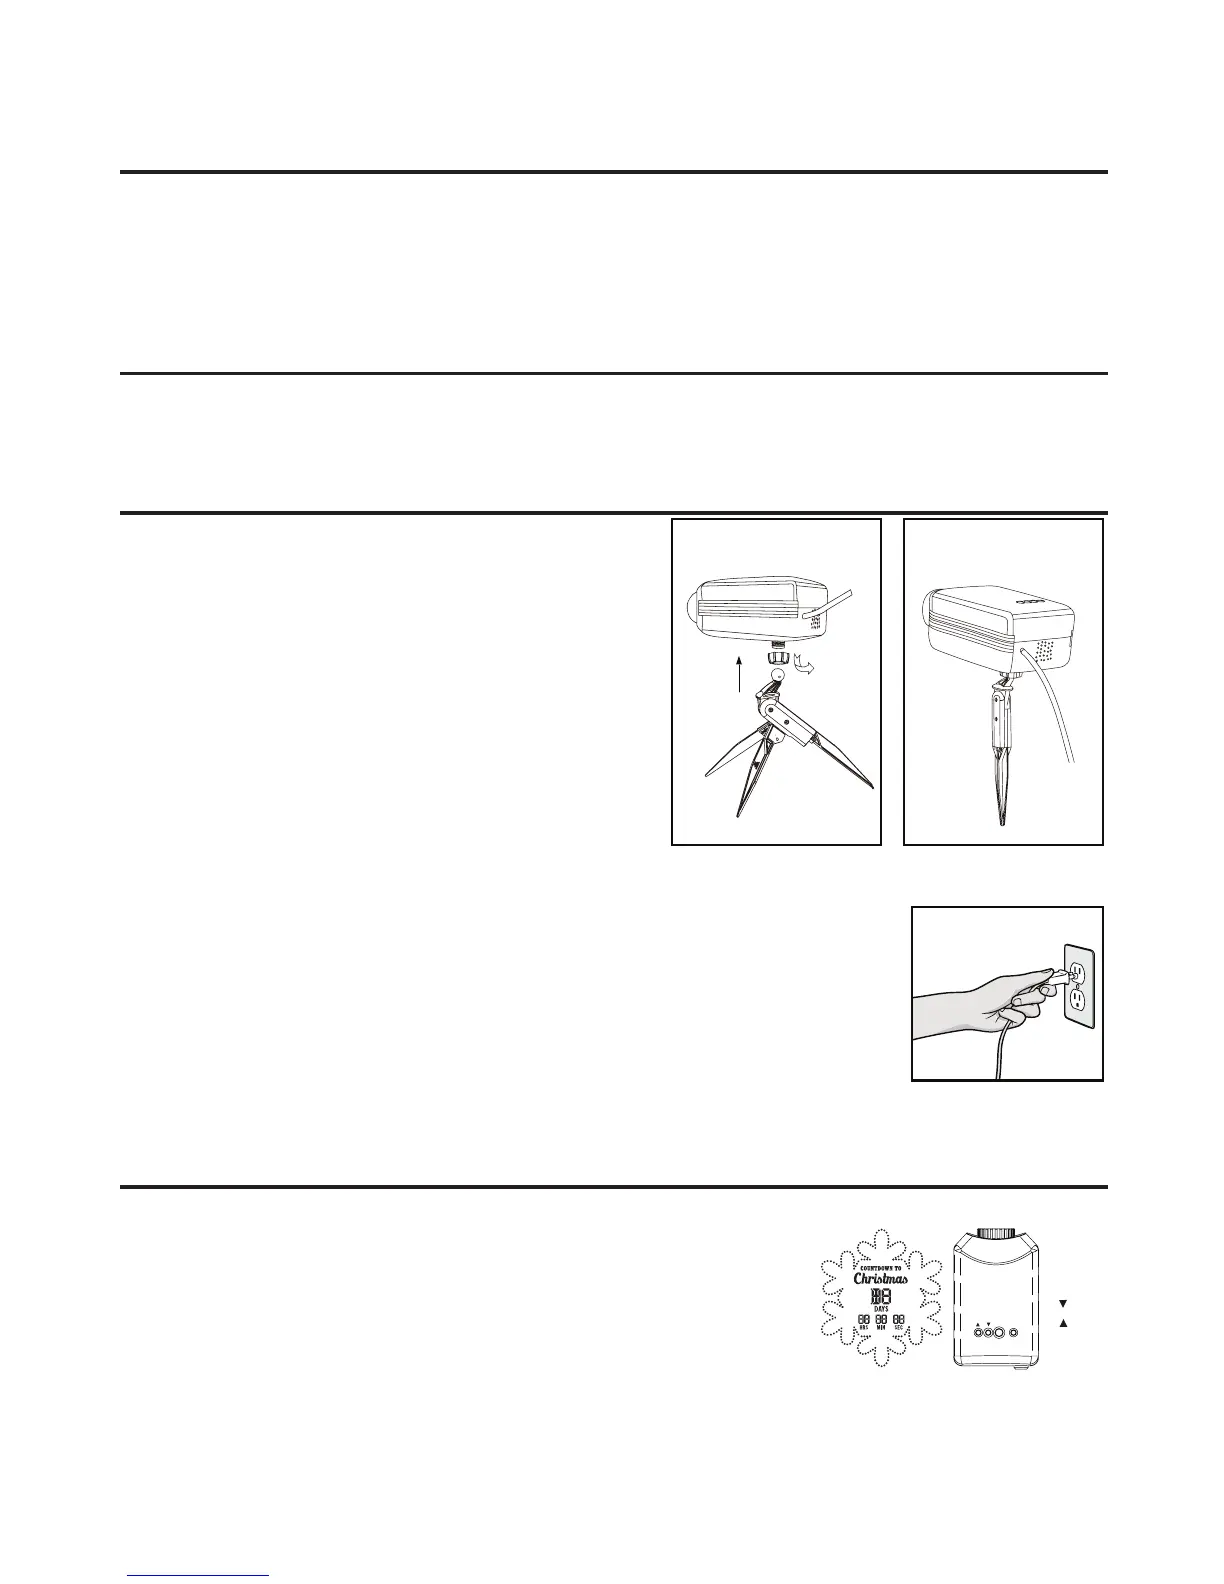
2. Connect the stake to the projector by pushing the swivel ball
through the ring, then screw it onto the projector. Swivel to
reach the angle desired. (Illustration 1)
3. Grasp the handle of the stake and insert into the ground.
(Illustration 2)
4. Plug power cord into standard wall socket. ( illustration 3)
5. Unplug when not in use.
COUNTDOWN SET-UP INSTRUCTIONS
To set your countdown, follow the steps below:
1. Press the reset button. The screen will look like this:
Illustration 1 Illustration 2
Illustration 3
A
M R
M: mode
: down
: up
R:reset
 Loading...