Installation Steps
21
Document No. PEXPERTIM - Rev. 1 - Release Date: May 2007
Configuration 3 - Mount to a solid wall
Not included in shipping carton:
Mounting bolts appropriate for the wall support
1. Determine the proper location for mounting the unit. Referring to the
Mounting Template, verify that each electrical box is positioned
correctly in relation to location of the mounting studs.
Note! For the following step, the two main holes and/or the two alternate mounting
holes can be used.
2. Position the template or the Master Control itself at the appropriate
height. Mark the wall for the mounting holes.
Note! If using the Master Control for marking, lay the unit aside before continuing.
3. Drill pilot holes appropriate for the wall anchors that will be used.
Remove the Mounting Template (if used).
4. Route the power supply wires and, if used, the Control Cable from the
Master Control Touch Panel, into the Master Control.
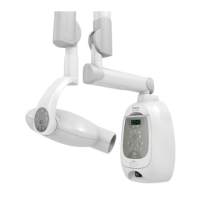
5. Place the Master Control into position and start the upper mounting bolt.
Do not tighten.
Figure 10 Start the Upper Mounting Bolt
6. To complete installation for the Master Control, go to Final Steps to
Install Master Control starting on page 25.
 Loading...