GENERAL “T” FENCE SYSTEM
UNPACK FENCE RAILS, GUIDE AND
REMOVE CARDBOARD END PROTECTORS.
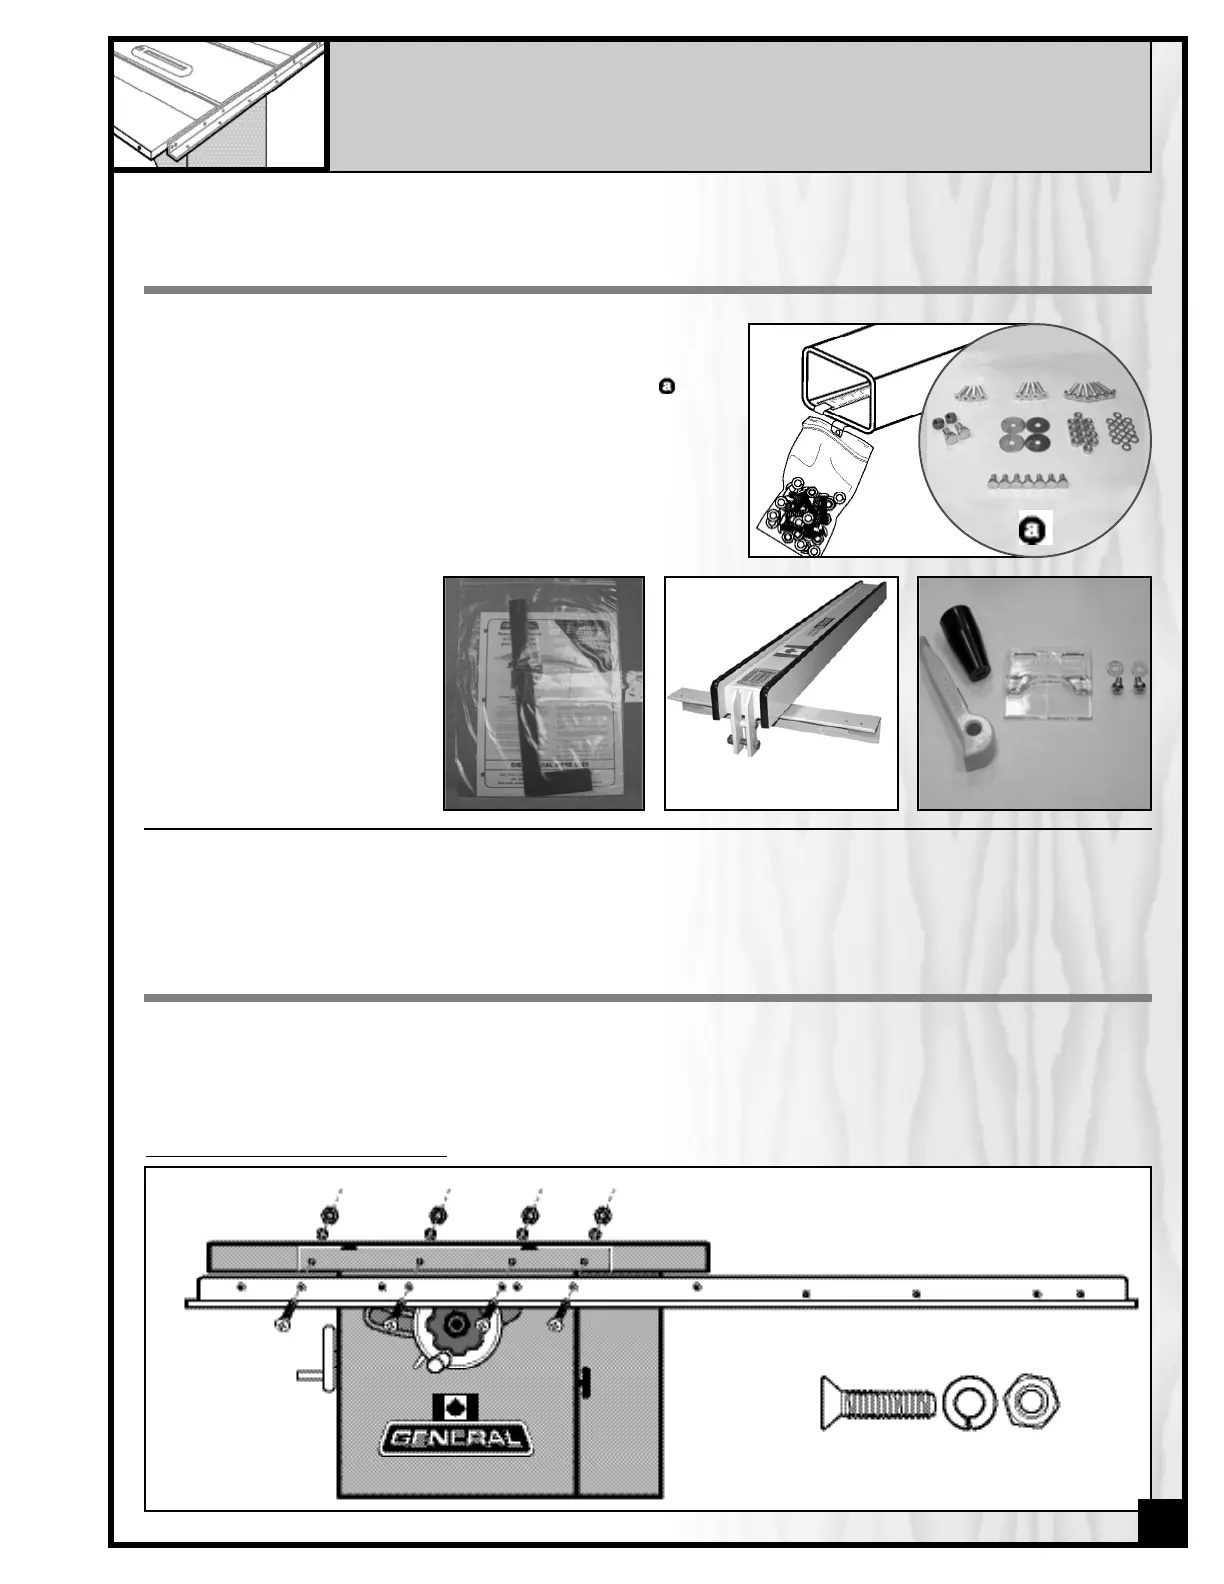
The bag of fastening hardware and the measuring tape will be
found tucked inside one end of the guide tube.
Your hardware bag will contain the contents shown in Fig. .
NOTE: Bag contains extra fasteners that may not be needed for
your installation.
Using the appropriate diagram for your model of saw and rails below, place 4 flat head countersunk screws, lock
washers and nuts, below, to assemble the front rail to the front of the saw. But don’t tighten the nuts yet.
Note: The front rail, is the wider of the two rails and has holes in both faces.
FOR MODEL 350/650/350R/650R
ATTACH THE FRONT FENCE RAIL TO YOUR SAW
These instructions come in
a plastic bag with an L-jig.
Don’t throw the L-jig away,
you’ll need it later!
Packed with the fence itself
are the pointer, locking handle
knob and locking handle. The
camfoot is already installed on
the fence.
5