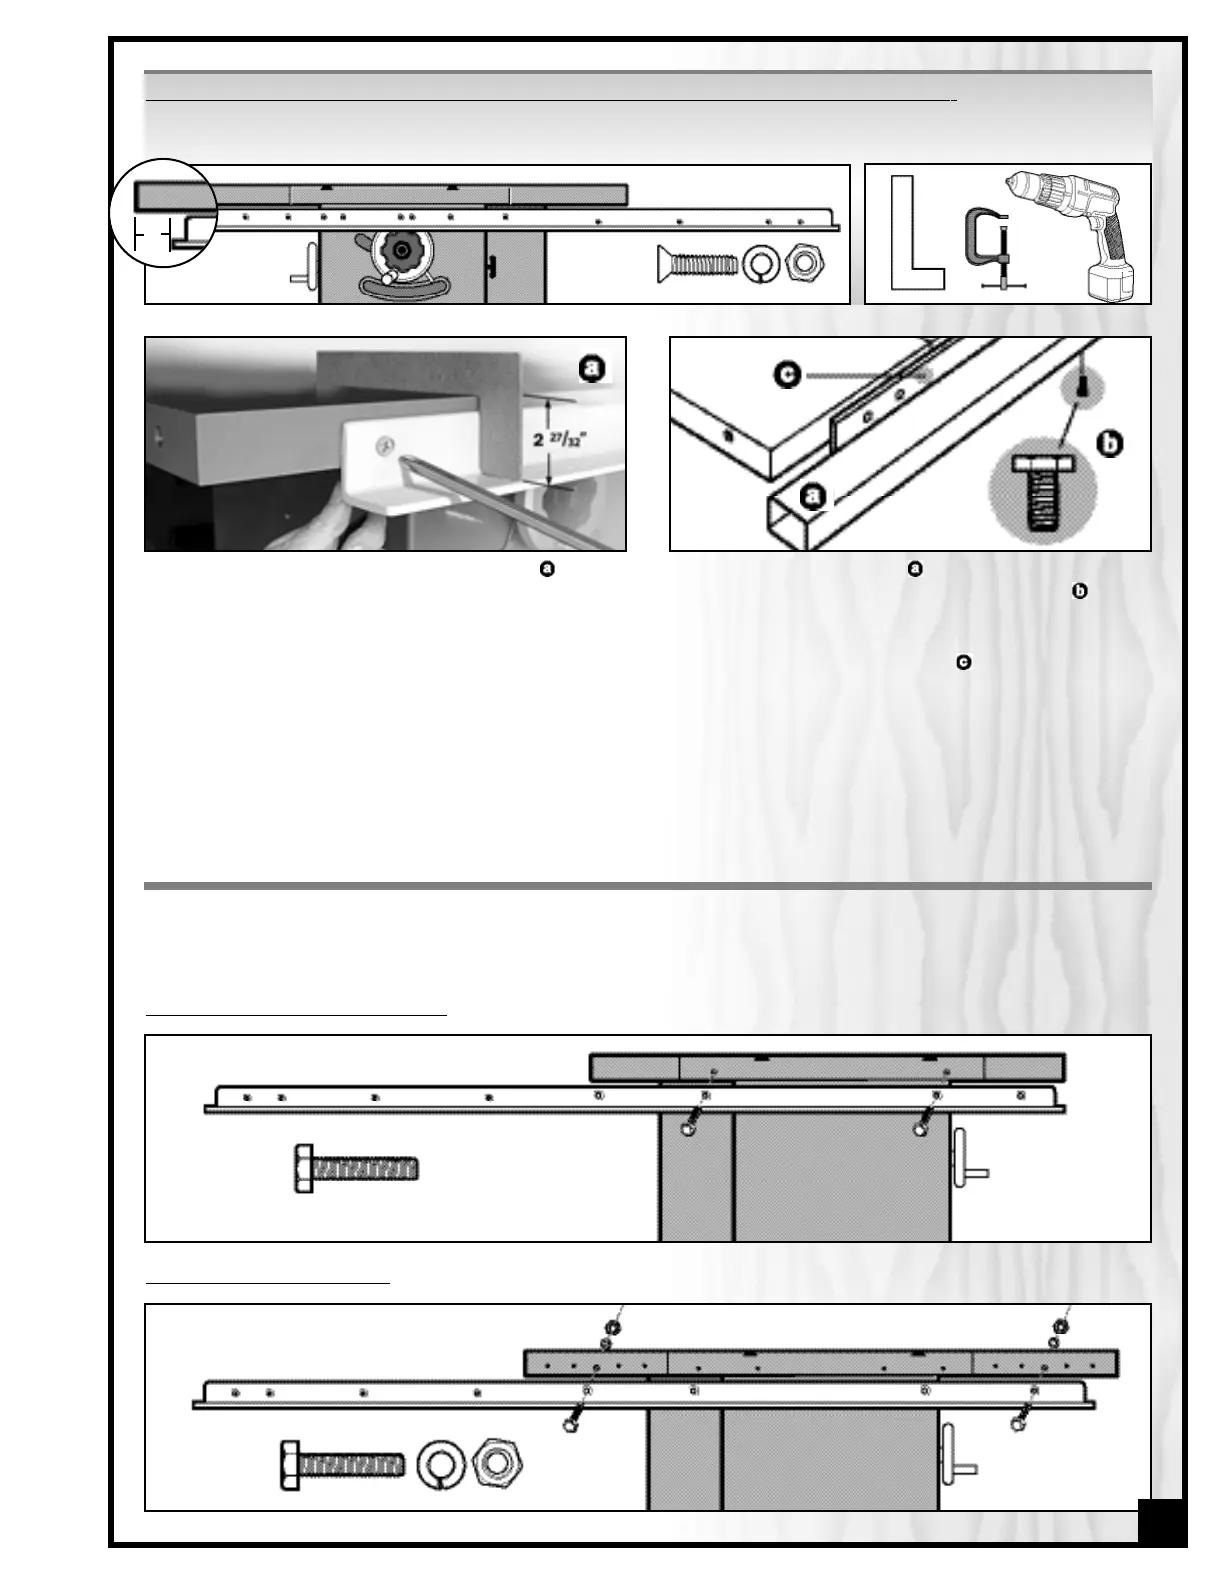
Using the appropriate diagram for your model of saw and rails below, place hex. head bolts and where applica-
ble lock washers and nuts to assemble the rear rail to the back of the saw.
Remember that if you are using General
T-fence rails with another manufacturer’s saw, you may have to drill custom holes in your saw to fit
.
Place the supplied L-jig, as shown at far right , on top
of the table. Adjust the rail height until the bottom of the
jig is flush with the rail shelf.Hold the nuts firm with a 7/16”
wrench and tighten the two screws on left and right ends
of the rail. Tighten the center screws only after double-
checking rail height using the L-jig all along the rail and
at both ends.
Assemble the guide tube, , to the front fence rail by
fastening the 5 hex head bolts (3/8” x 3/4”), , to the
underside of the rail.
Note: When the tube is attached, there will be a gap of
about 1” between it and the rail, , in which part of the
fence will ride.
ATTACH THE REAR FENCE RAIL TO YOUR SAW
HOW TO ASSEMBLE GENERAL T-FENCE RAILS TO ANOTHER MANUFACTURER’S SAW: If the pre-drilled holes in
our rail do not match those on your saw, we recommend clamping the fence to your saw, using the L-jig described on the next
page, and then drilling new holes through the softer cast iron metal of the saw, rather than that of the steel rails. Start with a small-
gauge pilot bit, then use a 1/4” bit to finish the holes.
Inset the rail
roughly the
width of the
fence: 4”
4”
FOR MODEL 350/650/350R/650R
FOR MODEL 50-250/50-260
7
 Loading...