Super-Vee™
5
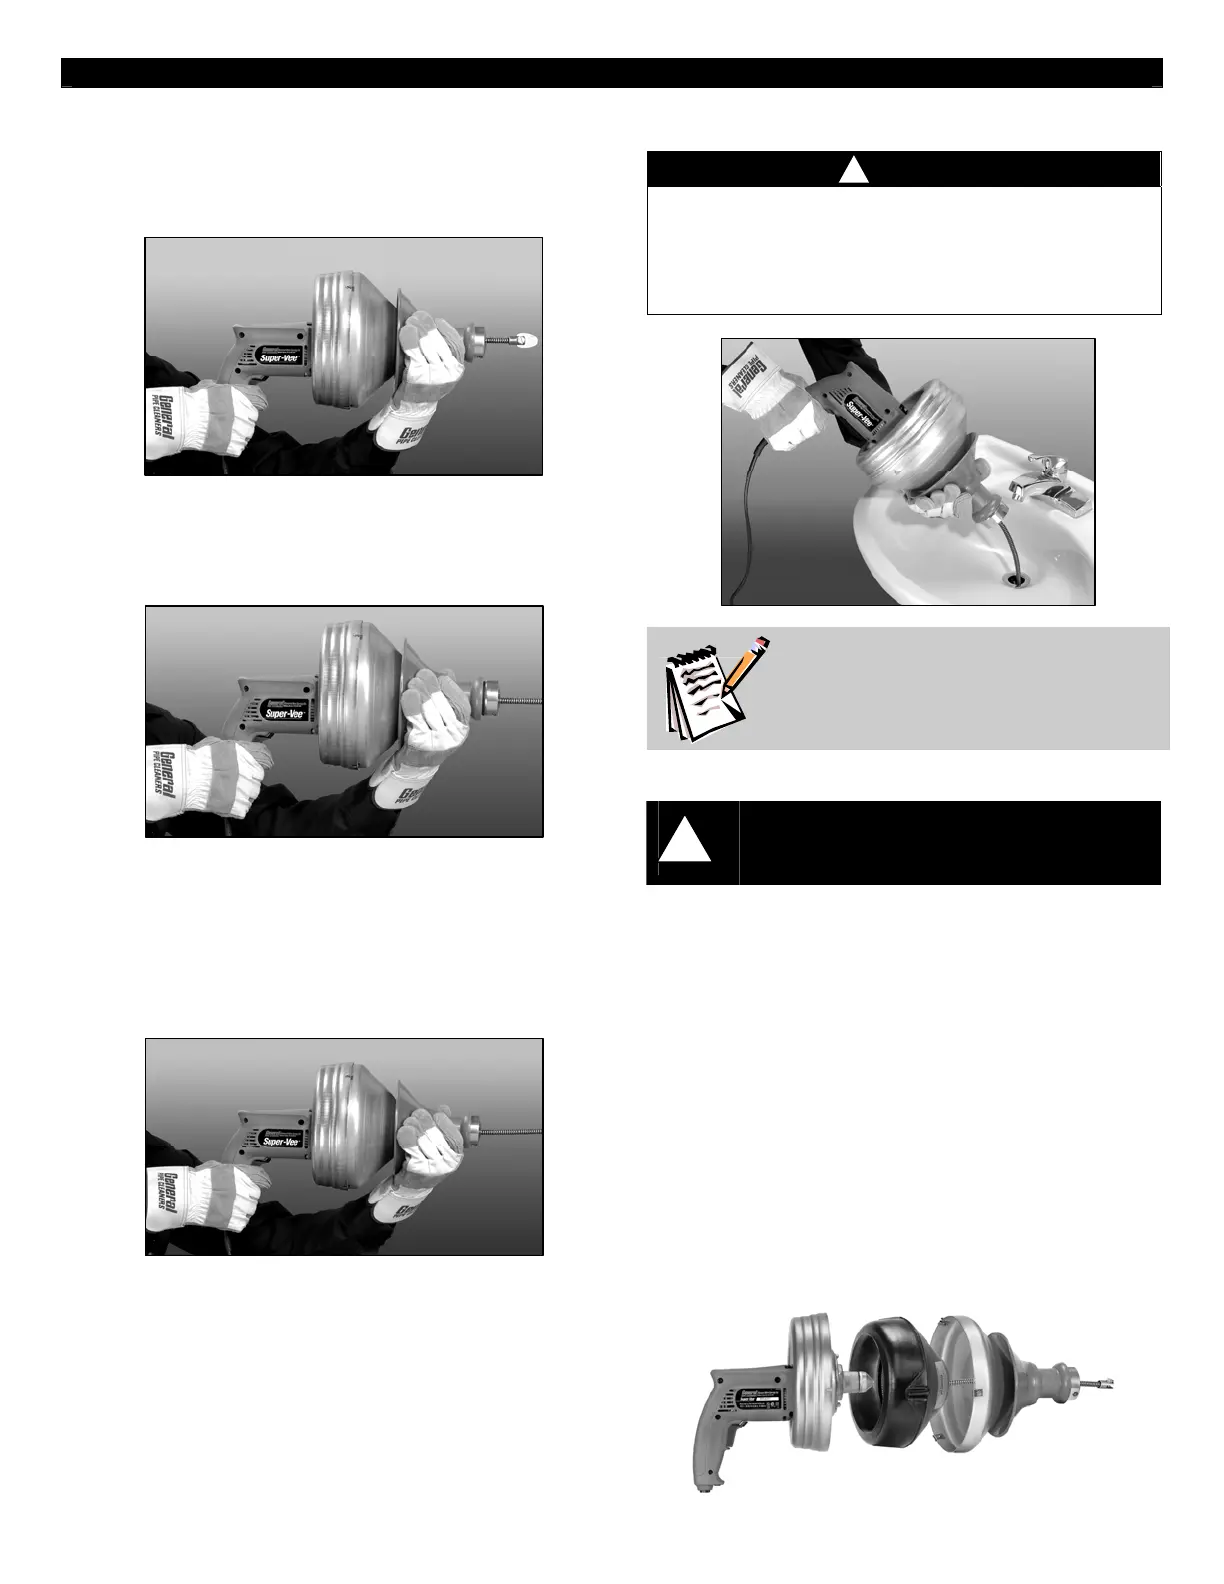
Operating Instructions
1. Slide the grip shield forward to release cable.
Place the cable in the drain by hand as far as it
will go. Leave six inches of cable between the
machine and the drain.
2. Slide the grip shield back to grip the cable. Gently
squeeze the trigger and move the machine toward
the drain opening. DO NOT FORCE THE
CABLE. The job won’t go any faster and you
could kink the cable.
3. After the cable has fed into the drain, release the
trigger.
4. Slide the grip shield forward to release the cable.
Pull the Super-Vee back while holding the able in
place. After you are past the first bend, you
probably will not have to hold the cable as you pull
the machine back.
5. Slide the grip shield back, squeeze the trigger and
move the machine toward the drain again. Slide
the grip shield forward and pull the machine back.
Be sure to allow no more than six inches of cable
between the machine and drain opening. Too
much slack in the cable can cause it to tangle and
kink.
6. Repeat procedure until you have worked through
the stoppage.
7. Reverse the procedure to pull the cable out of the
line.
! CAUTION
Do not use reverse to pull the cable out of the drain.
Always run your machine in Forward, whether you
are feeding the cable into the line or pulling it out.
Use reverse only to release cable if it should
become caught in the line.
Hint: It's often helpful to have a small
stream of water running in the line to
wash the cuttings away while the
machine is in operation and after.
TO CHANGE CABLE CARTRIDGES
1. Remove the cutter and screw from the cable, if
one is attached.
2. Loosen the three screws that hold the front and
back of drum together.
3. Pull the drum off of the front of the machine.
4. Remove the cartridge. Press replacement
cartridge firmly into the back of the drum. Make
sure to line up the grooves in the cartridge with
the slots in the drum back.
5. Slide cable through the front of the drum. Be sure
the grip shield is in the forward position. Position
the drum front so that the screws and slots in the
drum back are aligned.
6. Tighten the screws firmly, making sure they are
centered in the slots, and tightened so that the
heads of the screws are flush with the drum.
DISCONNECT MACHINE FROM
POWER SOURCE BEFORE
CHANGING CARTRIDGES!
!
!
 Loading...