EasyManua.ls Logo

Generalmusic WK3 World Keyboard User Manual

Default Icon
320 pages
To Next Page IconTo Next Page
Page #1 background imageLoading...
Page #1 background image
IMPORTANT
Read Before Using Keyboard!
Congratulations on your purchase of the new Generalmusic WK3 World Keyboard. This instrument is
equipped with cutting edge Flash ROM memory, so that your new keyboard can be permanently updated
by disks with the latest operational advantages and new features. It is important that you follow the proce-
dure below before using your instrument for the first time to ensure that the instrument functions prop-
erly. Check with your authorised Generalmusic dealer for exciting new features to load in your Flash ROM
in the future.
STEP 1
With the instrument turned OFF, insert the first Generalmusic “WK3 OS-Disk
1/2” included in your materials packet into the disk drive. After you have
inserted the disk, turn the instrument ON.
STEP 2
You will see a message in the instrument display screen that says:
Loading OS-DISK clears ALL MEMORY!! <Enter to Load/Escape to abort>
Press ENTER and wait about 3 minutes until you see a second message in the
display that says:
INSERT NEXT OS-DISK please <Enter to load/Escape to abort>
STEP 3
Remove the first disk from the drive and insert the second disk “WK3 OS-
Disk 2/2” in the drive.
Press ENTER and wait until the loading operation terminates.
When the new system has finished loading, remove the operating system
disk WK3 OS-DISK 2/2 from the drive before proceeding to the final step.
FINAL STEP
Press and hold the UPPER 1 selector button located to the right of the LCD
display and simultaneously press buttons 2, 3 and 4 of the PROGRAMMA-
BLE PADS section. The message SYSTEM RESET appears in the display for
a few seconds then the instrument resets to the factory-set situation.
You have now completed the update process, and your Generalmusic World
Keyboard has been permanently upgraded.
UPPER 2
UPPER 1
LOWE
R
PROGRAMMABLE PADS
Buttons to press for the System Reset
TEMPO
DATA
ESCAPE
ENTER
Position of the
Enter & Escape
controls
Procedure to unlock the instrument
If the instrument has been left turned off for a long period of time, the backing battery will slowly
discharge, causing the total loss of all user programmed data. If the battery has lost its charge com-
pletely, when you turn the instrument on, it will lock. To restore normal operation, follow the
procedure outlined below to recharge the battery.
1. Turn the instrument on with the ”WK3 OS Disk 1/2” inserted in the drive and follow the Operat-
ing System loading procedure as described on the front page of the owner’s manual, IMPOR-
TANT - Read Before Using Keyboard!”.
2. When you have carried out the SYSTEM RESET procedure as described in the FINAL STEP,
leave
the instrument on for at least 2 hours to recharge the battery.
If you foresee leaving the instrument turned off for a long period of time, be sure to save all user-
programmed data to disk (Songs and Song/Styles, User Styles, Performances).
If the instrument works at power up after being left turned off for a long period of time,
leave it on for
at least 3-4 hours to recharge the battery.
271050
IMPORTANT
Read Before Using Keyboard!
Congratulations on your purchase of the new Generalmusic WK3 World Keyboard. This instrument is
equipped with cutting edge Flash ROM memory, so that your new keyboard can be permanently updated
by disks with the latest operational advantages and new features. It is important that you follow the proce-
dure below before using your instrument for the first time to ensure that the instrument functions prop-
erly. Check with your authorised Generalmusic dealer for exciting new features to load in your Flash ROM
in the future.
STEP 1
With the instrument turned OFF, insert the first Generalmusic “WK3 OS-Disk
1/2” included in your materials packet into the disk drive. After you have
inserted the disk, turn the instrument ON.
STEP 2
You will see a message in the instrument display screen that says:
Loading OS-DISK clears ALL MEMORY!! <Enter to Load/Escape to abort>
Press ENTER and wait about 3 minutes until you see a second message in the
display that says:
INSERT NEXT OS-DISK please <Enter to load/Escape to abort>
STEP 3
Remove the first disk from the drive and insert the second disk WK3 OS-
Disk 2/2” in the drive.
Press ENTER and wait until the loading operation terminates.
When the new system has finished loading, remove the operating system
disk WK3 OS-DISK 2/2 from the drive before proceeding to the final step.
FINAL STEP
Press and hold the UPPER 1 selector button located to the right of the LCD
display and simultaneously press buttons 2, 3 and 4 of the PROGRAMMA-
BLE PADS section. The message SYSTEM RESET appears in the display for
a few seconds then the instrument resets to the factory-set situation.
You have now completed the update process, and your Generalmusic World
Keyboard has been permanently upgraded.
UPPER 2
UPPER 1
LOWER
PROGRAMMABLE PADS
Buttons to press for the System Reset
TEMPO
DATA
ESCAPE
ENTER
Position of the
Enter & Escape
controls
Procedure to unlock the instrument
If the instrument has been left turned off for a long period of time, the backing battery will slowly
discharge, causing the total loss of all user programmed data. If the battery has lost its charge com-
pletely, when you turn the instrument on, it will lock. To restore normal operation, follow the
procedure outlined below to recharge the battery.
1. Turn the instrument on with the ”WK3 OS Disk 1/2” inserted in the drive and follow the Operat-
ing System loading procedure as described on the front page of the owner’s manual, IMPOR-
TANT - Read Before Using Keyboard!”.
2. When you have carried out the SYSTEM RESET procedure as described in the FINAL STEP,
leave
the instrument o
n for at least 2 hours t
o recharge the batt
ery.
If you foresee leaving the instrument turned off for a long period of time, be sure to save all user-
programmed data to disk (Songs and Song/Styles, User Styles, Performances).
If the instrument works at power up after being left turned off for a long period of time,
leave it o
n for
at least 3-4 hours t
o r
echarge the batte
ry.
271050

Table of Contents

Question and Answer IconNeed help?

Do you have a question about the Generalmusic WK3 World Keyboard and is the answer not in the manual?

Generalmusic WK3 World Keyboard Specifications

General IconGeneral
BrandGeneralmusic
ModelWK3 World Keyboard
CategoryElectronic Keyboard
LanguageEnglish

Summary

IMPORTANT SAFETY INSTRUCTIONS

INSTRUCTIONS PERTAINING TO A RISK OF FIRE, ELECTRIC SHOCK OR INJURY TO PERSONS

Covers essential safety guidelines for using the product, including water exposure, ventilation, and power connection.

GROUNDING INSTRUCTIONS

Explains the importance of grounding for electrical safety and proper connection procedures.

SPECIFICATIONS

Polyphony & multitimbricity

Details the instrument's polyphony and multitimbricity capabilities across different modes.

Sound Generation

Describes the sound generation technology, including PCM, Wavetables, and digital filters.

IMPORTANT INFORMATION

The WK3 should contain the following items from the factory:

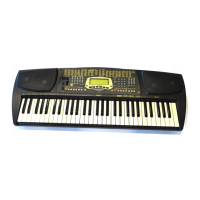
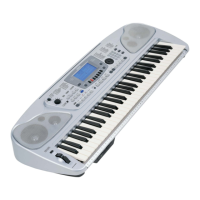
Lists the essential components included with the instrument upon purchase.

GENERAL SAFETY INSTRUCTIONS

Power source

Safety precautions regarding the instrument's power supply and connection.

Handling the power cord

Guidelines for safely handling the power cord to prevent hazards.

General user maintenance

Instructions for cleaning and maintaining the instrument's exterior and keys.

PLAY AND RECALL KEYBOARD SOUNDS IN REAL TIME

Play on the keyboard.

Explains how to initiate sound playback on the keyboard.

Adjust the overall volume.

Details how to use the master volume control for optimal sound levels.

PLAY KEYBOARD SOUNDS WITH AUTO MATIC ACCOMPANIMENTS (STYLES)

Press SINGLE TOUCH PLAY.

Activates automatic accompaniment and sound recall for Styles.

Select a Style.

Guides the user on how to choose and select a Style.

PLAY WITH EFFECTS OR BYPASS THEM

Bypass

Explains how to temporarily disable or bypass effects for the current Performance.

REGULATE THE GENERAL EFFECT VOLUMES AND ACTIVATE LOUDNESS

Modify the selected parameter with the Dial.

Describes how to adjust effect volumes and loudness using the dial.

SAVE THE SONG TO DISK

Write a name for the Song file.

Instructions for naming the song file before saving to disk.

Front panel

speaker & tweeter

Identifies the location of the instrument's speakers and tweeters.

control panel

Locates the main control panel section of the instrument.

Rear Panel (Connections)

COMPUTER

Details the computer interface port for data transfer.

Control panel (central section)

SLIDERS

Describes the function of various volume and control sliders.

STYLE/SONG GROUPS

Explains the buttons used to access Style and Song groups.

EDIT PERFORMANCE

Details the function buttons for editing performance parameters.

Rear Panel (Connections)

MIDI

Explains the MIDI IN, OUT, and THRU ports for connecting external devices.

OUTPUTS

Describes the audio output jacks for connecting to external sound systems.

STYLE LOCK and SINGLE TOUCH PLAY buttons

SINGLE TOUCH PLAY led on:

Explains the behavior of Single Touch Play when the LED is active.

Song/Style Performance

TRACKS

Details the concept of tracks within a Performance and their assignments.

COMPUTER

Types of computer connection

Outlines different methods for connecting the instrument to computers.

The Display

THE MAIN “DEFAULT” DISPLAY

Describes the instrument's primary display screen upon power-up.

SELECTION WINDOWS

Explains the temporary displays used for selecting items.

EDIT PAGES

USER MESSAGES AND WARNINGS

Details the types of messages and warnings displayed during operation.

MODIFYING THE PARAMETER VALUES

Modifying parameters with the DIAL

Explains how to adjust parameter values using the rotary dial.

SOUNDS & THE KEYBOARD MODE

FULL MODE

Describes the full keyboard mode where upper sections play across the entire range.

Selecting Sounds

SELECT KEYBOARD SOUNDS

Guides on assigning sounds to specific keyboard sections (Upper/Lower).

ASSIGNING SAMPLES TO THE TRACKS

Select a keyboard section or any other track.

Instructions for selecting a track to assign a sample to.

DISPLAY HOLD

To close the selection window

Explains how to close a selection window while keeping Display Hold active.

How to modify the Performances

ASSIGNING SOUNDS TO TRACKS

Details how to assign sounds to specific tracks within a Performance.

CHANGE THE TRACK STATUS

To change the status of the keyboard tracks

Describes how to activate or mute keyboard tracks (Upper 1, Upper 2, Lower).

TRANSPOSING THE TRACKS (BY SEMITONES)

Select the track that requires transposing using the Function buttons.

Guides on selecting tracks for transposition using function buttons.

STORE PERFORMANCE

Performances can memorise the following data:

Lists the types of data that can be saved within a Performance.

SAVE CHANGES TO A DIFFERENT PERFORMANCE (OR CREATE A NEW ONE)

Rotate the Dial to select the Performance destination.

Explains how to select a destination for saving Performance changes.

RESTORING THE ORIGINAL PERFORMANCE SETTINGS

Press F5 to select the PERF command and to activate the “Restore Original Perf” window.

Details how to access and activate the Restore Original Perf function.

Selecting Styles

OPTION A: RECALL KEYBOARD SOUNDS AUTOMATICALLY

Method to automatically recall keyboard sounds and Style settings.

SELECTION VIA THE PERFORMANCES

Explains how to select Styles by recalling stored Performances.

The Style controls

START/STOP

Controls for starting and stopping Style arrangements and recording.

KEY START

Function to synchronize accompaniment start with keyboard input.

The Automatic Styles section

ARRANGE ON/OFF

Enables or disables all accompaniment tracks for a selected Style.

ARRANGE MEMORY

Controls whether accompaniment continues after releasing keys.

LOWER MEMORY

Determines if the Lower section sound continues after releasing keys.

SPLIT - programme a new split point

Press one of the Function buttons F7 or F8 to activate the Split function.

Guides on activating the split function using specific function buttons.

The three modes

F1/F2/F3 activate ONE FINGER;

Explains how to activate the One Finger chord recognition mode.

F4/F5/F6 activate FINGERED;

Details the activation of the Fingered chord recognition modes.

The Utility section

SINGLE TOUCH PLAY

Assigns Style parameters, including sounds, tempo, and effects.

TEMPO LOCK

Allows locking the Style tempo to prevent changes when recalling Styles.

HARMONY ON/OFF

Enables or disables the Harmony Type for orchestrating melodies.

The Style Tempo

CHANGE THE TEMPO OF A STYLE

Explains how to adjust the tempo of a Style using the DIAL.

TEMPO LOCK

Locks the current Style Tempo, preventing changes across selections.

Examples of how to use the Styles

Press SINGLE TOUCH PLAY.

Activates Style arrangements and recalls associated parameters.

Tap Tempo

While the Style is not playing, tap on TAP TEMPO.

Method to set Style tempo by tapping the TAP TEMPO button.

FADE IN AND OUT OF A STYLE

Press FADE IN/OUT in Style stop status.

Activates the Fade In function for gradual volume increase.

DEACTIVATE (MUTE) ONE OR MORE AC COMPANIMENT TRACKS

Select a Style (ex Shuffle from the Rock Group).

Guides on selecting a Style to mute specific accompaniment tracks.

SAVE A USER-PROGRAMMED STYLE PERFORMANCE

Assign different sounds to the tracks.

Details assigning sounds to tracks within a User Style Performance.

Select a destination Performance.

Instructions for selecting a memory slot to save the User Style Performance.

LOADING SONGS AND MIDI FILES

LOADING STYLES

Explains how to load programmable Styles into RAM memory.

LOADING PERFORMANCES

Details loading programmable Performances into RAM memory.

LOADING SAMPLES

Describes the process of loading samples into the Sample-RAM.

LOAD SAMPLE

«Load Sample» performs a test to determine the origin of the Sample.

Tests the sample's origin and loads it to the appropriate memory location.

LOADING ALL DATA FROM DISK

Procedure for loading all data types from disk into RAM.

Save Operations

SAVING SONGS

Instructions for saving WK3 Songs to disk for library building.

SAVING MIDI FILES

Details saving WK3 Songs as Standard MIDI Files for external use.

SAVING GROUPS OF FILES (STYLES, PERFORMANCES)

Insert a floppy disk into the drive.

Guidance on inserting a floppy disk correctly into the drive.

SAVE SAMPLE

SAVING ALL DATA TO DISK

Procedure for saving all instrument data to disk.

FORMATTING PROCEDURE

Select «720 Kb Format» or «1.44 Mb Format.

Guides on selecting disk format options (720Kb or 1.44Mb).

FILE ERASE

Select «File Erase».

Initiates the process to erase files from a disk.

Precautions to observe when using WK3 disks with a computer

do not change the file extension because it identifies the file type and therefore, the relative structure.

Rule: Do not alter file extensions to maintain file type identification.

do not write names longer that 8 characters (excluding the extension).

Rule: File names must not exceed 8 characters (excluding extension).

Selecting and playing back Songs

TO SELECT A SONG

Instructions for selecting songs from memory.

PLAY A SONG TRACK IN REAL TIME

A) disengage one of the tracks used by the Song, or

Method to play along by disengaging a track used by the Song.

Displaying Lyrics

TO DISPLAY LYRICS

Procedure to display song lyrics on screen or external monitor.

Selecting and playing back Song/Styles

TO SELECT A SONG/STYLE

Instructions for selecting Song/Styles from memory.

PLAY A SONG/STYLE TRACK IN REAL TIME

A) disengage one of the keyboard tracks used by the Song/Style, or

Method to play along by disengaging a keyboard track used by Song/Style.

Selecting the effect types

HOW TO SELECT THE EFFECT TYPES

Guides on selecting and assigning effects to the current Performance.

Bypassing the effects

Press an active button (led on) to bypass the relative effect type.

Explains how to bypass an effect by pressing its active button.

Effect Editing

THE MIDI THRU PORT

THE COMPUTER PORT

Details the connection of the instrument to a computer via a serial cable.

MIDI CONNECTION RULES

ASSIGNING MIDI CHANNELS

Explains how to assign MIDI channels to tracks for Performance configuration.

Principal MIDI applications

WK3 PILOTING AN EXPANDER WITH THE PERFORMANCES (OR ADDITIONAL KEY BOARD)

Guide for using WK3 as a master to control expanders or other keyboards.

ADDITIONAL DEVICES

THE COMPUTER PORT

Details connecting the instrument to a PC or Macintosh via the computer port.

SELECTING THE STYLES VIA MIDI COMMON

CONTROLLING THE STYLES VIA MIDI COMMON

Explains how to control Style functions via MIDI Common Channel messages.

Additional MIDI parameters

AUTO ARRANGE

How to change the status of the Auto Arrange function.

Guides on enabling or disabling the Auto Arrange function.

Select the FINGERED 1 function.

Select the Song option.

Press ENTER twice to safe the Song with its original name.

Confirms saving the song with its original name or prompts for a new name.

Selecting Styles

PANEL SELECTION

Guides on selecting Styles directly from the instrument panel.

SELECTION VIA THE PERFORMANCES

Explains selecting Styles through stored Performances.

Selecting Sounds

BY SELECTING PERFORMANCES OR STYLES

Describes selecting sounds via Performances or Styles.

PANEL SELECTION

Guides on selecting sounds directly from the panel using Sound Groups.

SELECTION VIA MIDI

Explains selecting sounds using MIDI messages.

Selecting Samples

PANEL SELECTION

Guides on selecting samples from the panel via the Samples button.

SELECTION VIA MIDI

Explains selecting samples using MIDI messages.

STANDARD EDIT PROCEDURE

MEMORISING MODIFICATIONS TO A PERFORMANCE

Explains how to save edited changes to the current Performance.

2/11 TRANSPOSER

3/11 DETUNE

Fine-tuning function for individual tracks, affecting pitch by 1/64th semitone.

4/11 PITCH BEND RANGE

Enables/disables pitch bend for tracks and sets max amount affected.

5/11 SOUND EDIT

Assigns edited sound versions to selected tracks.

The MIDI Edit functions

CHANNEL (F1, F2) - MAIN DISPLAY

Accesses MIDI channel settings for tracks 01-08 and 09-16.

1/2 MIDI CHANNEL

Assigns MIDI channels (1-16) to tracks 01-08.

2/2 COMMON & CHORD CHANNEL

Sets MIDI channels for special operations like keyboard simulation and chord data.

DUMP (F6) - MAIN DISPLAY

MIDI DUMP SAVE ALL (F1), SAVE PERFORMANCE (F3), SAVE SEQUENCER (F5)

Options for dumping instrument data (all, performance, sequence) via MIDI.

1/2 GENERAL MIDI (F1, F2)

2/2 SYSTEM EXCLUSIVE (F1, F2)

2/2 SYSTEM EXCLUSIVE ID # (F3, F4, F5)

Specifies the WK3 Identification number for receiving SysEx messages.

2/2 WS MODE (F6, F7, F8)

Configures WK3 for interfacing with Gem Series WS instruments.

3/3 MIXER: UTILITY (MIXER LOCK - F1, F2, F3)

The Sound parameters

1/2 ATTACK (F1, F2)

Adjusts the attack phase of the sound, affecting volume rise time.

1/2 DECAY (F3, F4)

Adjusts the decay phase of the sound, affecting time to silence after attack.

1/2 RELEASE (F5, F6)

Adjusts the release phase of the sound, affecting time to silence after note release.

2/2 LFO DELAY (F7, F8)

Clear Sound and Clear All

3/3 CLEAR “SOUND” (F3, F4, F5, F6)

Restores a single sound's ROM parameter status.

2/2 CLEAR ALL (F3, F4, F5, F6)

THE STANDARD DRUMKIT EDIT PROCEDURE:

1. Select the Drum track.

Selects the drum track for editing within the Performance.

1/3 BRILLIANCE (F5, F6)

1/3 TUNE (F7, F8)

High resolution fine-tuning parameter for percussive sounds.

2/3 PAN (F1, F2)

Determines the position of percussive sound within the stereo panorama.

Erase “Drumkit” and Clear “Drumkit”

3/3 ERASE “DRUMKIT” [KEY=XX] (F3, F4, F5, F6)

Restores a single percussive sound's ROM parameter status within a drumkit.

2/2 CLEAR “DRUMKIT” (F3, F4, F5, F6)

Page 1/7 - MIC/LINE

INPUT... (F1, F2)

Enables or disables signal reception for the Mic/Line Input.

BRILLIANCE... (F3, F4)

Regulates signal quality for brighter or mellower tone.

REVERB... (F5, F6)

Routes signal to the Reverb DSP for applying reverb effects.

Page 3/7 - Keyboard and Video controls

MASTER TUNING... (F1, F2)

Fine-tunes the instrument's pitch in fractions of a semitone.

DYNAMIC SENSITIVITY... (F3, F4)

Determines keyboard response to velocity changes.

VIDEO COLOUR SETUP.. (F5, F6)

Allows selection of background color for external monitor display.

Page 5/7 - Pedal Switch Logic

PEDAL 1... (F1, F2, F3)

Changes polarity for pedal switch socket 1 for compatibility with other brands.

DAMPER... (F6, F7, F8)

Changes polarity for the Damper socket for compatibility with other brands.

PEDALBOARD MODE... (F5, F6)

PEDALBOARD VELOCITY... (F7, F8)

Activates or deactivates velocity sensitivity for the pedalboard.

THE REVERB PARAMETERS

Filt. (High or Low pass filter)

Determines the cutoff frequency of the filter for reverb.

Room Size

Defines the dimensions of the simulated room for reverb effects.

THE EFFECTS PARAMETERS

L.P.Filter (Low Pass Filter)

Determines the cutoff frequency of the filter for effects.

Delay (delays)

Sets the delay repetition velocity.

CREATING A USER STYLE

ENTER USER STYLE RECORDING

Procedure to enter user style recording mode.

THE USER STYLE PERFORMANCE

Details the default sound configuration for empty User Styles.

START RECORDING YOUR NEW USER STYLE

Press START/STOP to start the recording.

Initiates the recording process with a one-measure countdown.

Edit User Style Performance

Save the modifications by pressing STORE PERF + ENTER, or START/STOP (without pressing Escape).

Saves modifications to the User Style Performance or starts recording.

USER STYLE EDITING

TO MODIFY AN EXISTING USER STYLE

Guides on entering record mode to edit an existing User Style.

ENTER SONG/STYLE RECORD MODE WITH A ROM STYLE

Select the Style that you want to record.

Instructions for selecting a ROM Style to record.

START THE RECORDING

Press INTRO if you want to start with an Intro.

Allows pre-setting an introduction (Intro, Fill, Ending) before recording.

Programming the Song/Style Performance

Select an existing Song/Style or select a Free location from the Song/Style Group.

Guides on selecting a Song/Style or an empty slot for programming.

RECORDING PROGRAM CHANGE DATA

RECORDING PADS DATA

Captures events generated by the Programmable Pads during recording.

RECORDING STYLE CHANGE DATA

Records Style Change data in the Common track during recording.

RECORDING CONTROL DATA

Captures control data from pedals, trackball, and MIDI messages.

Recording Songs

PREPARE THE SONG FOR RECORDING AND ENTER RECORD MODE

Steps to prepare and enter record mode for a song.

START TO RECORD THE SONG

Programming the Song Performance

Select an existing Song or select an Empty location from the Song Group.

Guides on selecting a Song or an empty slot for programming.

Quantize function

Clear function

CLEAR

Provides options to cancel data from tracks or specific events.

THE CLEAR DISPLAY

Shows the display interface for the Clear function options.

Clear Track for Songs

CLEAR ALL (F2)

Cancels a complete User Style, Song/Style, or Song, restoring 'empty' status.

CLEAR CONTROL (F3)

Cancels specific Control events from single or all tracks.

Erase Note

TIME SIGNATURE

NUMBER OF BARS

Sets the number of bars for User Style Riffs or Songs.

TEMPO REC

HOW TO “PUNCH IN” A CORRECTION

Explains how to correct tracks by punching in new notes using a pedal.

All Style copy :

Rotate the DIAL to select ALL_STY.

Copies the entire source Style, including variations, to the User Style.

ALL COPY (SONG/STYLE AND SONG) :

Copies all Song/Style and Song data from disk to RAM.

ABOUT THE WK3 SAMPLER

Sampling resolution

Defines sampling accuracy in BITS, indicating voltage level resolution.

High Frequency sampling

For short, accurate samples lasting approximately 3 seconds.

Preparing to sample - select the Splits

Split A corresponds to an 88 note keyboard range (A0 - C8).

Defines Split A's range and reference note for sampling.

EDITING THE SAMPLE

Press EDIT (F7).

Enters the Sample Edit parameters for modifying captured samples.

MAPPING THE SAMPLE

With the Split parameters showing, select the MAPP option.

Selects the mapping parameter to change the sample's reference note.

Programmable Pads Assign

THE PADS AND TRACK 9

Explains the relationship between Programmable Pads and Track 9.

7. Press and HOLD the Pad to which you want to assign a Sound.

8. Play any note on the keyboard corresponding to the one to assign to the selected Pad.

Assigns a keyboard note to the selected Pad for sound playback.

MIDI Implementation Chart

Audio/Video Interface Installation instructions

TO REMOVE THE PROTECTIVE PLATE:

Steps for removing the protective plate to access the interface slot.

Specifications

Related product manuals