Section 2 • Specifications
REV B
September 2016
Part No. 227123 GRC 2 - 5
a
b
c
b
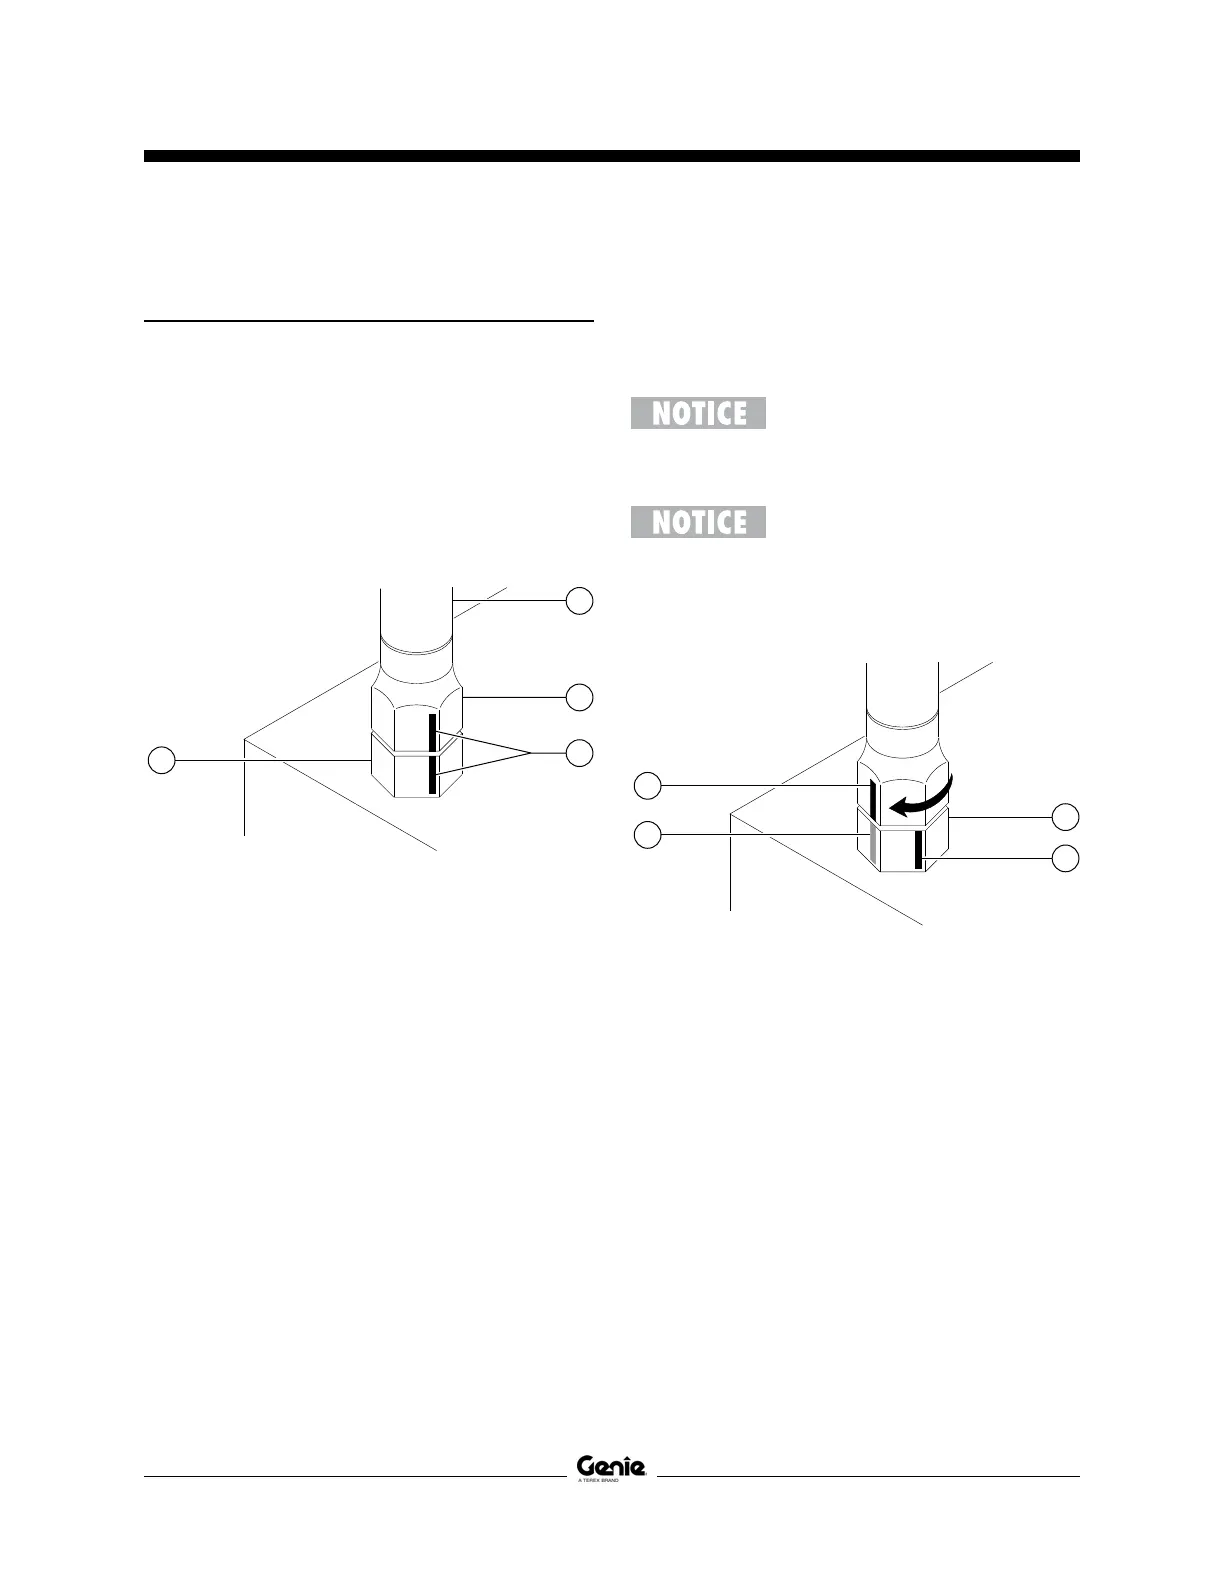
3 Working clockwise on the body hex fitting, make
a second mark with a permanent ink marker to
indicate the proper tightening position. Refer to
Figure 2.
Use the
JIC 37° Fittings
table on
the previous page to determine
the correct number of flats for the
proper tightening position.
The marks indicate that the correct
tightening positions have been
determined. Use the second mark
on the body hex fitting to properly
tighten the joint after it has been
loosened.
Figure 1
a hydraulic hose
b hex nut
c reference mark
d body hex fitting
b
c
a
d
Torque Procedure
JIC 37° fittings
1 Align the tube flare (hex nut) against the nose of
the fitting body (body hex fitting) and tighten the
hex nut to the body hex fitting to hand-tight,
approximately 30 in-lbs / 3.4 Nm.
2 Make a reference mark on one of the flats of the
hex nut, and continue it on to the body hex
fitting with a permanent ink marker. Refer to
Figure 1.
Figure 2
a body hex fitting
b reference mark
c second mark
4 Tighten the hex nut until the mark on the hex
nut is aligned with the second mark on the body
hex fitting.
5 Operate all machine functions and inspect the
hoses and fittings and related components to
confirm that there are no leaks.
SPECIFICATIONS

 Loading...