English
-38-
NOTE
The USB driver that bundled inside the CD-ROM is designed in a form 2 in 1 (USB &
PC camera driver).
a) On Windows 98, the Windows OS will install both USB & PC camera drivers.
b) On Windows 2000/ME/XP, it will only install PC camera driver.
Step2: Connecting the Camera to Your
Computer
1. Connect one end of the USB cable to an
available USB port on your computer.
2. Connect the other end of the USB cable to the
USB connector on the camera.
3. Select [PC Cam] using the
button and
press the SET button.
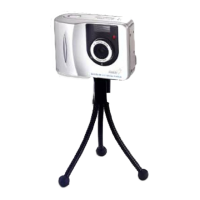
4. Position the camera steadily on top of your
computer monitor or use a tripod.
NOTE
When using this camera as a PC camera, there is no need to install any batteries
into the camera. The camera will automatically power on when connected to the
computer via USB cable.
Step3: Running Your Application Software ( i.e.
Windows NetMeeting)
To use Windows NetMeeting for videoconferencing:
1. Go to Start → Programs → Accessories → Communications → NetMeeting to
launch the NetMeeting program.
2. Click the Start Video button to view live video.

 Loading...