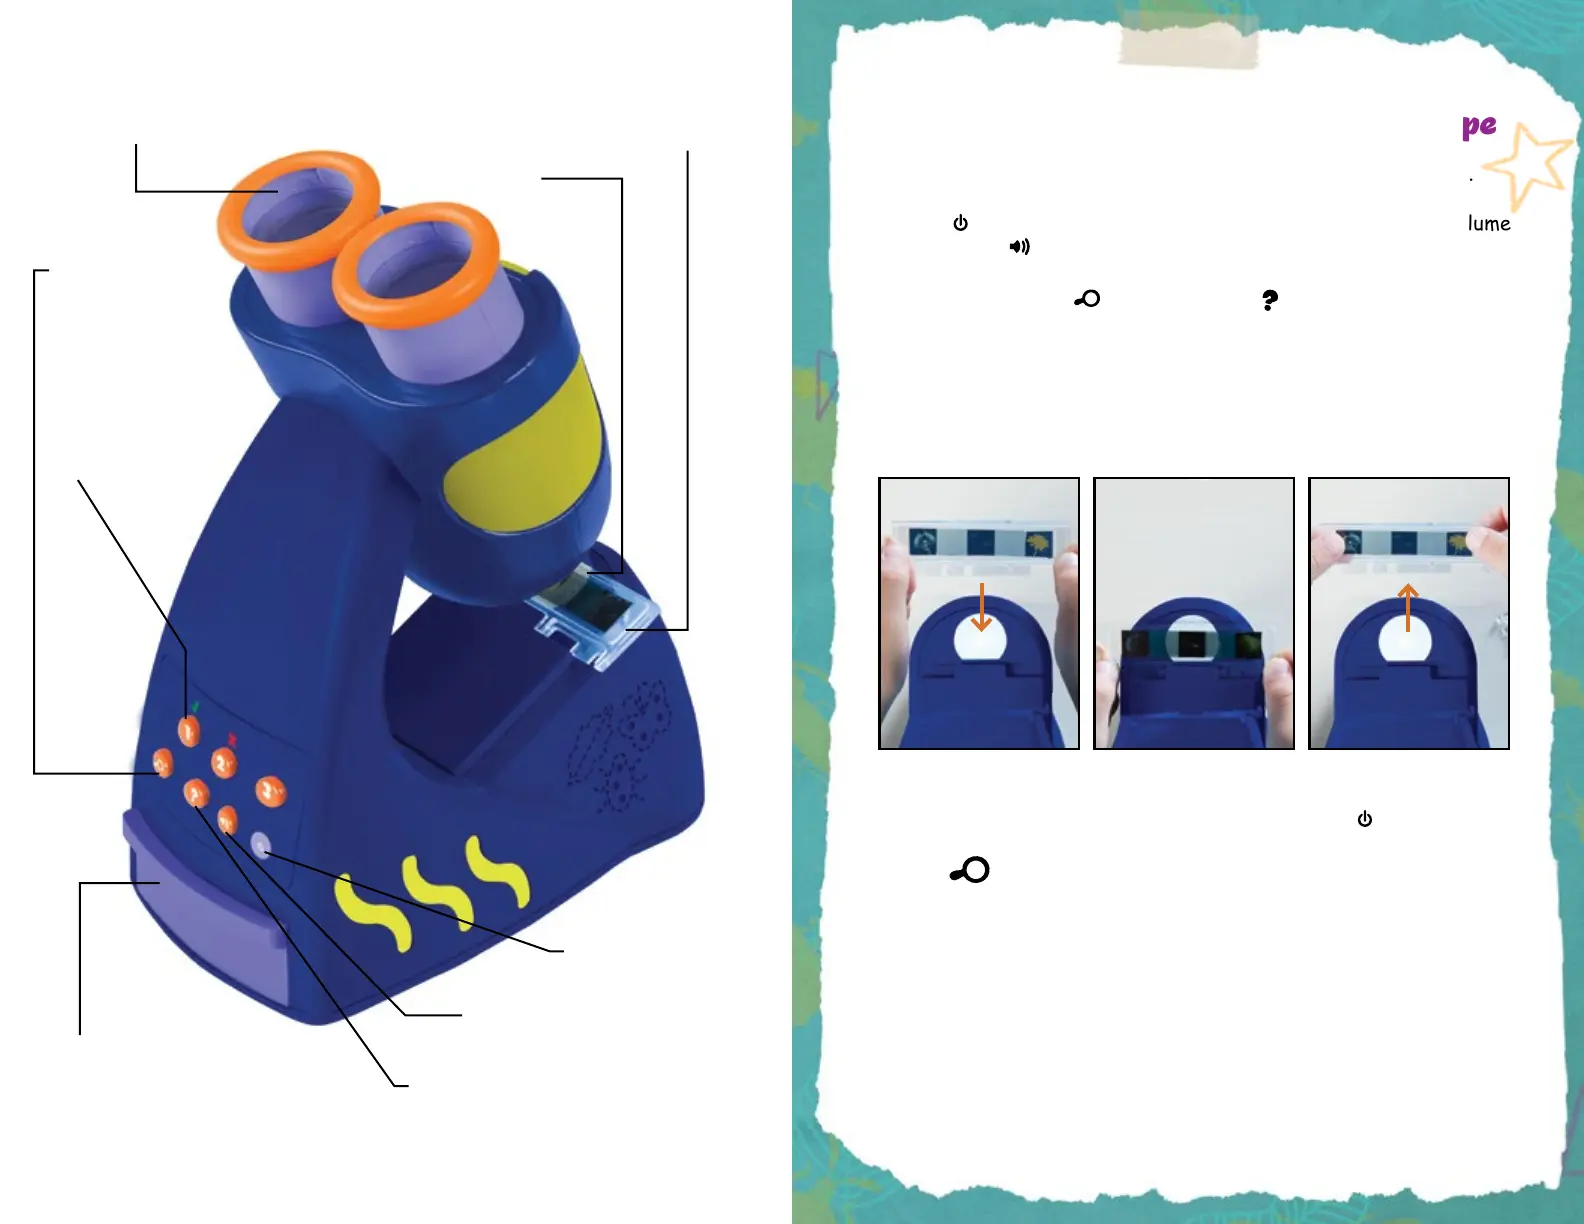
1. Install 3 AAA batteries, following the instructions on page 3.
2. Press to turn on the Talking Microscope and select your volume
by pressing .
3. Pick a mode: Press for Facts. Press for Quiz.
4. Insert a slide into the microscope stage as shown below. If you
placed the slide correctly, you will see the specimen in the center
of the viewing area when looking through the eyepiece. Your
microscope will also begin reading facts or questions aloud.
There are 20 slides in total; each slide contains three images.
5. Turn the Talking Microscope off by pressing the button.
Facts
In fact mode, you will hear the Talking Microscope say fun facts about
the slide you have chosen. Look into the microscope as you listen. Then
gently pull the slide out as shown in the diagram above, shift it over
to the next image, and click it into place. Each slide has a total of five
facts. Each individual image may have one, two, or three facts.
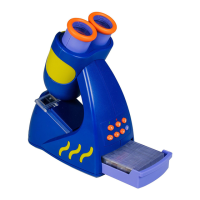
5x Focusing magnier
Lupa de enfoque 5x
Loupe focalisante 5x
5-faches Vergrößerungsglas
Slide storage compartment
Compartimento para guardar
los portaobjetos
Compartiment de rangement des lames
Aufbewahrungsfach für Objektträger
Here’s How to Use the Talking Microscope
2
Stage
Platina
Platine
Objekttisch
Slide
Portaobjetos
Lame
Objektträger
Answer buttons
Botones de respuesta
Boutons Réponses
Antwort-Tasten
Quiz button
Botón de modo cuestionario
Bouton Questions
Quiz-Taste
Fact button
Botón de modo datos
Bouton Faits
Info-Taste
Power
Encendido/Apagado
Marche/arrêt
An/Aus
Volume
Volumen
Volume
Lautstärke
1. Slide going in
2. Slide in place
3. Slide coming out
1