INSTALLING & REMOVING UV-C BULB
INSTALLING & REMOVING UV-C BULB
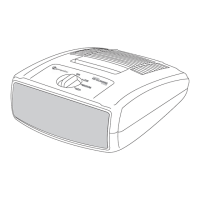
1. Remove the Rear Cover of the unit by pushing Lock & Release Button (Fig. 1).
Bulb is NOT visible
until the BULB COVER
has been removed.
FIG. 4
FIG. 5
TWIST BULB
1/4 TURN TO
REMOVE.
TWIST BULB
1/4 TURN TO
REINSTALL.
E-8
E-9
FIG. 1
FIG. 2
FIG. 3
IMPORTANT: The UV-C Bulb should be replaced every 10 - 12 months depending on use.
Please contact Germ Guardian Customer Service at 1.866.603.5900 or visit us at
www.germguardian.com to purchase a replacement bulb.
Replacement UV-C Bulb: LB5000.
2. After removing the Rear Cover from the unit, remove the Combination Filter (Fig. 2).
3. After removing the Combination Filter, use a Philips head screwdriver to remove four (4)
screws and detach the Bulb Cover (Fig. 3).
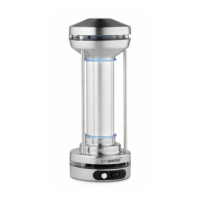
4. The UV-C Bulb is removed by rotating it one quarter turn and then sliding it out of the
top and bottom lamp sockets (Fig. 4).
INSTALLING & REMOVING UV-C BULB
4. The UV-C Bulb is reinstalled by sliding it into the top and bottom lamp sockets and
rotating it one quarter turn (Fig. 5).
 Loading...