4 5
C. GPA SWITCH INSTALLATION
ENEN
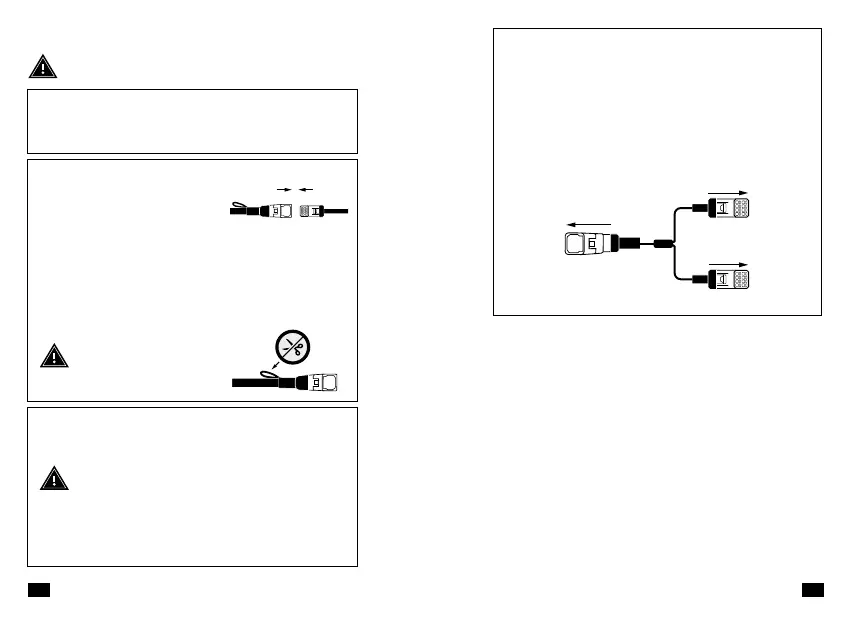
1. Install GPA Switch on the handlebar using a screw
already fixing any other control. Insert the screw into the GPA
Switch eyelet.
2. Remove the protective cap
from the “MAIN” male connector of
GET ECU and link it to the female
connector on the GPA Switch loom.
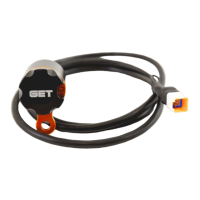
GPA Switch
NOTE:
The loom of GPA Switch is long enough to reach those ECUs located
far from the bar (e.g., under the seat). For those applications where
the loom results too long, make sure it does not remain exposed
or in any case is protected. Use zip ties if necessary.
ATTENTION: Don’t cut or
damage the “CAN Cable” of
the GPA Switch connector.
3. Use zip ties to bundle together loom and bar making sure
the loom does not remain exposed and is in any case protected.
ATTENTION:
- Check that the wiring does not obstacle the free
movement of the handlebar in both directions.
- Always make sure that the connectors are correctly
associated; when connecting them, a “click” is heard
that indicates they are connected correctly.
REMEMBER TO WORK UNDER SAFETY CONDITIONS
AND TO KEEP THE ENGINE TURNED OFF.
NOTE:
To connect both GPA Switch and GET Wifi-Com to GET ECU
use the specific “GL-0084-AA” loom (sold separately).
Plug the “MAIN” connector of GET ECU into the “GP1EVO”
connector of the loom. Plug the connector of the GPA Switch
into the “GPA” connector of the loom. Plug the connector of
the Wifi-COM into the “WFCOM-PC” connector of the loom.
GL-0084-AA loom
to Wifi-COM
to GPA Switch
GP1EVO
connector
GPA connector
WFCOM-PC
connector
to GET ECU
D. GPA SWITCH OPERATION
Once the GPA Switch is connected to the GET ECU, it is ready to
work and set the level of GPA indicated. The maximum level of
GPA is 10, while at level 0 GPA Technology will be turned off. A
good suggestion for first users to find the ideal level of GPA to
set (it may be totally different from rider to rider) would be start
riding at level 10 and then decrease the level of GPA assistance
until the level which fits more is achieved.
NOTE: If a specific GPA level is set directly on the power maps
of GET ECU, this level will not be followed when installing LC-
GPA. In this case the GPA level the maps will follow is the one
selected with the LC-GPA.
 Loading...