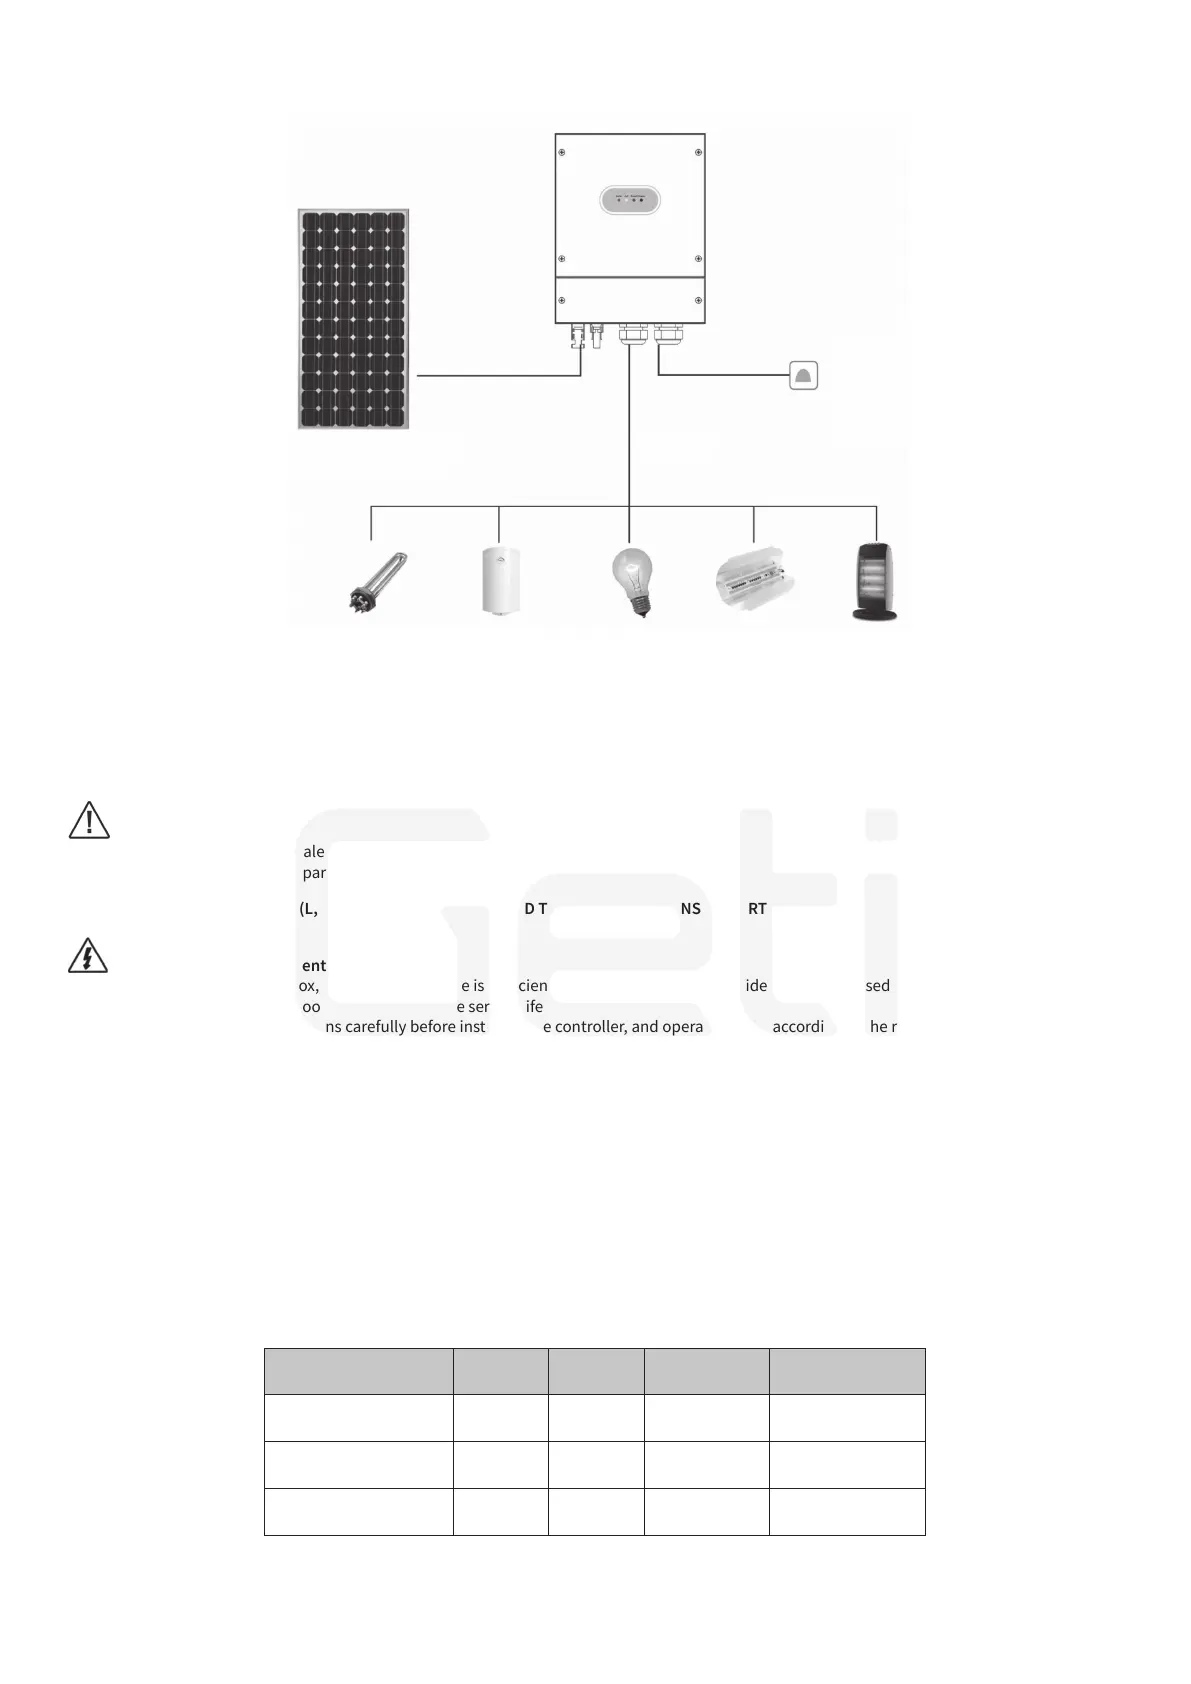
2.4.2 System wiring diagram
Heating element Electric water Incandescent Lodine Electric
heater tungsten lamp heater
MPPT Solar heating controller
Solar panel
Load
230V AC grid
3. Installation
3.1 Getting started
The installation environment is critical to the performance and service life of the controller. The controller is recommended to be installed in a dry
environment and prevent water inltration. It is best to ensure suicient ventilation around the controller and suicient air ow.
CAUTION!
Never install the controller in a sealed box!
This controller cannot be used in parallel!
THE OUTPUT OF THE INVERTER (L, N) MUST NOT BE CONNECTED TO ELECTRICAL MAINS OR EARTH!
WARNING! Risk of equipment damage!
If the controller is installed in a box, make sure that there is suicient ventilation inside and outside the box. A closed environment will cause the tem-
perature of the controller to rise too high and reduce the service life of the controller.
Please read all installation instructions carefully before installing the controller, and operate strictly according to the requirements. Any inappropriate
operation behavior may cause damage to the controller and aect the normal use.
Install spare tools:
● wire stripper ● inatable drill
● wire cutter ● spirit level
● phillips screwdriver ● hacksaw (used for cutting pipelines with protective wires)
● crimping tool ● wall nail
3.2 Installation
3.2.1 Wire diameter selection
It is very important to choose a suitable cable diameter for the controller. Generally, at least ensure that the voltage drop of the cable from
the controller to the solar panel, the controller to the heating rod, and the controller to the water dispenser is less than 2% of the system voltage.
The following table provides the minimum wire diameter requirements at an ambient temperature of 45 degrees Celsius:
Maximum
current
Cable
material
Recommended
wire diameter
Minimum required
wire diameter
Between controller
and photovoltaic panel
20 A copper 6 mm² 4 mm²
Between controller
and load
20 A copper 6 mm² 4 mm²
Between controller
and AC input
20 A copper 6 mm² 4 mm²
3
 Loading...