- 22 -
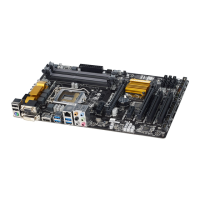
1-9 Onboard Buttons, Switches, and LEDs
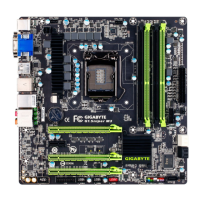
BIOS Switch:
TheBIOSswitch(BIOS_SW)allowsuserstoeasilyselectadifferentBIOSforbootuporoverclocking,helpingto
reduce BIOS failure during overclocking. The SB switch allows enabling or disabling of the Dual BIOS function.
2:BackupBIOS(BootfromthebackupBIOS)
1:MainBIOS(BootfromthemainBIOS)
BIOS_SW
2: Single BIOS
1: Dual BIOS
SB
SB
BIOS_SW
F_USB30
F_U
B_
F_ F_
_
B
BS_
B
SB_
B
_S
S_
_
B
_U
_
B
S
123
123
123
123
1
1
1
1
BSS
S
_S
SSU
1 2 3
S3
BSSS
U
__ 3
F_USB3F
S _
S _
S _
SF
F_USB30
F_U
B_
F_ F_
_
B
BS_
B
SB_
B
_S
S_
_
B
_U
_
B
S
123
123
123
123
1
1
1
1
BSS
S
_S
SSU
1 2 3
S3
BSSS
U
__ 3
F_USB3F
S _
S _
S _
SF
F_USB30
F_U
B_
F_ F_
_
B
BS_
B
SB_
B
_S
S_
_
B
_U
_
B
S
123
123
123
123
1
1
1
1
BSS
S
_S
SSU
1 2 3
S3
BSSS
U
__ 3
F_USB3F
S _
S _
S _
SF
F_USB30
F_U
B_
F_ F_
_
B
BS_
B
SB_
B
_S
S_
_
B
_U
_
B
S
123
123
123
123
1
1
1
1
BSS
S
_S
SSU
1 2 3
S3
BSSS
U
__ 3
F_USB3F
S _
S _
S _
SF
1
2
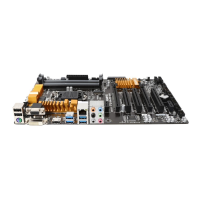
1-8 ChangingtheOperationalAmplier
For purchasing the IC extractor and OP Chip, please contact the local dealer.
Step 1:
Use an IC extractor to carefully grip the IC's sides and extract it
from the socket.
Step 2:
Align the notch on your OP chip with the notch on the socket and
gently press the chip into the socket until seated.
 Loading...