Do you have a question about the Global Caché iTach Flex IP and is the answer not in the manual?
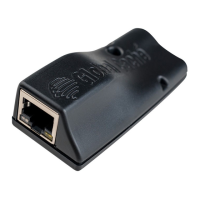
Connect RJ45 cable and power supply. Flex uses DHCP by default. Power LED blinks once per second for confirmation.
Download iHelp to find the IP address. If no DHCP, default is http://192.168.1.70.
Access web configuration pages via IP address to set the Flex Link Port for specific functions.
Configure port as 'Single IR Emitter' and connect IR emitter to test command execution like 'sendir'.
Configure port as 'Serial' with correct baud rate and connect the Flex Link Serial cable to the device.
Use the iLearn application to capture IR commands by pointing a remote at the Flex's top center hole.
Reset to factory defaults by holding the reset button for 8 seconds; LED blinks confirm the action.
The Global Caché iTach Flex IP is a versatile device designed to provide seamless integration of various control functionalities into an IP-based network. It acts as a bridge, allowing users to control devices that communicate via serial/RS232 or infrared (IR) signals using an IP network. This quick start guide emphasizes Global Caché's commitment to reducing environmental impact by minimizing paper output, directing users to their website for comprehensive documentation and tutorials.
The iTach Flex IP facilitates communication between an IP network and devices that utilize serial/RS232 or IR control. It receives commands over the network and translates them into the appropriate serial or IR signals to control connected equipment. This enables remote control and automation of a wide range of devices, from home theater components to industrial equipment, all managed through an IP network. The device supports both Power over Ethernet (PoE) and USB power options, offering flexibility in deployment.
Connectivity:
Network Configuration:
http://192.168.1.70.Serial/RS232 Specifications:
Infrared (IR) Specifications:
Physical:
Compliance:
Initial Setup and Connectivity:
IR Control:
Serial/RS232 Control:
Factory Reset:
Documentation and Support:
The iTach Flex IP is a robust and flexible solution for integrating diverse control systems into a modern IP infrastructure, designed for ease of use and comprehensive control.
| Brand | Global Caché |
|---|---|
| Model | iTach Flex IP |
| Category | Controller |
| Language | English |