Supplied By www.heating spares.co Tel. 0161 620 6677
8
220562A
5 L i g h t i n g , T e s t i n g a n d F i t t i n g I n t e r n a l P a r t s .
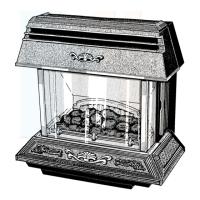
Diagram 4.3
4 I n s t a l l a t i o n
4.2 Gas Connection
Place the union nut and olive, from the loose items pack,
onto the prepared end of the gas supply tube, see
diagram 4.3.
Connect the gas supply tube, as diagram 4.3 tighten the
nut and olive at the gas service cock and union nut at the
gas tap.
5.1 Lighting and Testing
Make sure that the gas tap is in the off position, that is,
the flat on the drive rod faces the wall, see diagram 5.1.
Take the length of black insulating material from the
loose items pack. Slide the insulation down the drive
rod as shown in diagram 5.1 and then fit the control
knob.
MAKE SURE THAT THE ELECTRICAL SUPPLY TO
THE BACK BOILER IS SWITCHED OFF.
Take the ash pit cover from the packing, make sure that
the harness strain relief is fully located into the slot and
that the locknut is tightened.
Now fit the strain relief bracket by removing the burner
fixing screw, place the strain relief bracket on top of
burner end bracket and then replace screw, see
diagram 4.3.
Connect the wiring harness to the microswitch and
electrode, see diagram 7.3 and 7.4.
Fit the battery, from the loose items pack, see
diagram 9.1.
Note the ash pit cover can be left connected up to the
micro switch and tap.
Remove the pressure test nipple screw and fit a suitable
pressure gauge, see diagram 5.2.
Turn the gas service cock to BACK BOILER AND
FIRE “ON”, see diagram 3.2.
To check for gas soundness apply leak detection fluid to
the two joints on the previously fitted gas supply tube.
WARNING: Take care when carrying out the following
check, as the burner flame is fully exposed.
Push the control knob in slightly and turn it
anti-clockwise to position I , now fully push in,
clicking of the ignition will be heard and the burner will
light.
IMPORTANT: If the burner does not light within 3
seconds, release the tap, wait 10 seconds and repeat the
lighting operation.
Keep the knob pushed in for 10 seconds, during this time
the ignition system will continue to operate, indicated by
the clicking.
3/8 IN
OLIVE
UNION
NUT AND
OLIVE
STRAIN
RELIEF
BRACKET
UNION
NUT AND
OLIVE
BURNER
FIXING
SCREW
UNON
NUT
4021
 Loading...