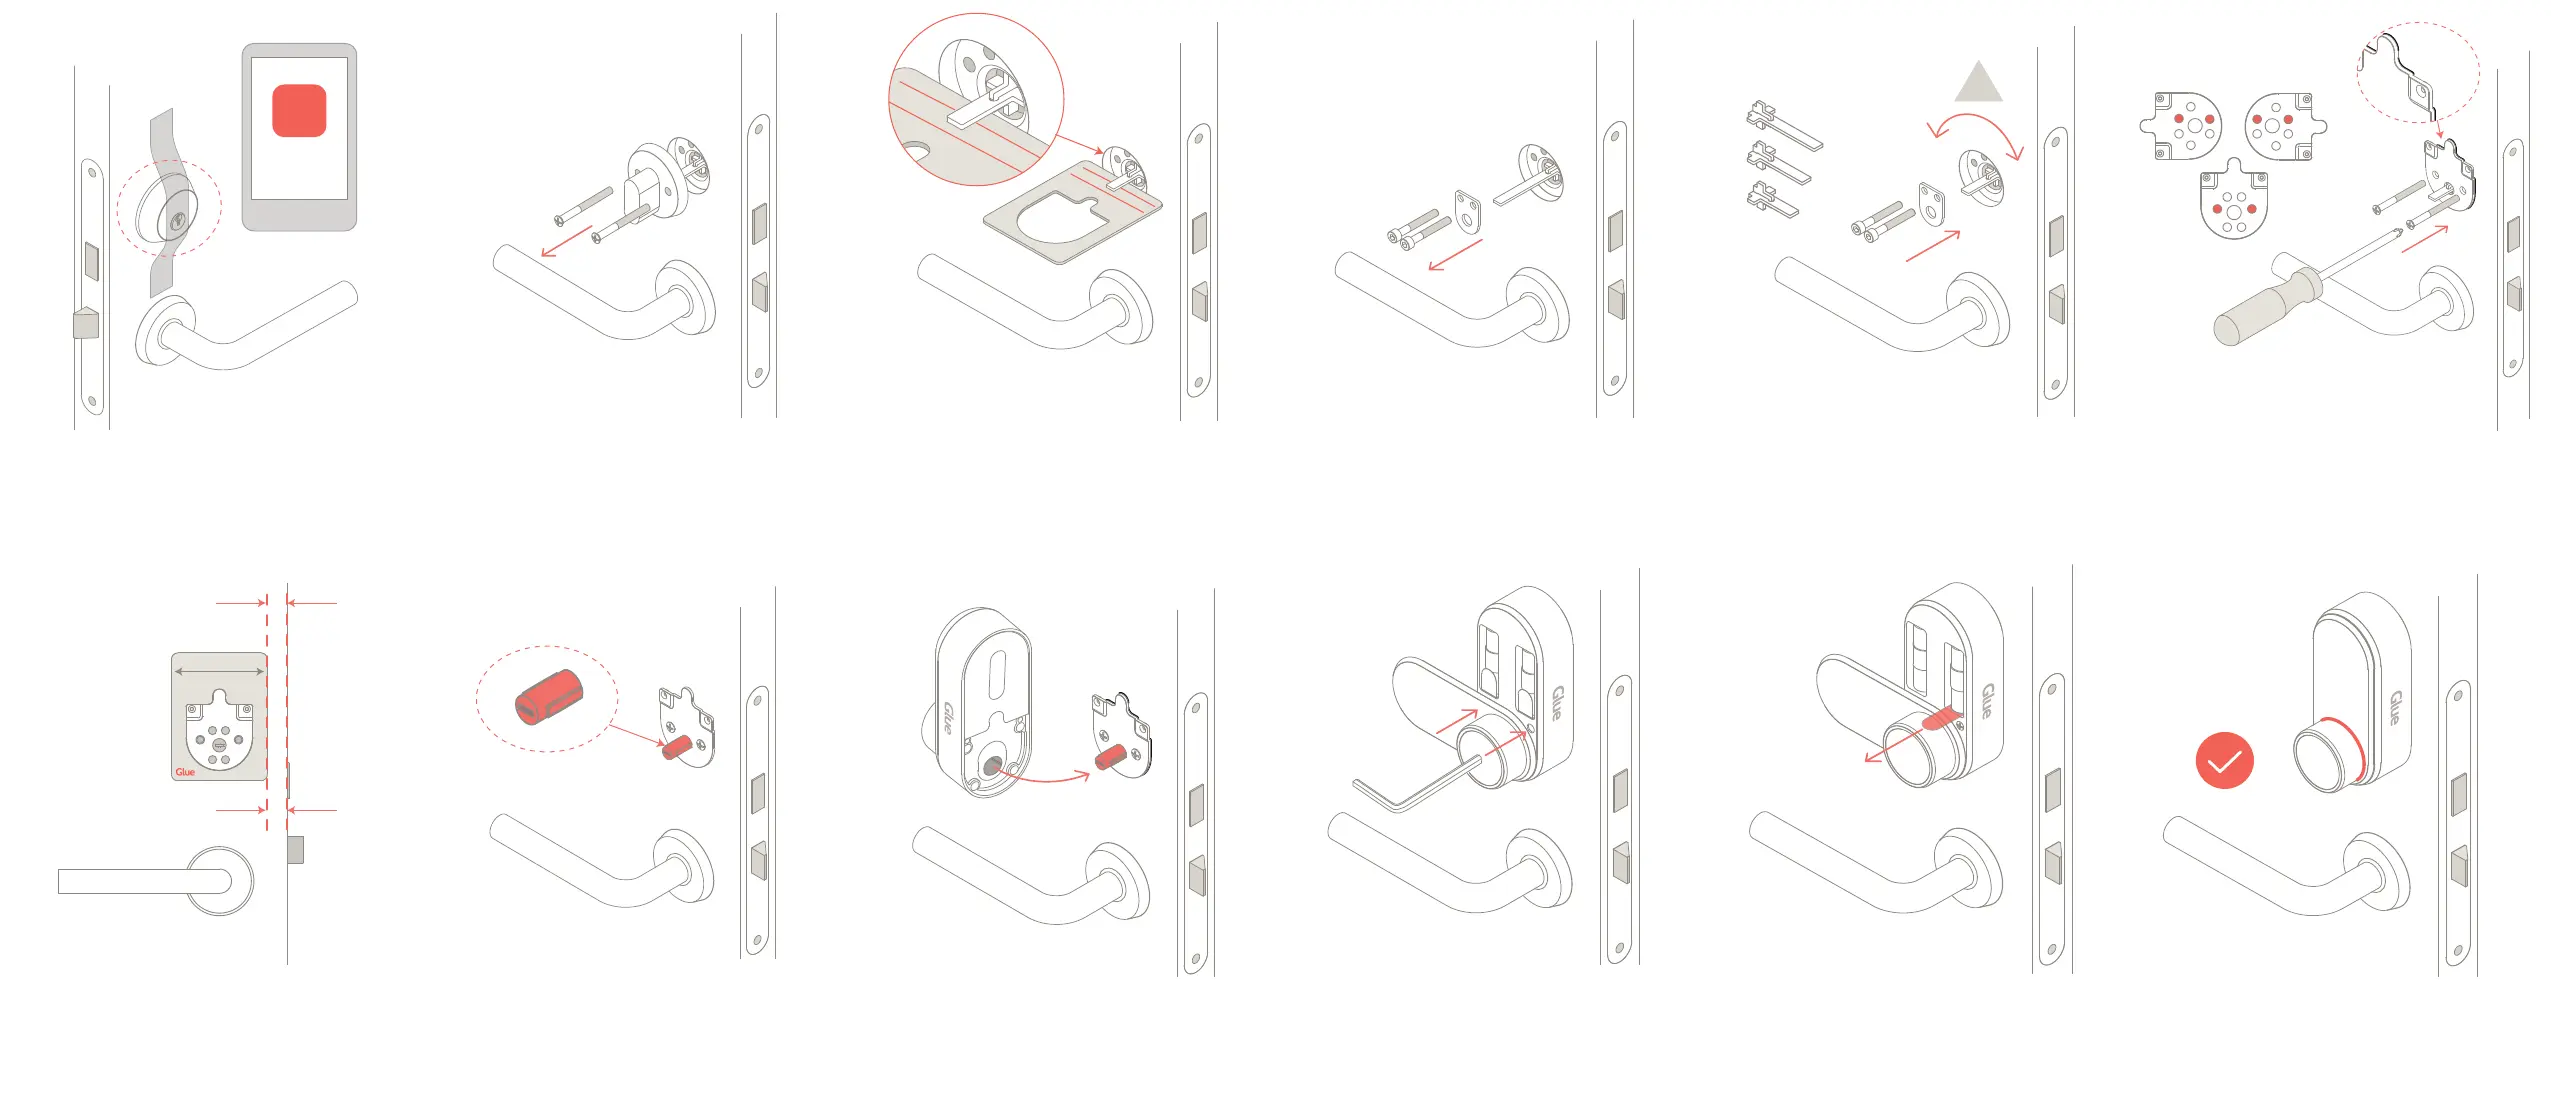
Step 1 - Download the GLUE LOCK App.
Secure the lock cylinder on the outside of the door with
scky tape. This makes it easier whilst you t your Glue
Smart Lock.
Step 2 - Remove the exisng inside thumb turn by
unscrewing the two screws in the thumb turn plate.
Keep these screws as you will use them later, if they
are long enough.
Step 3 - Measure the exisng tail piece in your lock with
the install template. The end should sit between the
MAX and MIN lines. If it is the correct length, skip to
Step 4.
Step 3a - If the tail piece is too short, or too long, un-
screw the D-plate and carefully remove it. Be careful
not to drop the screws inside the door body.
Step 3b - Replace with one of the three tail pieces
supplied, that ts between the MIN and MAX lines.
DO NOT ROTATE THE LOCK OR TAIL PIECE WHEN
FITTING.
Step 4 - Use screws from step 2 to loosely aach the
door plate. Use holes shown above depending on the
chosen mounng angle. The rubber side of the plate
faces the door. If a dierent length screw is required,
cut the longer screws supplied to the correct length.
Step 5 - Ensure the door plate is straight by using the
Glue Installaon Template as a guide with the side of
the door. Now fully ghten the screws, but do not
over ghten. It is not a problem if the door plate does
not fully cover the hole in the door.
Step 6 - Slide the insert supplied over the tail piece.
DO NOT ROTATE THE TAIL PIECE WHEN FITTING.
Step 7 - Turn the thumb turn on the Glue Smart Lock to
the approximate centre, unl the slots inside the turn-
ing secon align with the ribs on the insert. Then slide
the Glue Smart Lock over the insert onto the door plate.
Step 8 - Holding the Glue Smart Lock against the door,
screw the two screws behind the baery cover to the
door plate. Use the thumb turn on the Glue Smart
Lock to check the latch opens and closes smoothly, if
not, return to Step 4.
Step 9 - Check the lock is securely fastened to the
door. If not, check all screws are ghtened. Then re-
move the baery tabs. The light behind the thumb
turn will ash twice.
Step 10 - Once the light has ashed behind the thumb
turn your Glue Smart Lock is ready to calibrate.
From now on follow the instrucons in the app “Add
new Glue Lock”.
GLUE
LOCK
 Loading...