12
Apollo Lasher
7. Place the lasher on the strand and ensure that the strand is centered in the
grooves of both of the front and rear rollers.
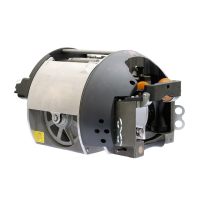
8. Close the front strand locks by
depressing simultaneously on both hooks
until audibly and visibly locked.
9. Close the rear strand locks by
simultaneously depressing on both hooks
until audibly and visibly locked. The lasher
is now secured to the strand.
10. Using the proper cable raising procedure for your application, lift the cable
or cables up to the strand, close the front gate and let the cable(s) rest on
the horizontal roller.
11. Adjust the position of the vertical rollers on the rear gate so that they
barely touch the sides of the cable(s). This step will have to be done every
time the bundle size changes.
12. Close the rear gate until it locks in its detented position.
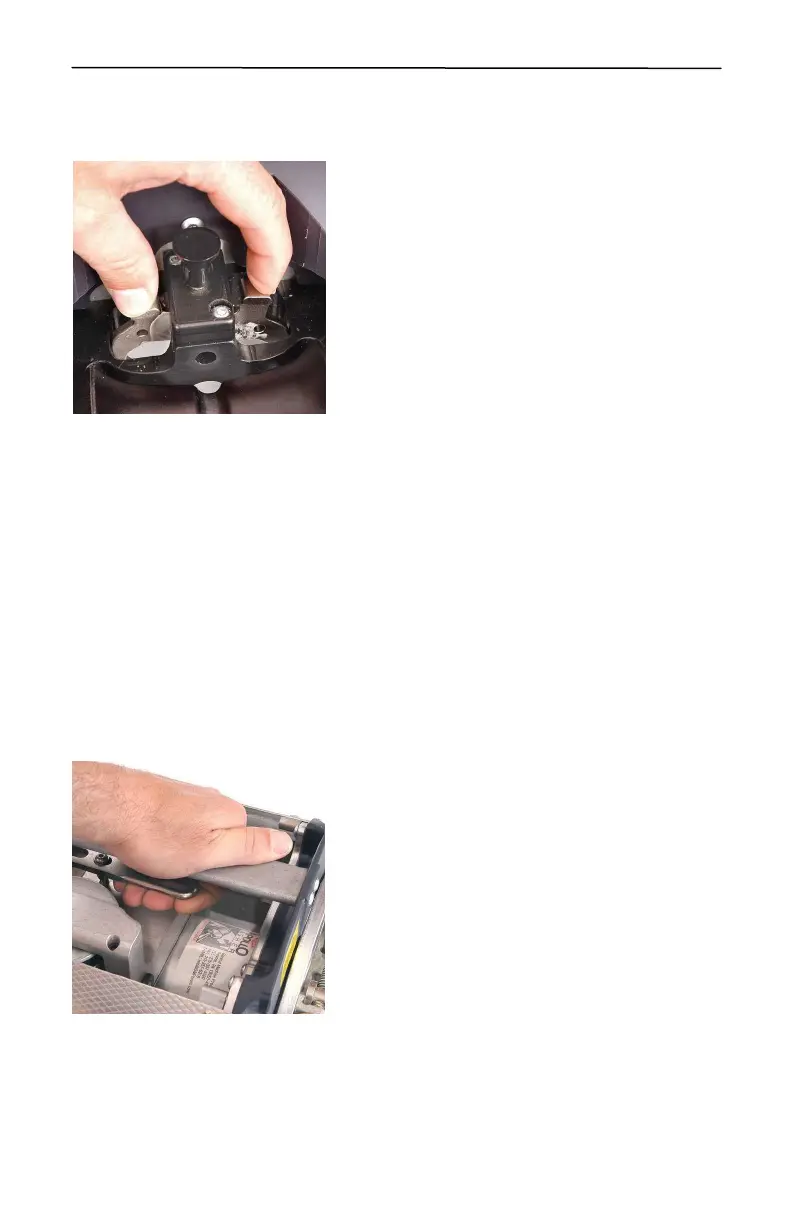
13. Raise the rear cable lifter by pushing up on the bottom of the lifter that
contacts the D shaft. The lock doesn’t have to be activated to raise the
cable lifter. If the rear cable lifter is too high, press the locking lever to
lower the rear cable lifter and try again.
14. Now the final steps. Pull up on the handle to de-clutch and disengage the
drive wheel to pull some lashing wire from the lasher. Secure the lashing
wire to the strand by using a GMP D or E
lashing wire clamp. Attach the bridle
assembly to the towing eyes on the Apollo
lasher and you are ready to lash.
See section 4.6 for more information on ter-
minating lashing wire.
Figure
20
Figure
21
 Loading...