Setup
Setting the Battery Chemistry
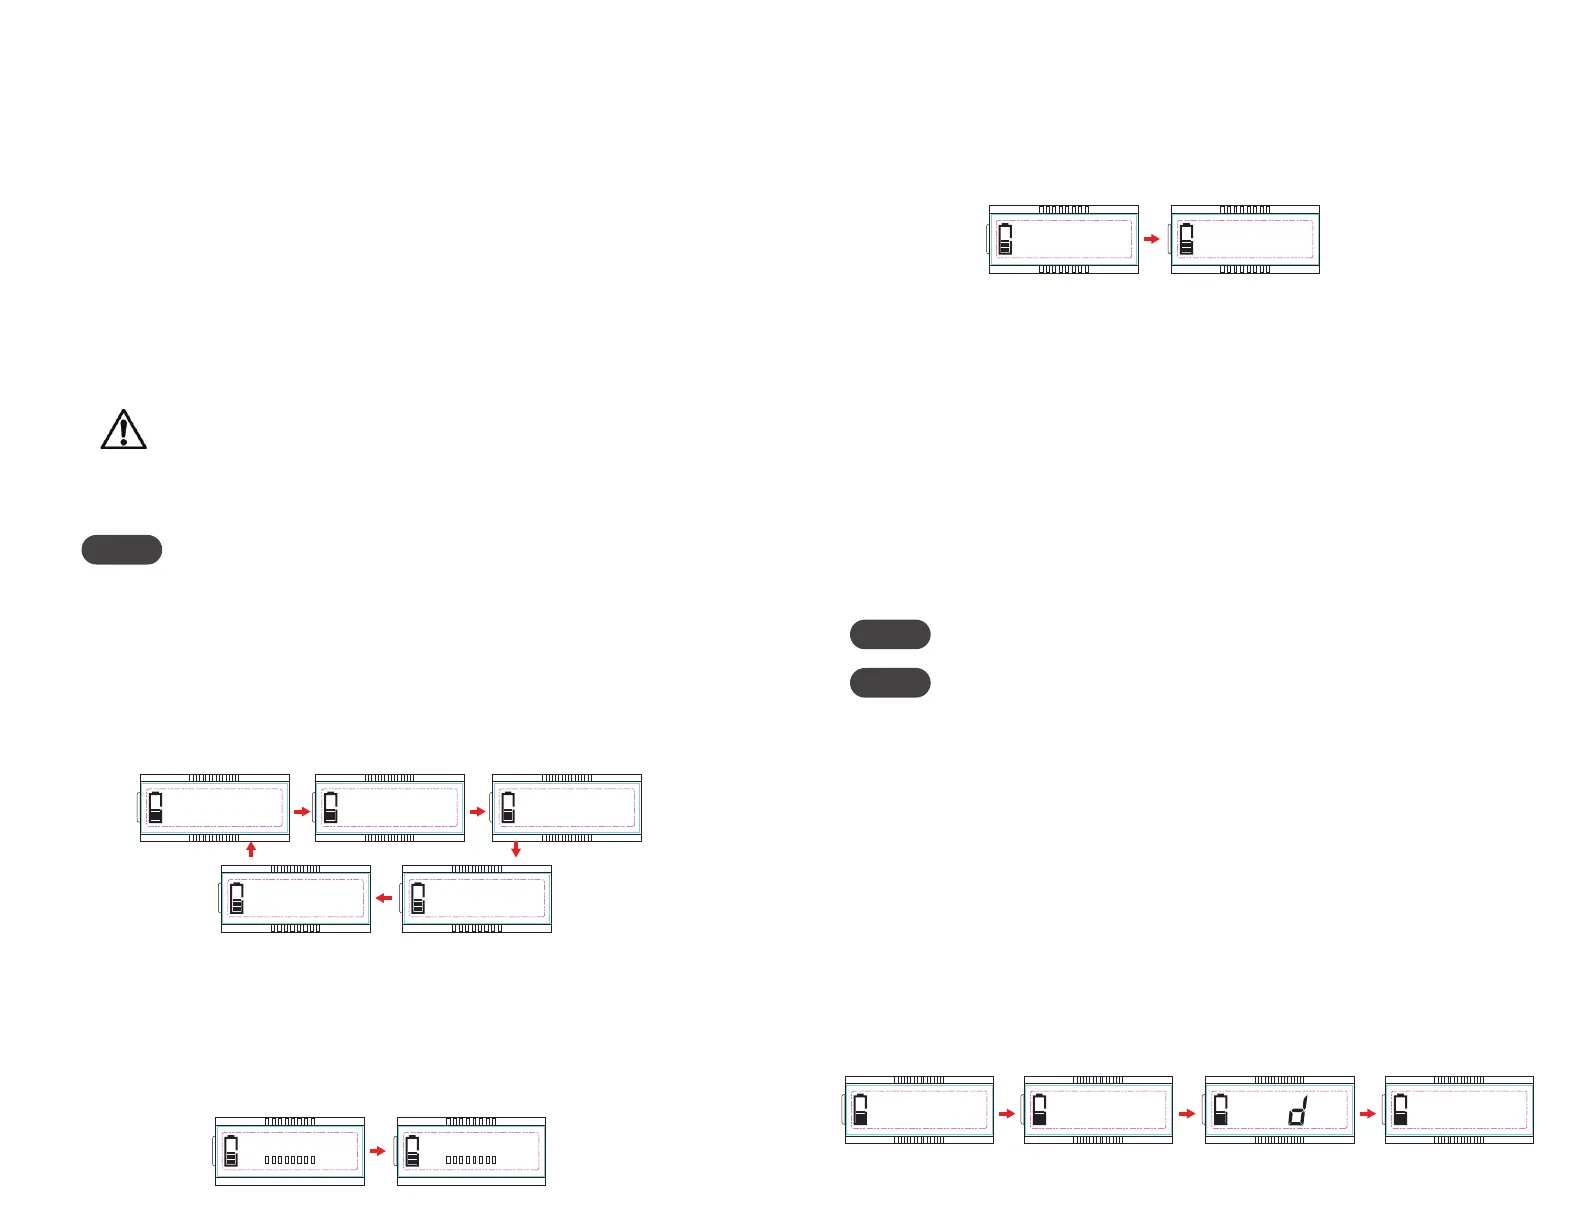
Setting Battery Type
Battery Types
Sealed, Gel, Flooded, Lithium
To set the battery type,
STEP 1: With the battery voltage displayed, press the SET button and hold for 5
seconds.
STEP 2: press the MENU button to cycle through battery types.
STEP 3: press the SET button to lock in the setting.
The SOLAR CONTROLLER is suitable for use with lead acid batteries (vented, GEL,
or AGM type) as well as some lithium iron phosphate (LiFePO4) batteries that are
supplied with a Battery Management System (BMS). If using lithium ion, it must be
lithium iron phosphate (LiFePO4) chemistry with a BMS. No other chemistries are
compatible.
Lithium batteries typically have maximum allowed charge currents. These
maximums typically decrease in cold temperatures. The solar controller does not
limit current for these restrictions, and system design of the solar array must
account for this.
Operating Instructions
Operating Instructions (Cont’d)
1. Locate a sunlit area, free from overhanging branches or obstructions.
2. Remove solar panel kit from kit bag.
3. Fold the two panels outward and extend the two support legs.
4. Connect battery clamps to the positive (red, +) and negative (black, -) battery
terminals.
If connecting to a pre-wired RV, rst insert the SAE connection to the port on the
side of your RV.
Connect your cable to the the solar panel cable using the greay quick-connect
cable.
Ensure the battery clamps do not come in contact with one another.
DO NOT let water come into contact with the controller.
5. Place solar panel facing the sun.
Avoid any shading no matter how small. An object as small as a
broomstick held across the solar module may cause the power output to
be reduced. Overcast days may also cut the power output of the module.
To obtain maximum output it is suggested that the panel’s direction be
frequently adjusted to track the sun’s movement throughout the day
(southerly exposure).
NOTE
NOTE
Be sure to follow all battery manufacturer safety instructions.
NOTE
The controller will not work unless there is a battery connected to the
Battery 1 terminals
16 9
1 8
SEL
BATT.
TYPE
16 9
1 8
GEL
BATT.
TYPE
16 9
1 8
FL
BATT.
TYPE
16 9
1 8
LFP
BATT.
TYPE
Sealed Gel Flooded Lithium
16 9
1 8
22.2
v
°C
PV
16 9
1 8
18.8
PV
A
16 9
1 8
10
PV
kWh
PV
kWh
16 9
1 8
12.8
BATT.
16 9
1 8
25.8
BATT.
1. Cycle through the following display parameters by pressing the set and menu buttons.
2. Clear the generated energy
3. Switch the battery temperature unit
Display: PV voltage, PV current, PV power, Battery voltage and Battery temperature
Step 1: Press the SET button and hold for 5 seconds under the PV power interface and the
value is ashing.
Press the SET button and hold for 5 seconds under the battery temperature interface.
Step 2: Press the SET button to clear the generated energy.
°C °F
16 9
1 8
8 1
BATT.
16 9
1 8
27
BATT.
16 9
1 8
0
PV
kWh
10
16 9
1 8
 Loading...