HOW IT
WORKS
Use the new Guide 12 Plus to charge AA and AAA (NiMH)
rechargeable batteries. Recharge from the sun using the
Nomad 5 solar panel or any USB port. The rechargeable
battery pack can also be used to power your phone,
wearables, GPS, or boost your tablet in a pinch. Guide 12
features a 12Wh (4.8V, 2500mAh) battery capacity (AA),
USB-C input/USB-A output ports, and built-in LED flashlight.
Compatible with:
• USB devices such as phones, GPS,
headlamps, POV cameras.
• Goal Zero Lights: Light-a-Life Mini, Lighthouse
Micro Flash, Crush Light, Crush Light Chroma.
The Guide 12 has two charging modes. One for AA (default
out of the box) and one for AAA. To switch between them
quick press the BATT CHECK/LIGHT button 3 times. If all 4
LEDs blink 5 times the Guide 12 is in AA mode. If LEDs 1 & 2
blink 5 times the Guide 12 is in AAA mode. The charging
current for AA batteries is 800mA and the charging current
for AAA batteries is 400mA. The max output for both types
of batteries is 5V, 2A (10W max)
When charging the LEDs will scroll when battery is fully
charged, all four lights stay on.
NOTE: If you are in the wrong charging mode the
indicator lights will be inaccurate.
Charging From Solar:
Charging phones, batteries, and other USB-powered
devices from the Nomad 5 is as easy as plugging in.
1. Use the built-in kickstand to position the panel
toward the sun.
2. Plug your phone or Guide 12 into the USB port located on
the back side of the panel and charge up.
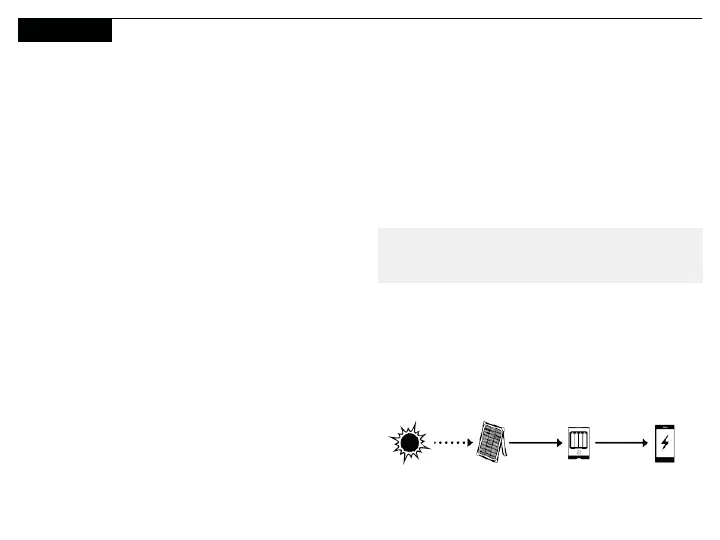
COLLECT
Gather the sun’s energy
with the solar panel.
3 4
STORE POWER
Plug a GoalZero Charge gear
recharger or phone anywhere.
intothe panel.
NOTE: When inserting batteries into the Guide 12 and
pressing the BATT CHECK/LIGHT button only one LED light will
display until the unit has been fully charged. To check the
battery level after they are fully charged, press the BATT
CHECK/LIGHT button and the unit will display approximate
charge level by displaying 1,2,3 or 4 LEDs.
Battery indicator is also the button for turning on
flashlight. Hold for approx 5 seconds to turn on/off.
All 4 batteries must be inserted in order to function.
WARNING: Make sure the batteries are inserted
correctly. Match + and - of battery to internal
markings of the Guide 12.
 Loading...