SET-UP
GOLD MAGIC® Model 10M, 12E, 12-10
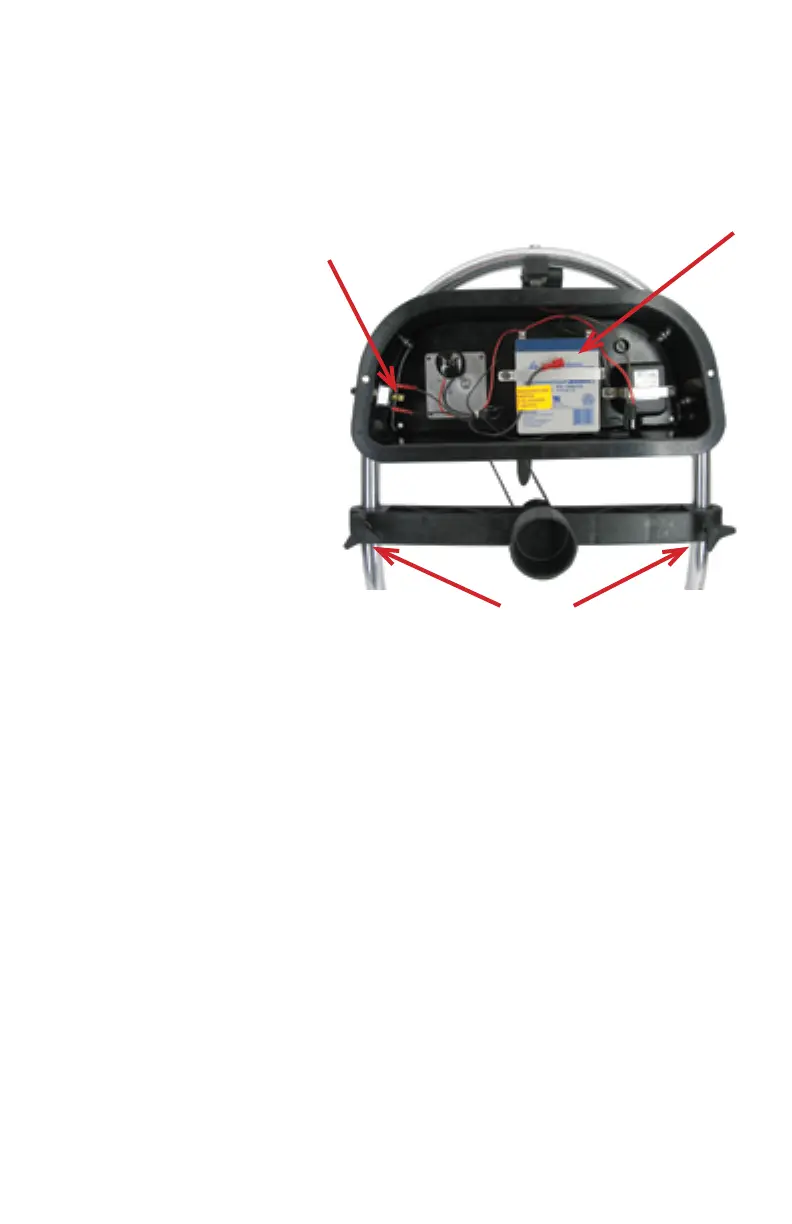
1-HOOKING UP THE BATTERY:
Your GOLD MAGIC was shipped with one of the power wires disconnected from the
switch. This is to prevent the unit from accidentally being turned on during shipping and
arriving with the battery discharged. This wire is attached to the battery with a sticker
instructing you how to connect it. Remove the cover of the Control Box by gently pulling
back on the two NY-Latches. You need to pull the wire free of the battery and push the
terminal onto the center termi-
nal of the switch.
2- BELT DRIVE TENSION
ADJUSTMENT:
The drive belt tension is adjust-
ed by loosening the two knobs
on the front of the axle bar and
moving the bar up or down.
The belt should be just tight
enough to prevent slipping.
Over-tightening will reduce mo-
tor life and operating time. The
toothed timing belt was chosen
for its ability to function, with
light tension, in wet conditions
without slipping.
3- PAN CLEANING & PREPARATION:
Before the rst use, (wet) we suggest that you clean the inside of the pan with alcohol or
liquid detergent to remove any mold release compound or oil that might be in the pan.
The molding production process and handling can result in a ne lm of oil on the sur-
face of a new pan. In water this oil will tend to impair the recovery of ne gold and acts
like a “life jacket” for that piece of gold and reduces its specic gravity and thus makes
it hard or impossible to recover. Do not use any abrasives in the process. You only want
to remove the surface lm of oil. You do not want to “rough up” the surface as this will
impair the recovery of ne gold.
4- INSERT THE PAN INTO THE HUB:
After you have cleaned your new pan and adjusted the belt tension, the last step is to
insert the knob on the back of the pan into the Hub. You do not need to push the pan all
the way in. Keep in mind that you will probably be frequently removing and reinserting
the pan.
5- INSERT THE CENTER CUP:
Push the removable center cup into the center of the pan and the setup is complete.
Drive Belt Tension Adjustment
5

 Loading...