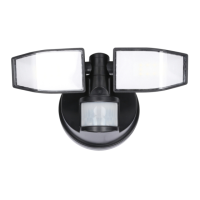
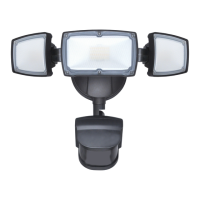
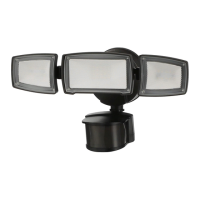
Model / Model / Model #: SE1249-WH3-02LF7-G, SE1249-BP2-02LF7-G
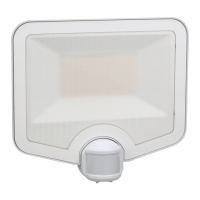
LED Motion Activated Hyper Bright Flood Light (Page 1)
Projecteur à DEL hyper brillant activé par le mouvement (Page 5)
Reflector LED hiperluminoso activado por movimiento (Página 9)
Hardware kit*/ Trousse de
quincaillerie* / Kit de aditamentos*
Required/
Nécessaire/
Obligatorio
ENGLISH
1. This fixture can only be installed over a recessed electrical box, OR a UL Listed
surface mount electrical box rated for wet locations. Recessed electrical box
installations REQUIRE the outer edge of the wall canopy to be completely sealed
with silicone RTV glue, and surface mount electrical boxes require the use of the
foam gasket (included), to prevent water seeping into the electrical box. Without
sealing the canopy enclosure, water seepage can short out the driver, and cause
product failure, and/or other safety issues.
2. DO NOT EAVE MOUNT ONTO PERFORATED OR CHANNELED MATERIAL
using a recessed junction box. Water can seep into the fixture and cause a
hazardous situation and/or fixture failure.
3. Do not look directly at LEDs for extended period of time. Can cause eye damage.
WARNINGS AND CAUTIONS
HOW TO CHOOSE A LOCATION SITE
1
2
IMPORTANT!! READ BEFORE YOU BEGIN!
4. LEDs can be damaged by electrostatic discharge shock. Before installation,
discharge yourself by touching a grounded bare metal surface to remove this
hazard.
5. Minimum 90°C supply conductors. For fixture electrical ratings, see fixture label.
6. If unsure if the electrical box is properly grounded, or the box is plastic and has
no ground wire, or are unfamiliar with the methods of properly grounding fixture,
consult a qualified electrician.
7. Do NOT use this fixture with dimmers.
8. Fixture will reliably operate between temperatures from -20°F to 122°F.
(At temperatures above 92°F, the PIR may not detect body heat.)
Diffuser
Diffuseur
Difusor
PIR control panel
Panneau de commande PIR
Panel de control del PIR
Light selection controls
Commandes de réglage de l’éclairage
Controles de selección de la luz
Wall plate
Plaque murale
Placa de pared
Knockouts
Sections défonçables
Destapaderos
* Actual hardware may differ from illustration.
* La quincaillerie incluse peut être différente de l’illustration.
* Los aditamentos reales pueden diferir de los que se muestran en la ilustración.
MOUNTING PREPARATION
AAx1
DDx3
EEx1
BBx2
CCx2
Sensor
(PIR) Head
Tête de
détecteur (PIR)
Cabeza del
sensor (PIR)
After unpacking the light, loosen both star
knobs on the mounting arms located on the
back of the fixture.
The arms have position hash marks to aid in the
installation for both STANDARD WALL MOUNT
and STANDARD EAVE MOUNT. By aligning
the hash marks (“-” and “=”), the arm will be
positioned for two very different configurations.
By aligning the “-” marks on the elbow joint and
then on the pivot joint the mounting arm is
articulated for WALL MOUNT installation. By
aligning the “=” marks on the elbow joint and
then on the pivot joint the mounting arm is
articulated for EAVE MOUNT installation.
Select a location that allows the sensor to perform to its highest level.
The fixture can be mounted two distinct ways: WALL MOUNT or EAVE MOUNT.
This security light uses passive infrared (PIR) technology to automatically turn on the
light. Passive infrared does not detect motion, but sensing differences in ambient
temperatures, versus warmer objects in its field of view. As such, the sensor can be set
off by a variety of other sources, including dryer vents, hot tubs, and the like. The PIR
sensor cannot detect motion through plexiglass or glass barriers. Select an installation
location carefully. Do not aim the PIR towards areas having frequent pedestrian or
motorized traffic, and/or other objects that generate areas of warmer air. All of these may
trigger the motion sensor security light and maybe disruptive to the intended operation of
the light.
Do NOT install near other sources of light, which can fool the built-in light sensor into
thinking it is daylight, and may prevent the proper operation of the light.
Silicone
Silicone
Silicone
1
2
Pivot joint
Elbow joint
WALL MOUNT EAVE MOUNT
SHUT OFF POWER AT THE CIRCUIT BREAKER OR FUSE PANEL BEFORE REMOVING
THE OLD FIXTURE OR INSTALLING THE NEW ONE.
1
2
3
4
DO NOT EAVE MOUNT ON PERFORATED OR
CHANNELED SOFFIT MATERIAL!
Mounting arm
Bras de montage
Brazo de montaje
Star Knob
Bouton en étoile
Perilla en forma de estrella
READ ENTIRE INSTALLATION PROCEDURE BEFORE YOU BEGIN!
“L” shaped Allen wrench
Clé Allen en forme de « L »
la lave Allen con forma de “L”