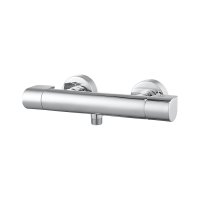
Do you have a question about the GoodHome Cavally 3663602301325 and is the answer not in the manual?
| Product Type | Shower head |
|---|---|
| Model Number | 3663602301325 |
| Brand | GoodHome |
| Material | Plastic |
| Spray Modes | 3 |
| Installation Type | Wall Mounted |
| Adjustable Angle | Yes |
| Hose Length | 1.5 m |
Read all safety warnings carefully and ensure full understanding before handling the product.
Do not overtighten fixings as this may damage the product. Ensure proper installation before use.
Connect to water supply according to Water Supply (Water Fittings) Regulations and UK Building Regulations.
Retain this information for future reference and read carefully for usage and maintenance.
Ensure all parts and required tools are available before installation by a competent person.
Flush supply pipes before connecting, isolate water, and check for leaks after installation.
Check water system suitability, minimum pressure, and maximum operating pressure (5 Bar).
Never leave pull-out tap heads submerged in sinks to prevent contaminated water backflow.
Use warm soapy water and a soft damp cloth for cleaning. Wipe dry with a clean cloth.
Periodically check flexible hose filters for blockages and clean the spout aerator gently.
10-year warranty for domestic use upon presentation of proof of purchase.
Excludes normal wear, damage from misuse, accidents, or non-original parts.
Assemble the initial fittings using provided parts [04]x2 and tools.
Attach components using parts [03]x2, following the indicated connection points.
Connect main body [01]x1 with components [02]x2 using specified tools.
Final visual representation of the assembled product.
Information for Kingfisher International Products Limited and Kingfisher International Products B.V.
Contact details for distributors in the UK, France, Poland, Germany, Russia, Romania, Spain, Portugal, and Turkey.