A
Anna MillerAug 6, 2025
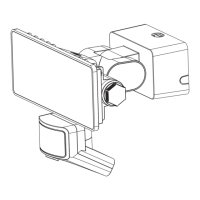
Why does my GoodHome Davern AWL1021-IB Flood Light come on for no apparent reason?
- PperezmichealAug 6, 2025
If your GoodHome Flood Light comes on for no apparent reason, several factors could be at play. Ensure that the product isn't wired through a dimmer or timer; replace these with a standard on/off switch. The sensitivity control might be set too high, so try decreasing the setting. External factors like wind moving trees, cars in the street, reflective objects, or sunlight falling onto the lens can trigger the sensor. Change the detection zone or relocate the unit. To test, block the lens with cardboard; if the light turns off, something in the detection zone is the cause. Relocate the unit or adjust the sensor's sensitivity.