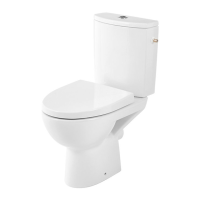
Do you have a question about the GoodHome valois 3663602690597 and is the answer not in the manual?
Check parts, prepare tools, ensure water is off, check mounting surface, consult installer if unsure.
Handle with care, use domestically only, ensure secure installation, and check for leaks post-installation.
10-year warranty for domestic use, requires proof of purchase, covers product breakdowns under normal conditions.
Check all parts, gather tools, ensure a clear, dry space, and turn off the main water supply before assembly.
Assemble the cistern components, including internal fittings, before attaching the cistern lid.
Install the water inlet valve into the cistern, ensuring a secure connection with the provided tools.
Fit the cistern outlet valve assembly into the cistern, securing it with the provided fittings.
Attach the cistern to the toilet bowl, aligning the bolt holes and securing them with washers and nuts.
Mount the toilet seat and cover onto the bowl by aligning the hinges with the fixing points.
Connect the water supply hose to the inlet valve and toilet cistern, ensuring a watertight seal.
Fix the toilet to the wall using the provided brackets, screws, and wall plugs for stability.
Connect the flexible water supply hose to the cistern inlet valve, ensuring it is properly tightened.
Allow 24 hours for any sealant or adhesive used during installation to cure fully.
Install the toilet seat and cover by attaching the hinges to the bowl fixing points and securing them.
Attach the toilet seat hinges to the bowl, ensuring they are correctly aligned and secured.