2019 | Condential and Proprietary | Do not distribute
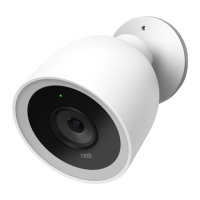
Mount the camera
Plug the end of the power cable that has the gray rubber ring into the base of the camera. It will click into place.
● Tuck the excess cable back into the hole in the wall.
● If you’re running the cable along the wall before it goes inside, route the cable through the notch in the wall plate.
Push the camera base into the wall plate until it clicks into place.
Install the wall plate
Once you’ve checked that the installation plan is good, you can mount the wall plate.
1. Hold the wall plate up where you want to mount the camera and mark the holes
with a pencil.
2. Use a 3/32" (2 mm) bit to drill pilot holes for the screws.
Note: If the wall is made of a hard material like brick or stucco, you may need to use
the included wall anchors to hold the screws. Use a 7/32" or 6 mm bit for the anchors.
If you’re installing the camera over the cable hole
● Use a ½” or 13 mm bit to drill the center hole.
● Run the cable through the hole in the wall and pull it through the wall plate’s
center hole until you reach the end of the cable. Make sure it’s the end of
the cable with a gray rubber ring.
Tip: Use the caps that came aached to both ends of the cable to keep dust
and di from geing into the connector. If you don’t have the caps, you can
cover the cable tip with some masking tape.
● Spread caulk on the back of the wall plate in the shape of a U. Leave an open
space that will point down when the plate is mounted so water can drain
out.
● Mount the wall plate with the included screws.
● Plug the end of the power cable that has the gray rubber ring into the base
of the camera.
If you’re routing the cable on the outside of your home
● Spread caulk on the back of the wall plate in the shape of a C. Leave an open
space that will point down when the plate is mounted so water can drain out.
● Mount the wall plate with the included screws.
Impoant: Make sure the wall plate’s cable notch points in the direction you’re
going to run the cable.
 Loading...