2019 | Condential and Proprietary | Do not distribute
● Install the wall plate
Once you’ve conrmed streaming video from the
chosen spot, it’s time to install the camera’s wall plate.
Remove the protective sticker and backing foam from
the wall plate.
We recommend you rst drill pilot holes with a 3/32” bit,
and then aach the wall plate with the screws.
If the wall is made of a material like brick or stone, you may need to use the included wall anchors. Use a 7/32”
masonry bit to drill holes for the anchors. Gently tap each anchor into the wall with a hammer until it’s ush with
the suace. Then aach the wall plate with the screws.
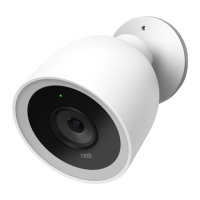
● Aach camera to wall plate
Once the plate is secure, aach the mounting magnet to the
wall plate. Then aach Nest Cam to the mounting magnet and
aim it where the customer wants.
Now you can remove the sticker from the Nest Cam’s lens; it’s
only there for protection during shipping and installation.
Use the Nest app to ne tune the camera’s position.
● Secure the cable
Next, you’ll need to secure the power adapter and cabl
e.
 Loading...