EasyManuals Logo

Google Nest Protect How To Install

Google Nest Protect
10 pages
To Next Page IconTo Next Page
To Previous Page IconTo Previous Page
Page #4 background imageLoading...
Page #4 background image
6. Remove the
old
backplate
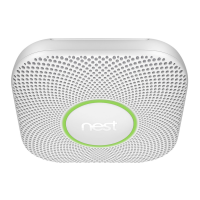
Unscrew the back plate from the ceiling or electrical box. Save
the screws for installing the Nest back plate later. You'll see one
or two wires coming from the ceiling.
7. Attach the
Nest
connector
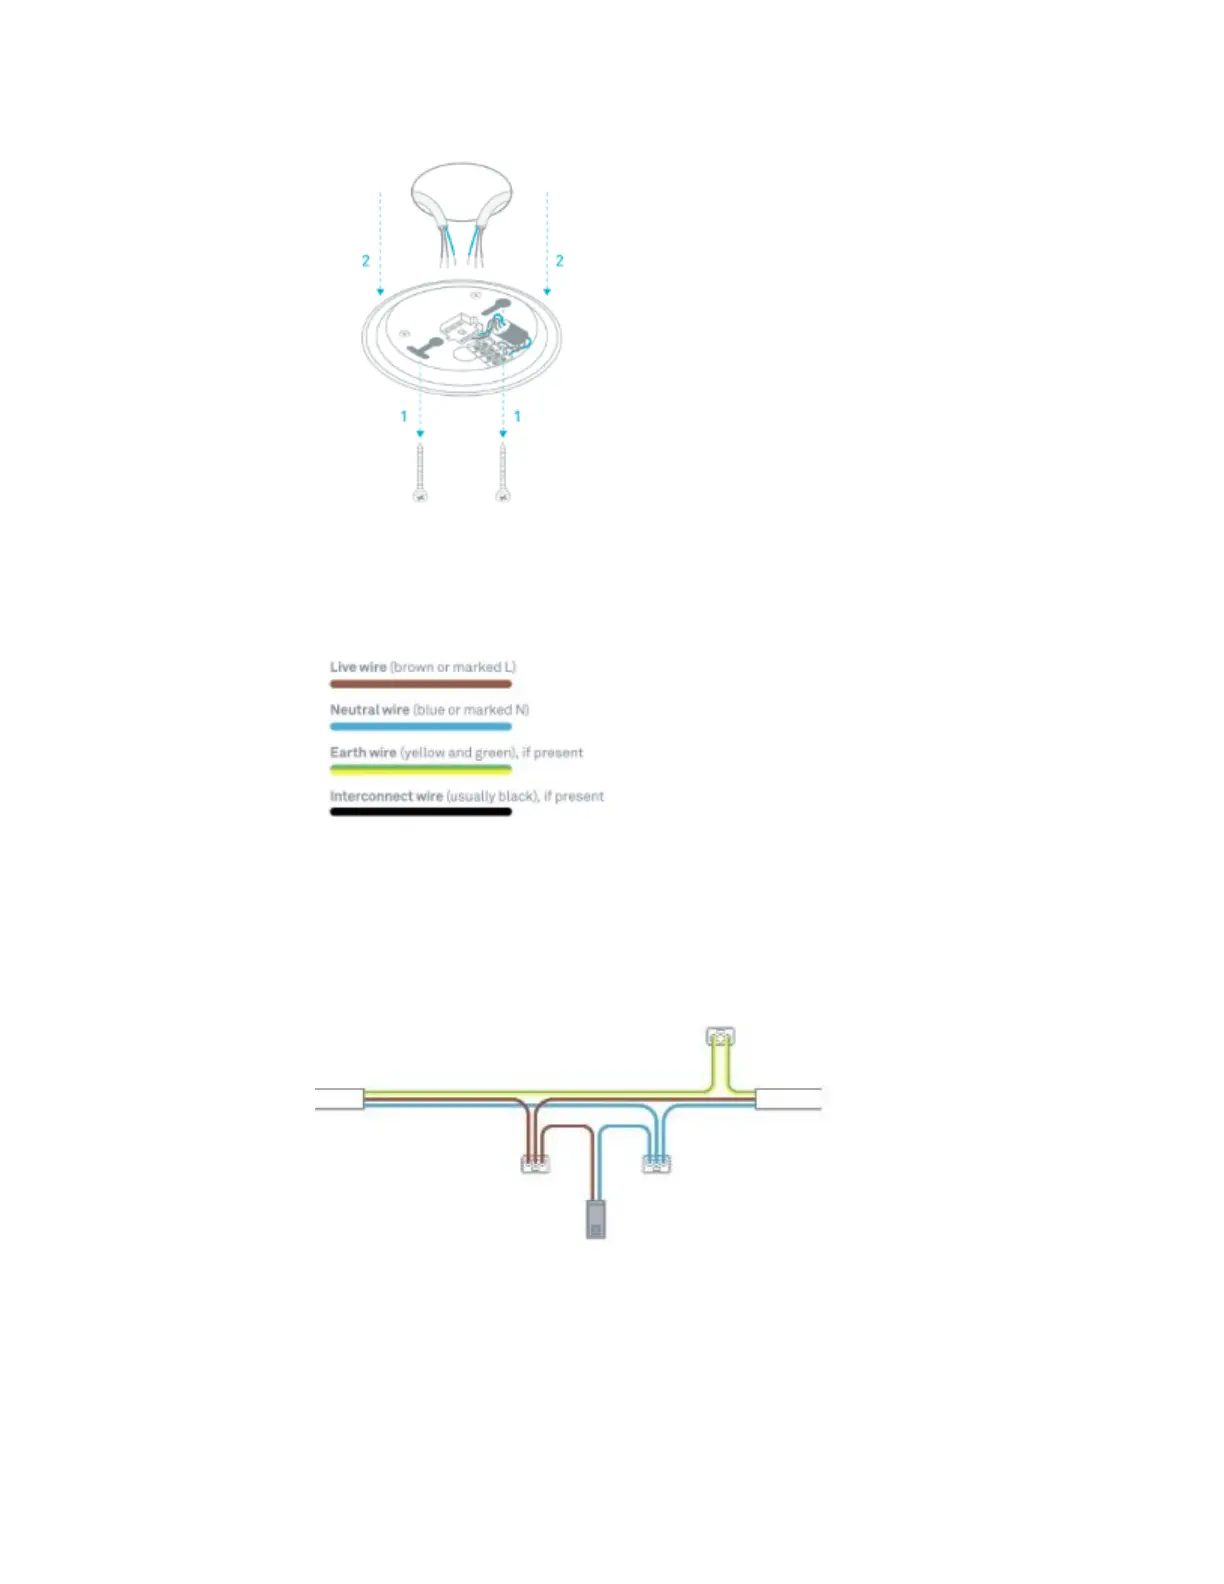
Each wire in the ceiling or wall will have two to four differently
coloured conductors. Their colours may vary based on their age.
If you are in the Netherlands, the interconnect conductor is
usually coloured orange.
Match the live wires coming from the ceiling to the live wires in
the Nest 230V AC connector and put them into a connector
block. All the neutral wires go into another connector block, and
the earth wires into a third terminal block.

Other manuals for Google Nest Protect

Questions and Answers:

Question and Answer IconNeed help?

Do you have a question about the Google Nest Protect and is the answer not in the manual?

Google Nest Protect Specifications

General IconGeneral
LED colorRed / Green / Blue
Detector typeCarbon monoxide detector
Maximum range15 m
Mounting typeSurface-mounted
Product colorWhite
Speaker power2 W
Alarm decibels85 dB
Number of LEDs6
Housing materialPlastic
Languages supportItalian
Placement supportedHorizontal/Vertical
Wireless connectionYes
Number of simultaneously connected devices (max)18
Package typeBox
Quantity per pack1 pc(s)
Wi-Fi frequency2.4 GHz
Wi-Fi standards802.11b, 802.11g, Wi-Fi 4 (802.11n)
Bluetooth version4.0
Connectivity technologyWireless
Number of screws4
Power sourceBattery
Battery voltage1.5 V
Battery technologyLithium
Compatible battery sizesAA
Operating temperature (T-T)4 - 38 °C
Operating relative humidity (H-H)20 - 80 %
Weight and Dimensions IconWeight and Dimensions
Depth38.5 mm
Width135 mm
Weight379 g