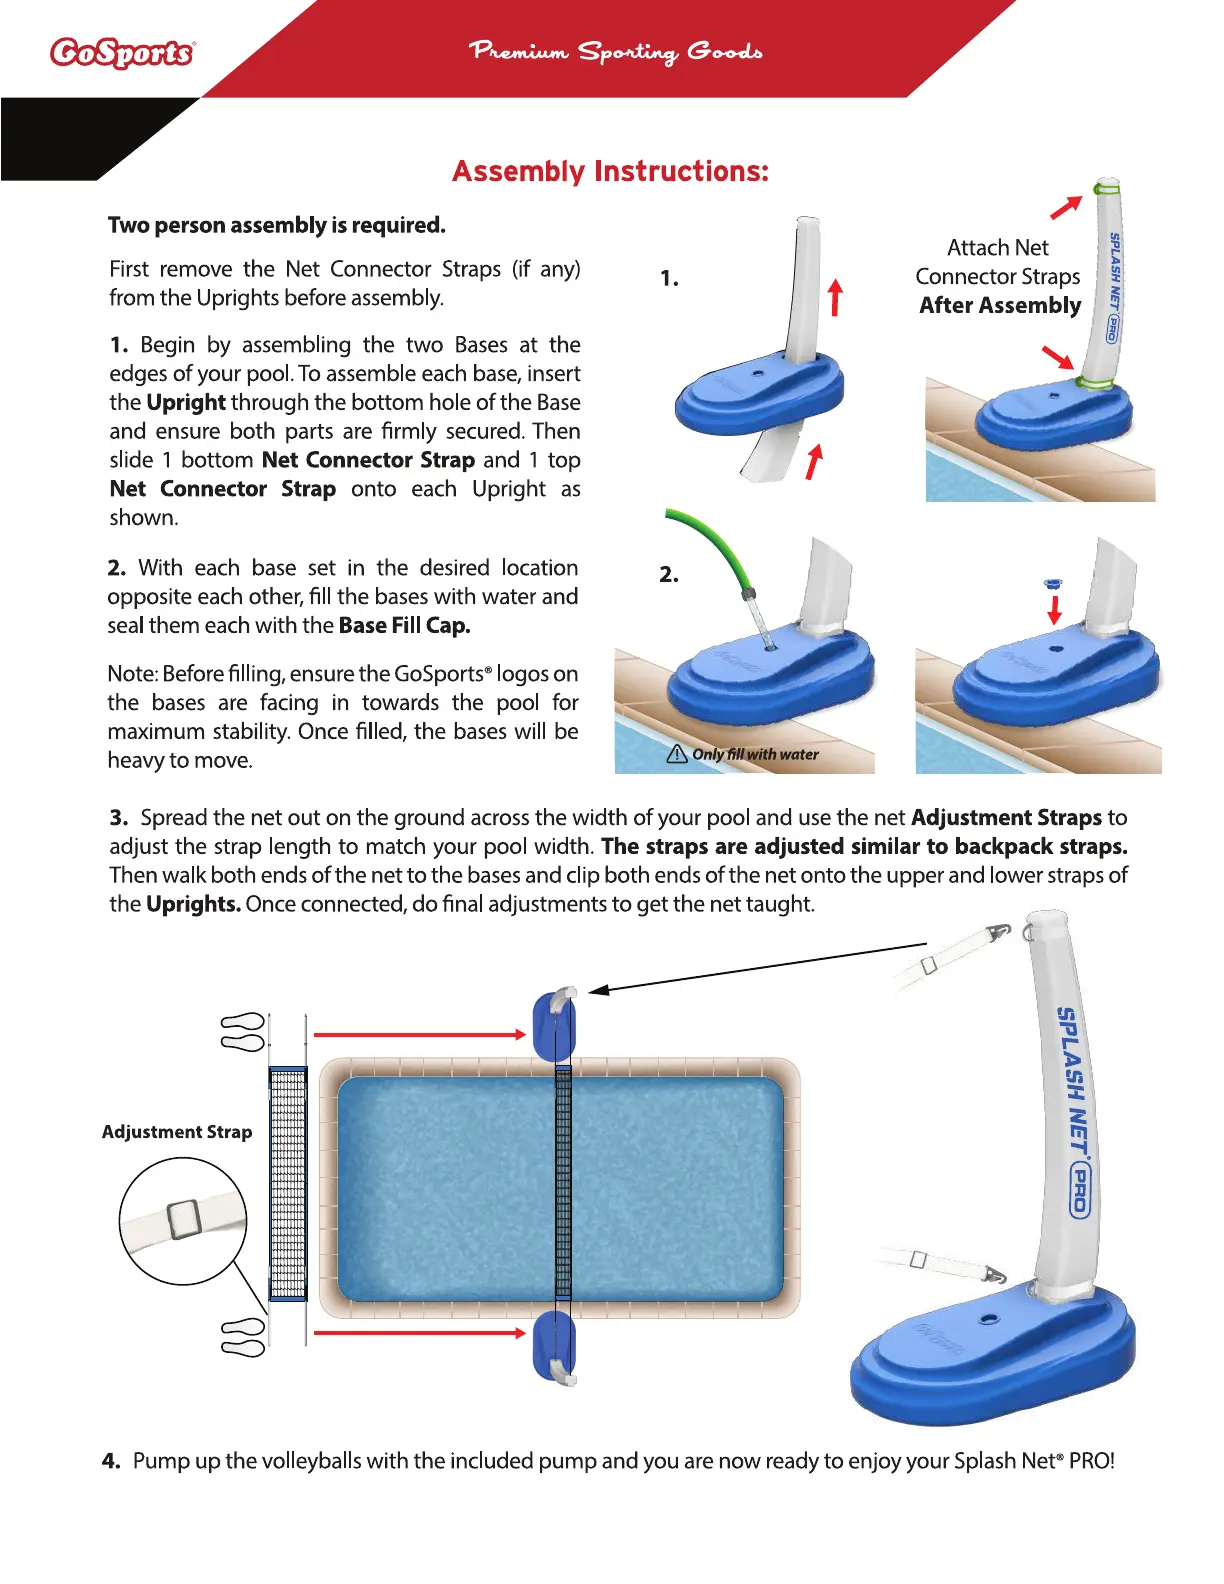
GoSports
Assembly Instructions:
Two person assembly is required.
First remove the Net Connector Straps (if any)
from the Uprights before assembly.
1. Begin by assembling the two Bases at the
edges of your pool. To assemble each base, insert
the Upright through the bottom hole of the Base
and ensure both parts are firmly secured. Then
slide 1 bottom Net Connector Strap and 1 top
Net Connector Strap onto each Upright as
shown.
2. With each base set in the desired location
opposite each other, fill the bases with water and
seal them each with the Base Fill Cap.
Note: Before filling, ensure the GoSports@logos on
the bases are facing in towards the pool for
maximum stability. Once filled, the bases will be
heavy to move.
Attach Net
Connector Straps
After Assembly
nly
water
3. Spread the net out on the ground across the width of your pool and use the net Adjustment Straps to
adjust the strap length to match your pool width. The straps are adjusted similar to backpack straps.
Then walk both ends of the net to the bases and clip both ends of the net onto the upper and lower straps of
the Uprights. Once connected, do final adjustments to get the net taught.
Adjustment Strap
uuunu
4.
Pump up the volleyballs with the included pump and you are now ready to enjoy your Splash Nee PRO!
 Loading...