GOST Phantom – Installation + Programming Guide
support@gostglobal.com or (954) 565-9898 3
Hardwired Input/Output ports
The GOST Phantom has two hardwired Inputs and/or Outputs which work in conjunction with “I/O 1”, “C”, and
“I/O 2” in Figure 2. An input is defined as a zone and an output is defined as a switch. Hardwired Zones +
Outputs can correspond to either I/O 1 or I/O 2. When programming the I/Os to function in the menu, you will be
prompted as to whether or not you want to use them at “Zone 1” or “Zone 2” and/or “Output 1” or “Output 2”(see
08-System Setup, 01-Zones or 03-Outputs)
If using either Input as a zone, place the Normally Closed sensor between “I/O 1” or “I/O 2” and “C”. Assure
that the terminal block screws are tight with a firm connection. Once the zone is programmed, cycle the magnet
for the zone across the switch once to assure it is functioning properly.
If using either Output as a trigger, you must use a third party relay. The outputs cannot drive more than 50
Milli Amps of current. Assure that the third party relay you use is rated properly for the device you are switching.
The most common relay will be a 12 VDC coil with say a 10 switch. Wire one side of the relay coil to 12VDC and
the other side to “I/O 1” or “I/O 2”. Then place the Negative to the middle “C”. After you program the output and
the event happens, there will be continuity between “I/O 1” or “I/O 2 and “C” for the duration of that event
Communicator
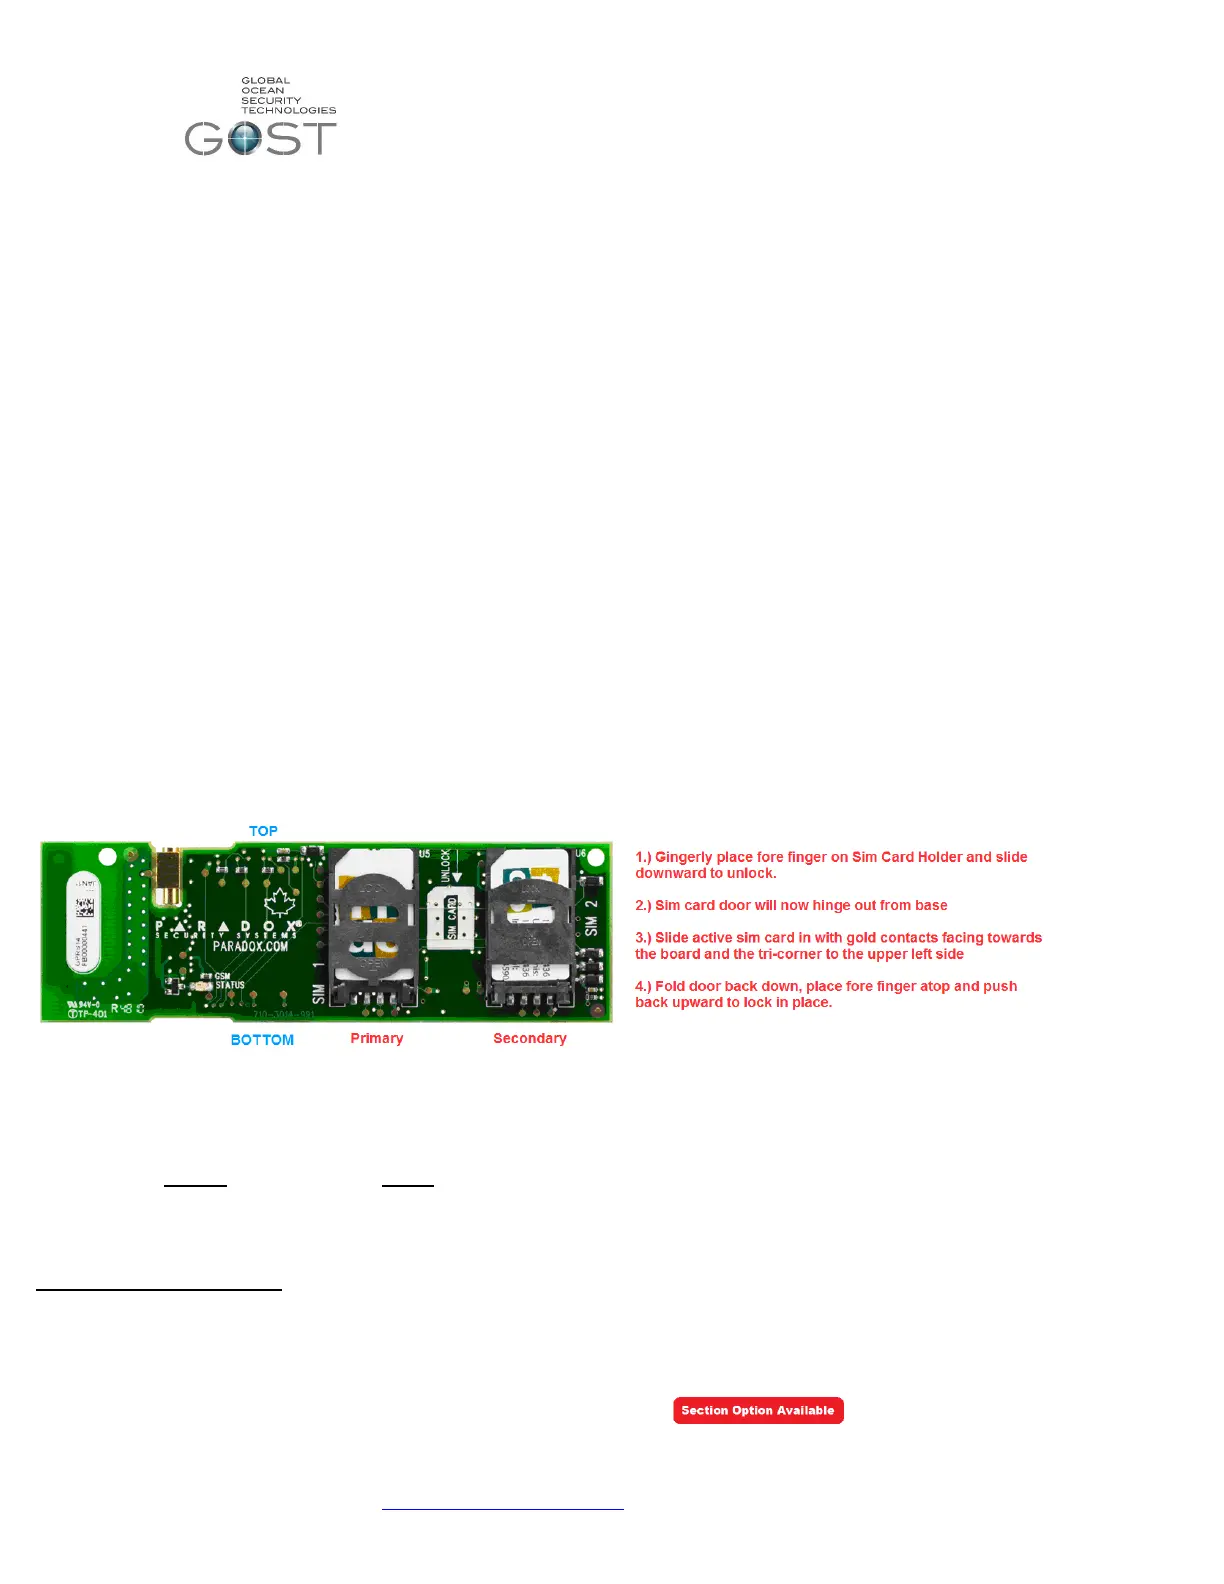
The GOST Phantom has a built in quad band communication module that is capable of both voice call outs and SMS
messaging. There are two sim card holders on this board for redundancy. This comes in handy if the boat is travelling
between countries and needs multiple GSM carriers. The primary sim card simply needs to be inserted into the primary “SIM
1” See description in Figure 3 to insert sim card(s) into onboard module. Most clients will only have the need for one primary
sim card. Have the owner, crew, or provider of the sim card assure they arrange with the GSM carrier to have voice / SMS
messaging available. The GOST Phantom is defaulted to report events thru this communicator as the primary method.
If you are using either a Separate GSM communicator (Insight Package) or Satellite phone, it will be necessary to adjust
the default system setting (08-System Setup-09-Communicator, Page 18) If the Installer is using the GOST Phantom in
conjunction with a GSM communicator or Satellite phone, alarms voice reports only will communicate voice alarms out thru the
“Tip” and “Ring” (no SMS Messaging). In either case, you will most likely have a four conductor RJ-11 telephone cable coming
from the communication method. After the cable is run to the GOST Phantom, take the two center Red and Green wires to the
Ring + Tip (respectively) as displayed in Figure 2 on the previous page.
Figure 3
Programming + Installation Overview
With the GOST Phantom mounted and powered up, it is time to program and install the different wireless entities of the
system. This guide focuses on the primary programming and Installation parts of the install. The system can be programmed
using either the section based method, the menu based approach (easiest and most common method), or a combination of
both. This guide is written in a fluid fashion and it is best to follow the steps in the order that it is written. In some cases, the
GOST Phantom comes with the sensors preprogrammed, in this case see the labels on the respective zones and outputs and
follow installation guidelines only for each wireless entity.
Section Based Programming – This method will need to rarely be used, though it is important for the installer to know that it
exists when some background changes need to be made. It is best to compare Section based programming to “DOS” on a
PC. To enter section based programming: go to the home screen of the panel, hold down the “ 0 “ key for approximately
three seconds, enter the installer code of “1111” (default), and enter the respective section number. Once the respective
values are changed by the installer, it will automatically jump to the next section number or you can simply press “# “to
proceed to the next section. To exit section programming, hit “* * “and “exit”.
NOTE: Section programming option availability will be represented by this icon:
 Loading...