To download this User’s Guide in English, Spanish, or French, or to get answers to frequently asked questions, visit the support section at:
www.gpx.com
Para descargar este Manual del Usuario en inglés, español y francés, o para obtener respuestas a preguntas frecuentes, visite la sección
de apoyo en: www.gpx.com
Pour télécharger ce guide de l’utilisateur en anglais, espagnol ou français, ou pour obtenir des réponses à des questions fréquemment
posées, consultez la rubrique d’assistance sur: www.gpx.com
For Warranty Information and the most up-to-date version of this User’s Guide, go to www.gpx.com
Customer Service: 1-888-999-4215 | Email Support: prodinfo@dpiinc.com | Email Parts: partsinfo@dpiinc.com
Copyright © 2018 Digital Products International (DPI, Inc.) All other trademarks appearing herein are the property of their respective
owners. Specications are subject to change without notice.
International Support
Protect for Today
Made
Green
Clock Time & Calendar
To Set the Time
1. Press and hold the Mode button until the hour display begins ashing.
2. Press the +/− buttons to adjust the hour. Note the PM indicator.
3. Press the Mode button again, the minute display will begin ashing. Press the +/−
buttons to set the minutes.
4. Press the Mode button again to nish, or wait for the display to stop ashing.
Alarm
To Set the Alarm Time
1. Press the Mode button to view the alarm on the display.
2. Press and hold the Mode button until the hour display begins ashing.
3. Press the +/− buttons to adjust the hour. Note the PM indicator.
4. Press the Mode button again, the minute display will begin ashing. Press the +/−
buttons to set the minutes.
5. Press the Mode button again to nish, or wait for the display to stop ashing.
6. Press the + button to turn the alarm ON or OFF. Note the indicator on the display.
User Settings
Temperature Display Format
• Press − button to switch between Fahrenheit or Celsius.
Disabling the Alarm
• Press the + button to turn the alarm ON or OFF. Note the indicator on the display.
Snooze
• Press the Snooze button to delay the alarm.
• Press the + button to cancel the alarm.
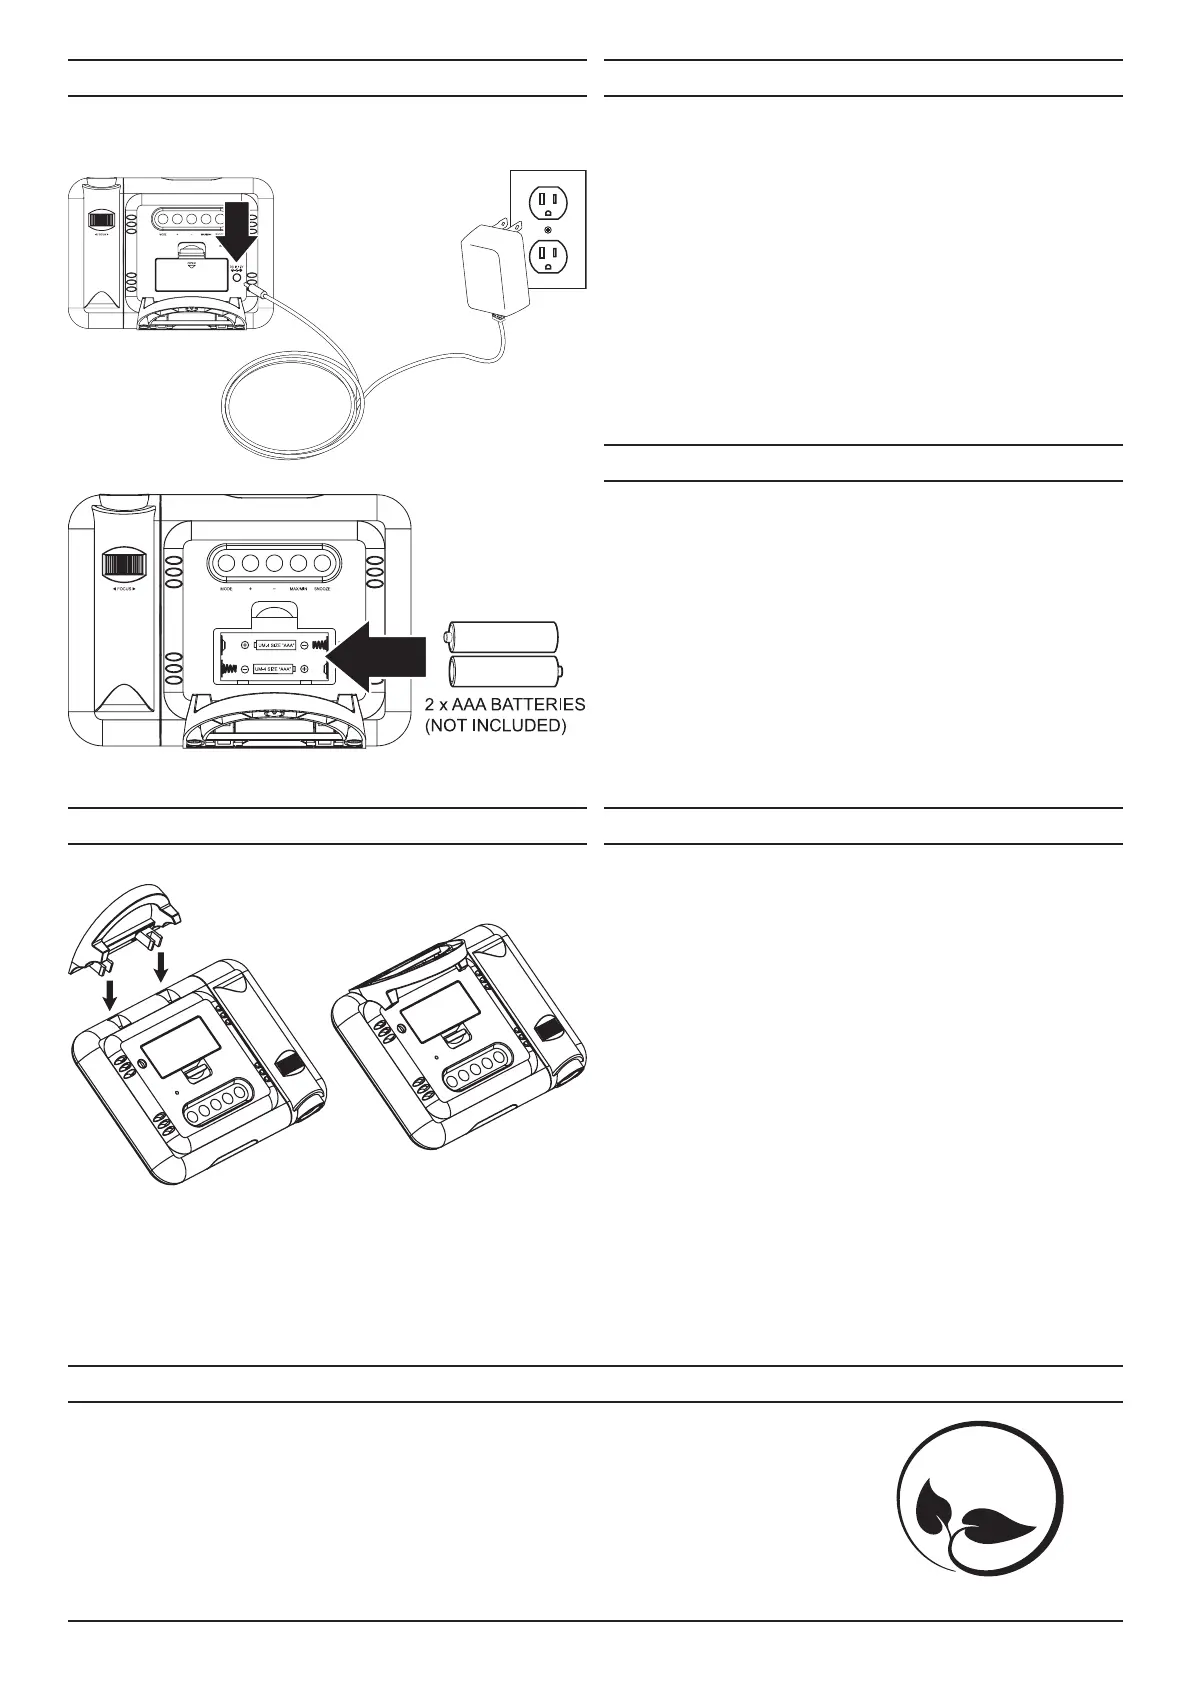
Power
Base Attachment
To power the unit, plug the AC/DC power adapter (not included) into the DC power port on the
rear of the unit and a standard AC power outlet.
To Set the Calendar
1. Press the Mode button to view the calendar on the display.
2. Press and hold the Mode button until the year display begins ashing.
3. Press the +/− buttons to adjust the year.
4. Press the Mode button again, the month display will begin ashing. Press the +/−
buttons to set the month.
5. Press the Mode button again, the day display will begin ashing. Press the +/− buttons
to set the day.
6. Press the Mode button again to nish, or wait for the display to stop ashing.
 Loading...