EasyManua.ls Logo

GQF HOVA-BATOR 2362E - User Manual

GQF HOVA-BATOR 2362E
4 pages
Print Icon
To Next Page IconTo Next Page
Loading...
ELECTRONIC THERMOSTAT
CIRCULATED AIR
MODEL 2362E
PARTS
Unpack the incubator from box. Check
for the components listed below.
Top with heat element, fan,
pilot light, thermostat, &
vent plugs installed.
Hova-Bator Bottom
Wire Floor
Plastic Liner
Owl Clips x 4
HOVA-BATOR
Owl Clip
Owl Clip
Slide clips over
wire fl oor & under
plastic liner
Notch
Unpack the incubator from the box
and set aside the thermometer
and wire floor. Remove the top
half from the bottom.
Attach Wire
Floor to Plastic Liner with Owl
Clips then place oor and liner in
Hova-Bator Bottom. Arrange the
plastic floor as shown using the
water troughs and turner power
cord notch as reference.
In most
climates, ll trough #1 (highlighted
in yellow) with water. Surface area,
not depth, determines humidity;
re ll trough as necessary to prevent
it from drying out.
NOTICE: Humidity troughs should be lled with cool tap water. Careful to avoid spilling
excess water outside of trough as it will eff ect humidity. Humidity should be between
45 and 55% for SETTING and 55 to 65% for HATCHING. Setting the humidity above
65% is not recommended as it may cause condensation to form on the windows and
can decrease hatch percentage.
Plug the cord set into the appropriate wall socket. The fan should then run and the
small heat indicator light on the thermostat box should be lit. Allow the incubator
to warm up for one hour. When the light begins blinking regularly, the incubator
is nearing its set point.
SETUP
1825 Thermometer
MADE IN USA
Question and Answer IconNeed help?

Do you have a question about the GQF HOVA-BATOR 2362E and is the answer not in the manual?

Overview

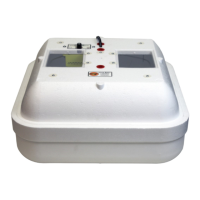
The GQF Hova-Bator Electronic Thermostat Circulated Air Model 2362E is an incubator designed for hatching eggs. It features an electronic thermostat for precise temperature control and circulated air to maintain a consistent environment within the incubation chamber.

Function Description:

The primary function of the Hova-Bator 2362E is to provide a controlled environment for incubating various types of bird eggs. It uses an electronic thermostat to regulate the temperature and a fan to circulate air, ensuring uniform heat distribution. The device is designed to simulate the natural conditions required for embryonic development, leading to successful hatching. It can accommodate different species of birds, with specific incubation periods and humidity requirements.

Important Technical Specifications:

The incubator operates with an electronic thermostat, which allows for more accurate temperature settings compared to manual adjustments. The circulated air system, driven by a fan, helps eliminate cold spots and ensures that all eggs receive consistent heat. The device includes a 1825 thermometer for monitoring the internal temperature. It is designed to maintain a temperature range suitable for most poultry and game bird eggs, typically between 99°F and 102°F. The unit is powered by electricity and includes a heat element for warmth and a fan for air circulation.

Usage Features:

Setup:

  1. Unpacking: Unpack the incubator from its box and check for all components: top with heat element, fan, pilot light, thermostat, & vent plugs installed; plastic liner; wire floor; 1825 thermometer; and four owl clips.
  2. Liner and Floor Installation: Place the plastic liner inside the bottom of the incubator, ensuring the notch in the liner aligns with the notch in the bottom. Then, attach the wire floor to the plastic liner using the four owl clips. The owl clips secure the wire floor approximately 1/2 inch off the bottom, allowing for proper air circulation and space for the water troughs.
  3. Water Troughs: Arrange the plastic water troughs as shown in the setup diagram. The water troughs and turner power cord notch are reference points. Most incubators in production #1 are highlighted in yellow with water. Surface area, not depth, determines humidity. Refill troughs as necessary to prevent them from drying out.
  4. Power Connection: Plug the cord set into an appropriate wall socket. The fan should then run, and the small heat indicator light on the thermostat box should be lit. Allow the incubator to warm up for one hour. The incubator is ready when the light begins blinking regularly, indicating it has reached its set point.

Location:

The incubator should be placed in a room with a stable temperature, ideally between 70°F and 75°F. Avoid locations with direct sunlight, drafts, or extreme temperature fluctuations (below 60°F or above 85°F), as these can affect the incubator's performance and lead to inconsistent temperatures.

Operation:

  1. Thermometer Reference: Reference the thermometer inside the incubator. If more heat is desired, turn the dial counter-clockwise (to the left). If less heat is desired, turn the dial clockwise (to the right). Note: Turn the dial in small increments to "fine tune" the temperature inside the incubator. It's a good idea to monitor the temperature frequently to ensure you're maintaining the desired temperature.
  2. Low Range Selector Switch: Use a small screwdriver or similar tool to move the switch to operate in the 82°F to 92°F range (not used for bird eggs).

Temperature & Hand Turning Eggs:

  1. Warm Eggs: Warm eggs to room temperature (70°F to 75°F) and place them on the wire floor. Lay them in a natural manner, which is on their side with the small end slightly down.
  2. Turning: Turn eggs 1, 2, or 3 times a day with a pencil mark on one side and an O on the opposite side of the egg. Turn the eggs so that X's appear face up. Next turning period turn all O's face up. Continue this routine each turning until 3 days before eggs are due to hatch.
  3. Read Temperature: Read temperature at 100°F (for most eggs) with the thermometer box resting on top of the eggs or turner. Do not put the thermometer on the wire floor as reading will not be as accurate for egg level.

Humidity & Hatching:

  1. Adding Water: Add water every few days to trough #1 only. Usually, twice weekly is sufficient. The amount of moisture in the incubator is determined by the surface area of water. Under high humidity conditions and for some types of eggs less humidity is required. Humidity may be reduced by covering a portion of a trough with aluminum foil or switching to one of the smaller troughs. Humidity for eggs has a broad range, but if there are doubts about humidity, less is usually better than more, except for the last 3 days. 2 to 3 days before the hatch, stop turning the eggs, and fill both trough #1 and #2 with water.
  2. Placement for Hatch: Place the top on the incubator and do not remove until the hatch is complete or 24 hours. Remove dry chicks as soon as possible to a brooder that has food and water and a temperature of about 95°F to 100°F. Chicks can survive up to 48 hours after hatch without food or water, but feed and water them as soon as possible to avoid stress. Some cases may require moving chicks to a brooder to dry.
  3. Humidity Troughs: The liner tray has 4 troughs to allow more options for humidity. Trough #1 is the largest and trough #4 is the smallest. In most climates use #1 for setting and both #1 and #2 during the hatch period.
  4. High Humidity Climates: In high humidity climates, it may be necessary to use smaller troughs for setting and hatching. For instance #2 for setting then #2 and #3 at the end of the hatch.
  5. Low Humidity Climates: In extreme low humidity climates, a combination of troughs may be used to reach the desired setting. Filling troughs #1 and #4 during the setting period for example.
  6. Testing: When trough #1 was filled completely, it lasted 3 days before needing refilling (room humidity at 60%).
  7. Red Vent Plugs: After hatch, pull red vent plugs to help dry chicks.

Moisture:

The purpose of supplying moisture in an incubator is to prevent excessive drying of the natural moisture from within the eggs. The correct amount of humidity can be determined by the size of the air sack when candled, or by weighing the eggs to gauge percent of weight loss. Both methods require knowledge and experience that first-time operators usually do not have. The Hova-Bator is designed for simplicity in this matter and works well for most species.

Vent Plug:

A red vent plug is located on the top of the incubator. This should be removed when the incubator is used at altitudes greater than 6000 feet above sea level. The plug may also be removed after the hatch is complete if water drops appear on the window due to high humidity. This will help to dry the chicks and the incubator. If removing the plug does not reduce the humidity enough, it may be necessary to prop up the top slightly to facilitate drying. If so, be sure to maintain proper temperature. Immediately after the hatch, remove all chicks and moisture wiped from the windows to aid drying. Replace the plug after chicks are removed.

Brooding:

When chicks are removed from the incubator, they must have a place that is warm and dry. A brooder should have one section that is heated, with a temperature of 100 degrees for the first week, and an unheated section for exercise. Food and water should be partially in heated area. Temperature should be reduced 5 degrees each week until it is down to 70 degrees. Some types of chicks need a temperature around 70 degrees until they are nearly grown. The incubator top is not satisfactory as a brooder, as there is not sufficient heat and the chicks may peck at pieces, feed and water chicks at once. Check with a local feed dealer for the proper feed for type of chicks you have hatched.

Maintenance Features:

  1. Cleaning: After each hatch, the incubator should be cleaned. Chicks may be removed 24 hours after they start to hatch. Extremely wet chicks should be left in the incubator to dry. If they don't dry in eight or more hours, remove them to a brooder or heat lamp, with temperatures of 95°F to 100°F. Remove the chicks on the day, or every time an incubator is opened, warm moist air escapes. Avoid chilling of wet chicks. Some chicks may be left in the hatch, so you can leave remaining unhatched eggs up to 3 days longer. Clean your incubator after the hatch with soap and water only. The plastic liner for the Hova-Bator bottom can be cleaned using detergents or disinfectants.
  2. Troubleshooting Poor Hatch:
    • Check Unhatched Eggs: Note the exact number of days it took to hatch any eggs (counting the day they were set as day one) or note the number of days for any eggs to pip the shell. Check unhatched eggs for chick development and note the number of these eggs in the batch. If all or most of the eggs have no development (clear inside) then the microscopic embryo had died before or at time of incubation or the egg was never fertile.
    • Over 70% Hatch Rate: If over 70% of the developed eggs hatched, there is little adjustment that can be done with humidity or temperature to improve this.
    • Developed but Unhatched Eggs: If many of the unhatched eggs are developed or partially developed into chicks and if eggs were of good quality and properly handled, then perhaps adjustments in temperature or humidity may be required.
    • Adjustments: If eggs hatched on time, begin any adjustments with the humidity first. Review the section under MOISTURE for adjustments. Make only one adjustment and then test it on a setting of eggs before making any other adjustments.
    • Late Hatch/Pip: If eggs have been determined to hatch late or pip late (one day or more), first check for too much humidity then look for too low of a temperature setting.
    • Early Hatch/Pip: If eggs pip or hatch early (one day or more) then look for too high of a temperature. Eggs hatching early or late due to temperature are probably within one degree of the proper temperature setting.

Limited Warranty:

GQF Manufacturing Co., Inc. guarantees against defects for a period of 1 year from the date of purchase. This warranty is void for products more than 3 years old when not sold directly from GQF to the consumer. Notify GQF Mfg. Co. of any defective items, giving the catalog number and name of the item, and a description of the issue. Send a copy of the invoice showing the date of purchase. GQF Mfg. Co. will send a replacement, replacement parts, or notify regarding return. Shipping charges for express shipping or shipments outside of the continental USA are to be paid by the customer. Products used outside of the continental USA may need to be returned to GQF at the user's expense for warranty work. Returning items without written permission will be at the owner's expense. GQF Mfg. Co. has no control over the usage of equipment and product supplied, and therefore assumes no responsibility for losses or damage from the equipment or product other than the replacement of defective parts. There is no guarantee on the hatchability of eggs. GQF assumes no responsibility for losses due to shipping damage, late shipment, or arrival of product. Do not expose electrical parts to water. Installation of electrical parts should be done by a qualified electrician. Use of replacement parts other than intended by GQF Mfg. Co. is not permitted. GQF is not responsible if the product does not comply with local product codes or codes outside of the USA.

GQF HOVA-BATOR 2362E Specifications

General IconGeneral
BrandGQF
ModelHOVA-BATOR 2362E
CategoryThermostat
LanguageEnglish