要求: 成品尺寸285*210mm,80G书写纸,单色双面印刷。
印刷成品必须按我司提供的文档1:1印刷,成品要印刷清晰,整洁,
不能有模糊,残缺、等现象.
常规
CK面板灯通用
说明书
80G
书写纸
骆韦东
2019.09.10
折叠后效果
L
ED PANEL LIGHT USER GUIDE
L USER GUIDEED PANEL LIGHT
1:1
7-123104-1000001
HUP-PL6060-CK-H0028B2
惠州民爆光电技术有限公司
Hu
更改线条图
B1
增加安装前验证是否变形的步骤
B2
285mm
210mm
WARNING:
1.Switch off before installation.
2.Switch on only after complete installation and examination of the circuit.
Installation Procedure
Safety Instruction:
Recessed
④ Make sure the led panel light
is firmly fixed, turn on the power.
AC~
① Remove the ceiling plaster
slab.
② Feed the main AC wire in
driver terminal block respectively,
connect the panel light and driver.
③ Fix the panel light into
plaster ceiling.
Basic safety precautions should always be followed when installing, including the following:
1. Read instructions carefully before installing.
2. This LED Panel requires professional installation and maintenance.
3. The power supply of the LED Panel should be powered by a dedicated external LED driver.
4. Disconnect the power supply before installing or maintenance.
5. Make sure the wires have been properly connected before powering on the device.
6. Ensure the product has enough space for heat dissipation.
7. Ensure the luminaries are never covered by any heat insulation mat or slim layer material at anytime.
8. Dimmable version could be compatible with a wide range of recommended TRIAC dimmers.
9. IP40 for indoor use only, not for damp loaction; IP54 for indoor damp location.
10. Ambient Temperature: -10℃ to + 45℃, Avoid direct sunlight.
11. Storage Conditions: Cool & dry conditions.
CAUTION:
Make sure that the mounting surface or structural member used for installation can support the weight
of LED Panel.
Recessed with frame
① Open a hole on ceiling
according to cutout size of
recessed frame.
② Fix 2pcs of clips to one side
of frame by screw, then insert
the frame into ceiling.
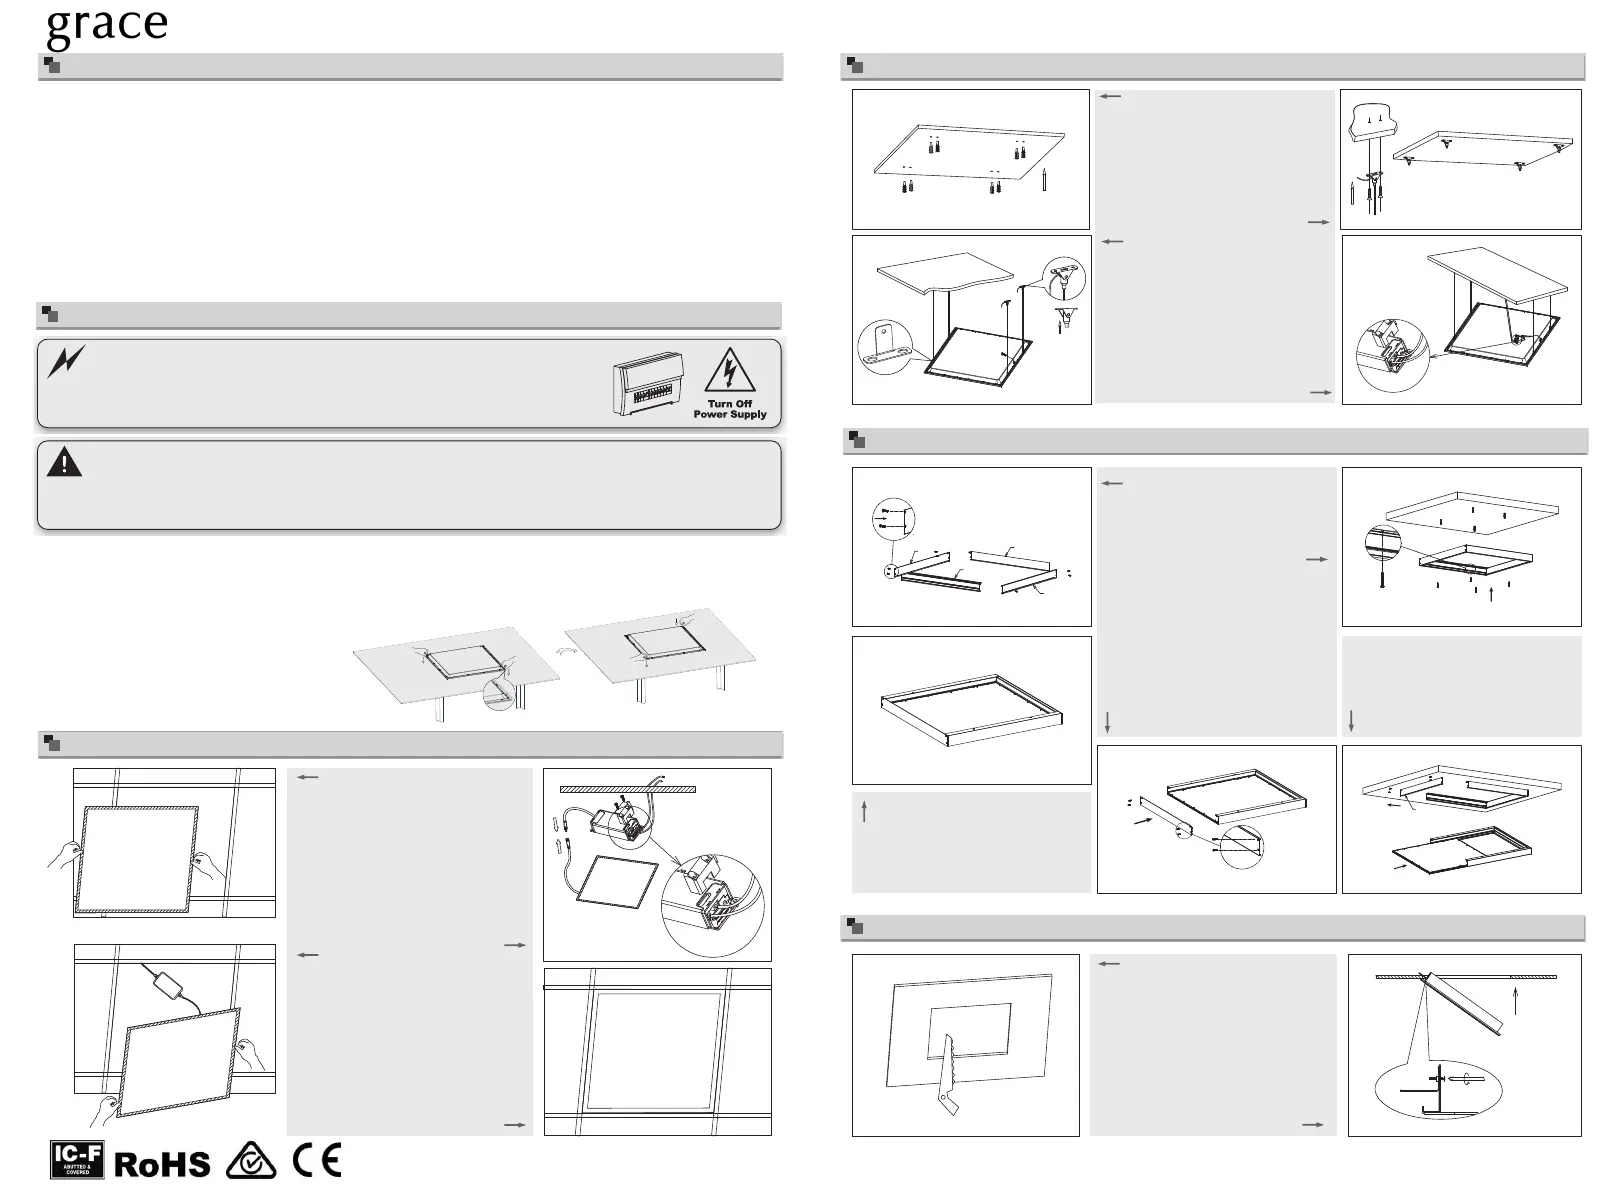
Suspended
①
place on the ceiling.
Fix the anchor into target
②
on the ceiling with plastic
anchor.
Fix the installation mount
Surface mounted
⑤ Make sure the frame and
panel light are firmly fixed, turn
on the power.
① Assemble the surface mounted
frame and fix by screws.
② knock the plastic
anchor into ceiling, fix the
surface mounted frame on
the ceiling by screws.
③ Unscrew the side frame then
take out, connect the panel light to
power supply, insert the panel light
into the frame.
④ Fix the side frame back by
screw.
③
suspended installation kits,adjust
the length of steel wires.
Hang the panel to ceiling with
④
driver terminal block respectively,
turn on the power.
Feed the main AC wire in
B
A
B
A
B
Lamp inspection before installation:
Take out the lamp from the box and put it in a flat table, if the lamp upwarps, please adjust the lamp with
below steps before installation:
1.Press the oposite angles at the same time;
2.Press another two oposite angles at the
same time, make sure the four angles are
flat, then start the installation.
AC~
④ Feed the main AC wire
in terminal block
respectively.
③ Fasten the frame into ceiling
by screwing another 2 pcs clips
on the other side of frame.
1. Turn off power before installation or before doing any maintenance work.
2. Do not install any luminaire near a heat source.
3. For Indoor use.
4. Do not exceed the nominal supply voltage or amperage ratings.
5. All wiring and installation of this luminaire must adhere to local and national wiring rules eg AS/NZS 3000:2007 Amendment 2:2012
Electrical Installation
6. Take care not to pull any electrical wires during unpacking as this may damage the connection.
7. Lay out all the components on a smooth surface and make sure there are no components missing before assembling.
8. To avoid injury or damage to the tting, please ensure that power leads and screws are secure before connecting the power.
9. Please keep instructions for future reference.
 Loading...