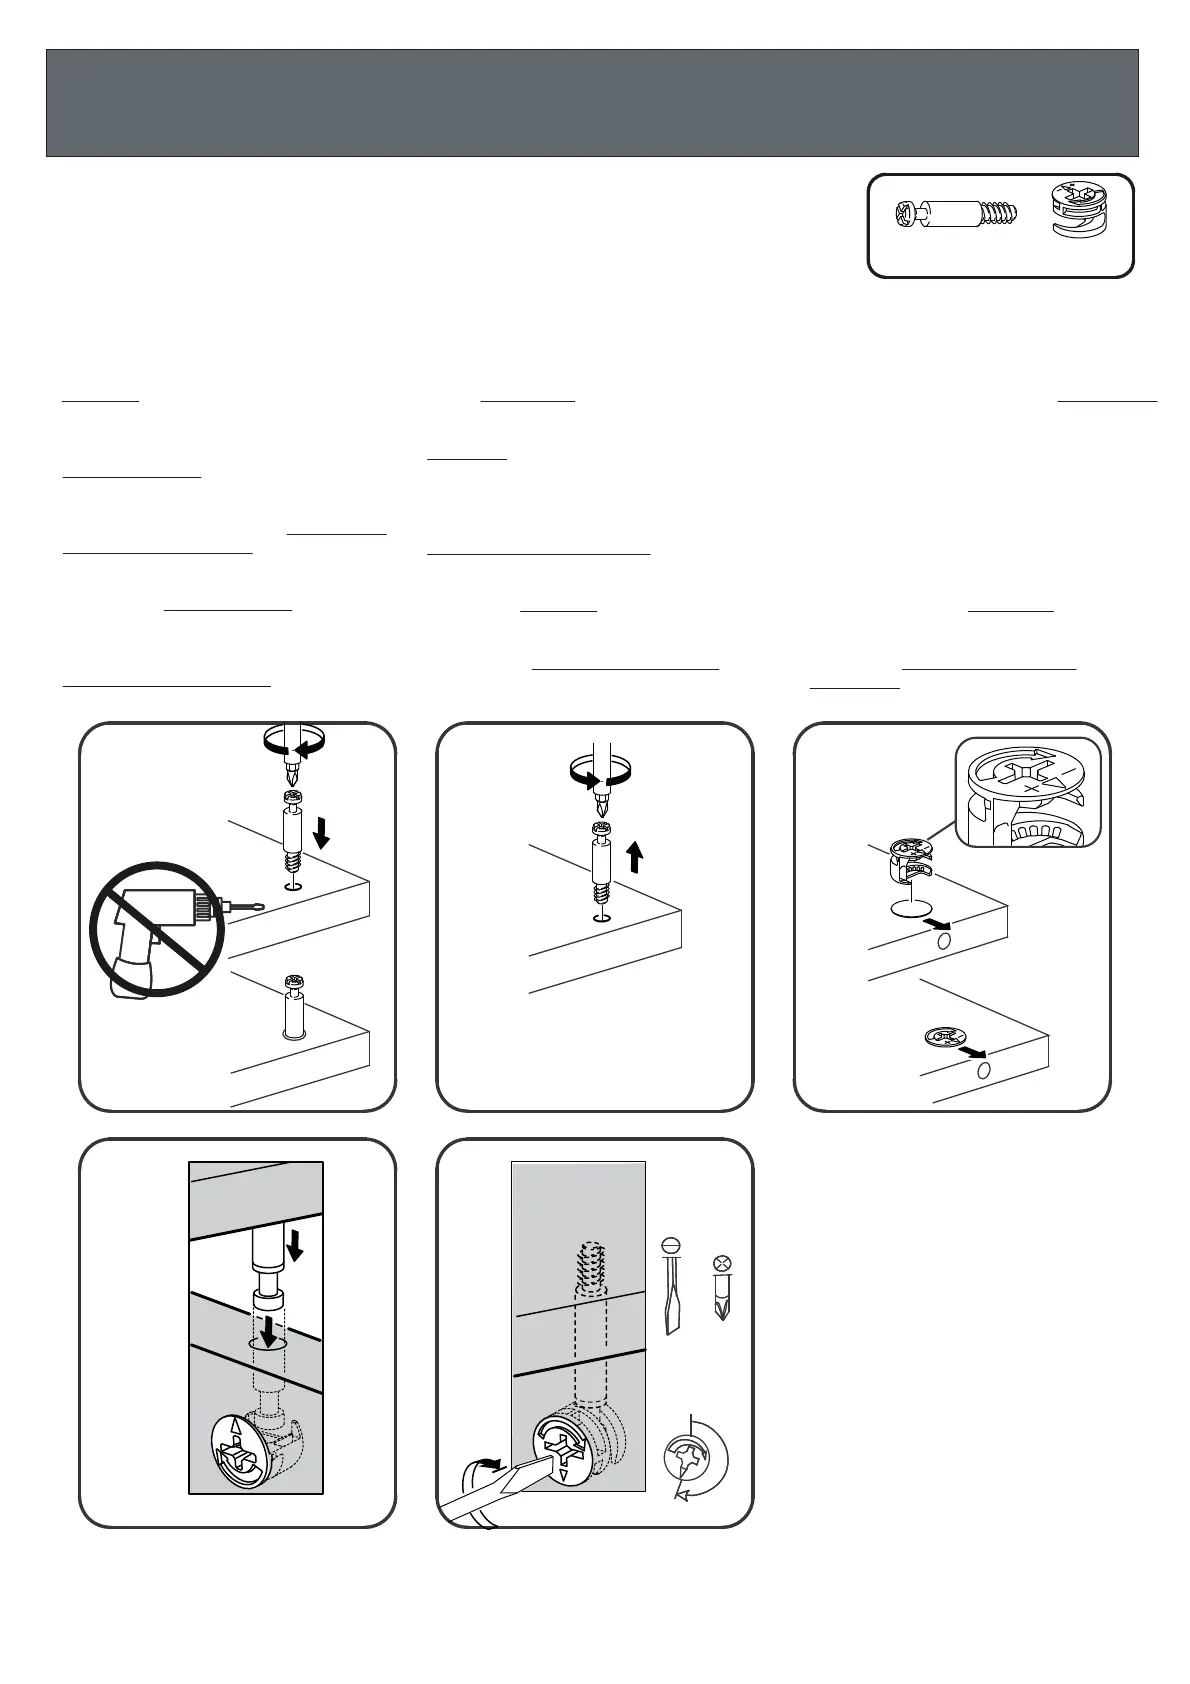
Fully insert the “Camlock Bolt
-2-” into the specified holes.
To withdraw the “Camlock Bolt -2-",
do not use any tool
, unscrew it with the hand.
With your thumb, insert the “camlock -1-”
into the specified holes with the arrow pointing
towards the insertion hole.
Insert the pieces into one another and make
sure they are completely united.
To lock the pieces together, turn (tighten)
the “camlock -1-” to the right for
slightly more than half a turn.
Insérer jusqu’au fond le «boulon camlock à
enfoncer -2-» dans les trous mentionnés.
Pour retirer
le «boulon camlock à enfoncer -2-»,
n’utiliser aucun outil, dévisser le à la main.
Avec le pouce, insérer «raccord camlock
-1-» dans les trous mentionnés,
la flèche vers le trou d’insertion.
Joindre les pièces l’une dans l’autre et s’assurer
qu’elles sont bien unies
l’une contre l’autre.
Tourner (serrer) «raccord camlock -1-»
vers la droite, un peu plus d’un demi tour
,
pour bloquer les pièces ensemble.
Introduzca el “Tornillo camlock -2-” hasta el fondo
en todos los agujeros mencionados.
Una las piezas entre sí. Asegúrese
de que se encuentren bien unidas
Haga girar hacia la derecha y ajuste la “
camlock -1-” dando algo más que una
media vuelta para que las piezas queden
atrancadas.
***THINGS TO REMEMBER FOR ASSEMBLING/ À RETENIR LORS DE L’ASSEMBLAGE/ A RECORDAR DURANTE EL ENSAMBLAJE***
FOR YOUR INFORMATION ONLY POUR INFORMATION SEULEMENT A TÍTULO INFORMATIVO
HOW TO USE THE CAMLOCK BOLT(-2-) AND THE CAMLOCK(-1-)
EXEMPLE D’UTILISATION (BOULON CAMLOCK(-2-) RACCORD CAMLOCK(-1-))
EJEMPLO DE UTILIZACIÓN (CAMLOCK(-2-) TORNILLO CAMLOCK(-1-)
SIAÇNARFHSILGNE
ESPAÑOL
ABC
45
Para retirar el “Tornillo camlock -2-”, no utilizar
herramientas, desatornillar el a la mano.
Introduzca con el pulgar la “camlock
-1-” en los agujeros mencionados, con la
flecha apuntando hacia el agujero de inserción.
A.
B.
C.
D.
E.
A.
B.
C.
D.
E.
A.
B.
C.
D.
E.
ASSEMBLY INSTRUCTIONS / INSTRUCTIONS D’ASSEMBLAGE /
INSTRUCCIONES DE ENSAMBLAJE
6
D
E
5
5
4
4
4
4
5
or/
ou/
o
5
 Loading...