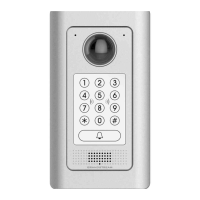
GDS3705 AUDIO DOOR ACCESS SYSTEM - QUICK INSTALLATION GUIDE
6
Option A
Plug an RJ45 Ethernet cable into the (Class 3) Power over Ethernet (PoE) switch.
Option B
Step 1:
Select an external DC12V, minimum 1A power source (not provided). Wire correctly the “+,-” cable of the power into
the “12V, GND” connector of the GDS3705 socket (refer to the previous mounting page for instruction). Connect the
power source.
Step 2:
Plug an RJ45 Ethernet cable into a network switch/hub or router.
Note:
Please refer to “Step 2” of “MOUNTING GDS3705” and “GDS3705 WIRING TABLE” at the end of QIG for all the
wiring and connection illustration and instructions.
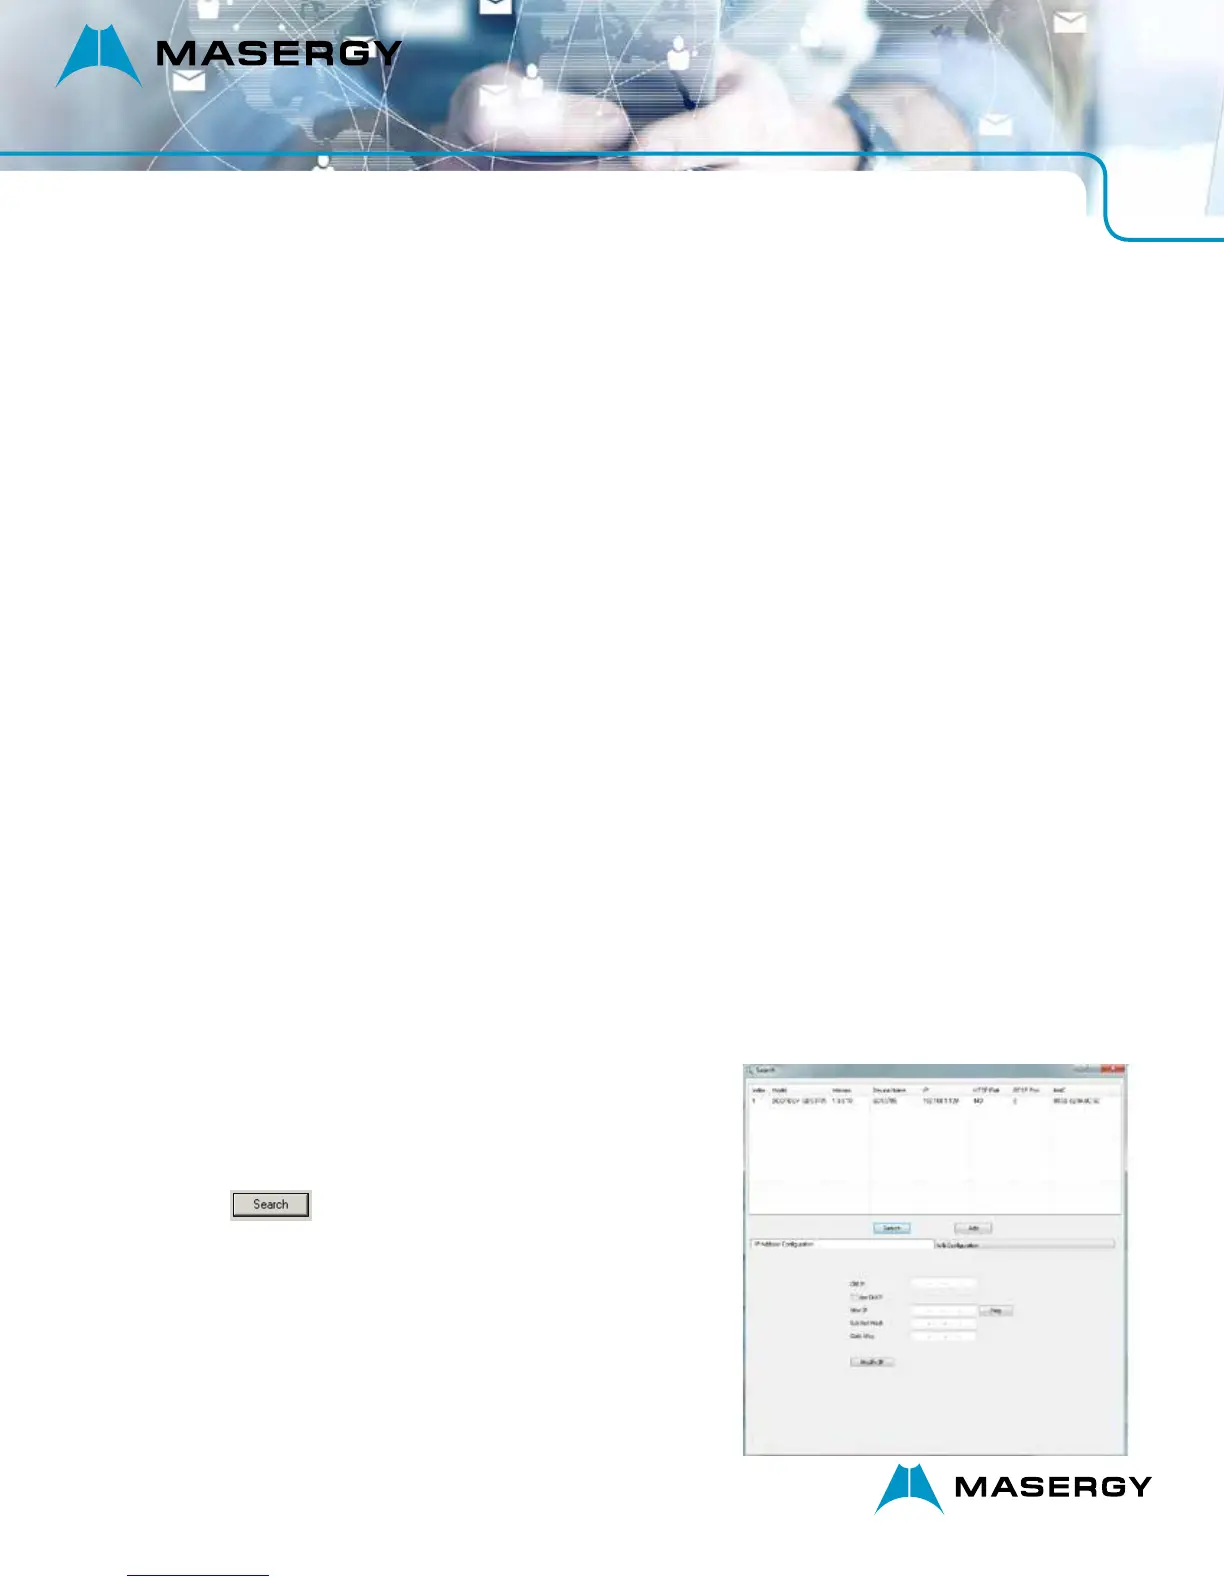
GDS3705 CONFIGURATION
The GDS3705 is by default configured to obtain the IP address from DHCP server where the unit is located.
In order to know which IP address is assigned to your GDS3705, please use GS Search tool as illustrated in following
steps.
Note:
If no DHCP server is available, the GDS3705 default IP address (after 5 minutes DHCP timeout) is 192.168.1.168.
Step 1: Download and install GS Search tool:
Step 2: Run the Grandstream GS Search tool on a computer connected
to same network/ DHCP server.
Step 3: Click on
button to start device detection.
Step 4: The detected devices will appear in the output field as show on
the right.
 Loading...