19
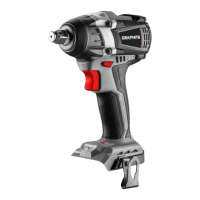
EQUIPMENT AND ACCESSORIES
1. Special key - 1 pce
2. Adaptor - 1 pce
3. Hexagonal key - 1 pce
4. Spacing washer, 3.8 mm thick - 5 pcs
5. Spacing washer with neck - 1 pce
6. Chisel - 1 pce
7. Transport case - 1 pce
PREPARATION FOR OPERATION
INSTALLATION / DEINSTALLATION OF ADAPTOR
Ɣ Slide the adaptor (3) into the dust extraction outlet (4) (be careful to place protrusions in notches) and
turn clockwise to secure (g. A).
Ɣ Adaptor removal is similar to installation, only the sequence of actions is reversed.
DUST EXTRACTION
During operation the wall chaser should be connected to external dust extraction device.
Ɣ Loosen nut (13) of the adaptor (3).
Ɣ Put end of hose of dust extraction system into the adaptor (3) and secure by tightening nut (13)
(g. B) (make sure the connection is tight).
When starting to work, rst switch on the dust extraction system, e.g. industrial vacuum cleaner, next
switch on the wall chaser. When the work is nished proceed inversely – switch o the wall chaser rst, next
the vacuum cleaner. This procedure allows to avoid unnecessary dustiness in the workplace. Some types
of industrial vacuum cleaners are equipped with power supply socket for power tools and switching the
vacuum cleaner on and o is automated, controlled with switching the power tool.
SETTING CHASE WIDTH / CUTTING BLADES REPLACEMENT
Use only diamond cutting blades designed for dry operation, consider maximum allowable
rotational speed specied on cutting blade.
Chase width depends on number of spacing washers placed between cutting blades, and on thickness of
cutting blades. Chase width range is 8 to 26 mm.
You can calculate chase width with the following formula:
Chase width = number of spacing washers x thickness + thickness of cutting blades.
Regardless of number of spacing washers between cutting blades, the spacing washer with neck
must be used and placed under the second cutting blade to keep its concentricity.
The wall chaser can be used with one or two cutting blades.
Ɣ Unscrew the base locking knob (7) and turn the base downwards (8).
Ɣ Undo screws (14) that x the cutting blades shield (5) (g. C).
Ɣ Pull away the front handle (1) and remove the cutting blades cover (5) (g. D).
Ɣ Press and hold the spindle lock button (11), use special key (included) to remove the outer ange (15)
(g. E).
Ɣ Important! Turn the nut counter-clockwise, according to direction of rotation of cutting blades.
Ɣ Take cutting blades, spacing washers and inner ange o the spindle and clean thoroughly.
Ɣ Important! Inner ange coupling should be properly seated on the spindle.
Ɣ Install inner ange and cutting blades with spacing washers to get required chase width (consider
appropriate direction of cutting blades rotation – see arrows on cutting blades and the protection
shield).
Ɣ Tighten the outer ange (15) while holding the spindle lock button (11) pressed.
Ɣ Install other parts in reversed sequence of disassembly.