1. Turn OFF the turbidity sensor by switching OFF all
automatic fuses in the monitoring unit (refer to el-
documents).
2. Place a cup under the calibration fluid drain off to collect
the discharge (underneath the cabinet).
3. Turn VALVE 3 to STOP position and VALVE 2 to
DRAIN position for WM units. Turn INTERNAL VALVE
to DRAIN position and CLOSE the BALL VALVE for
WMRTU units.
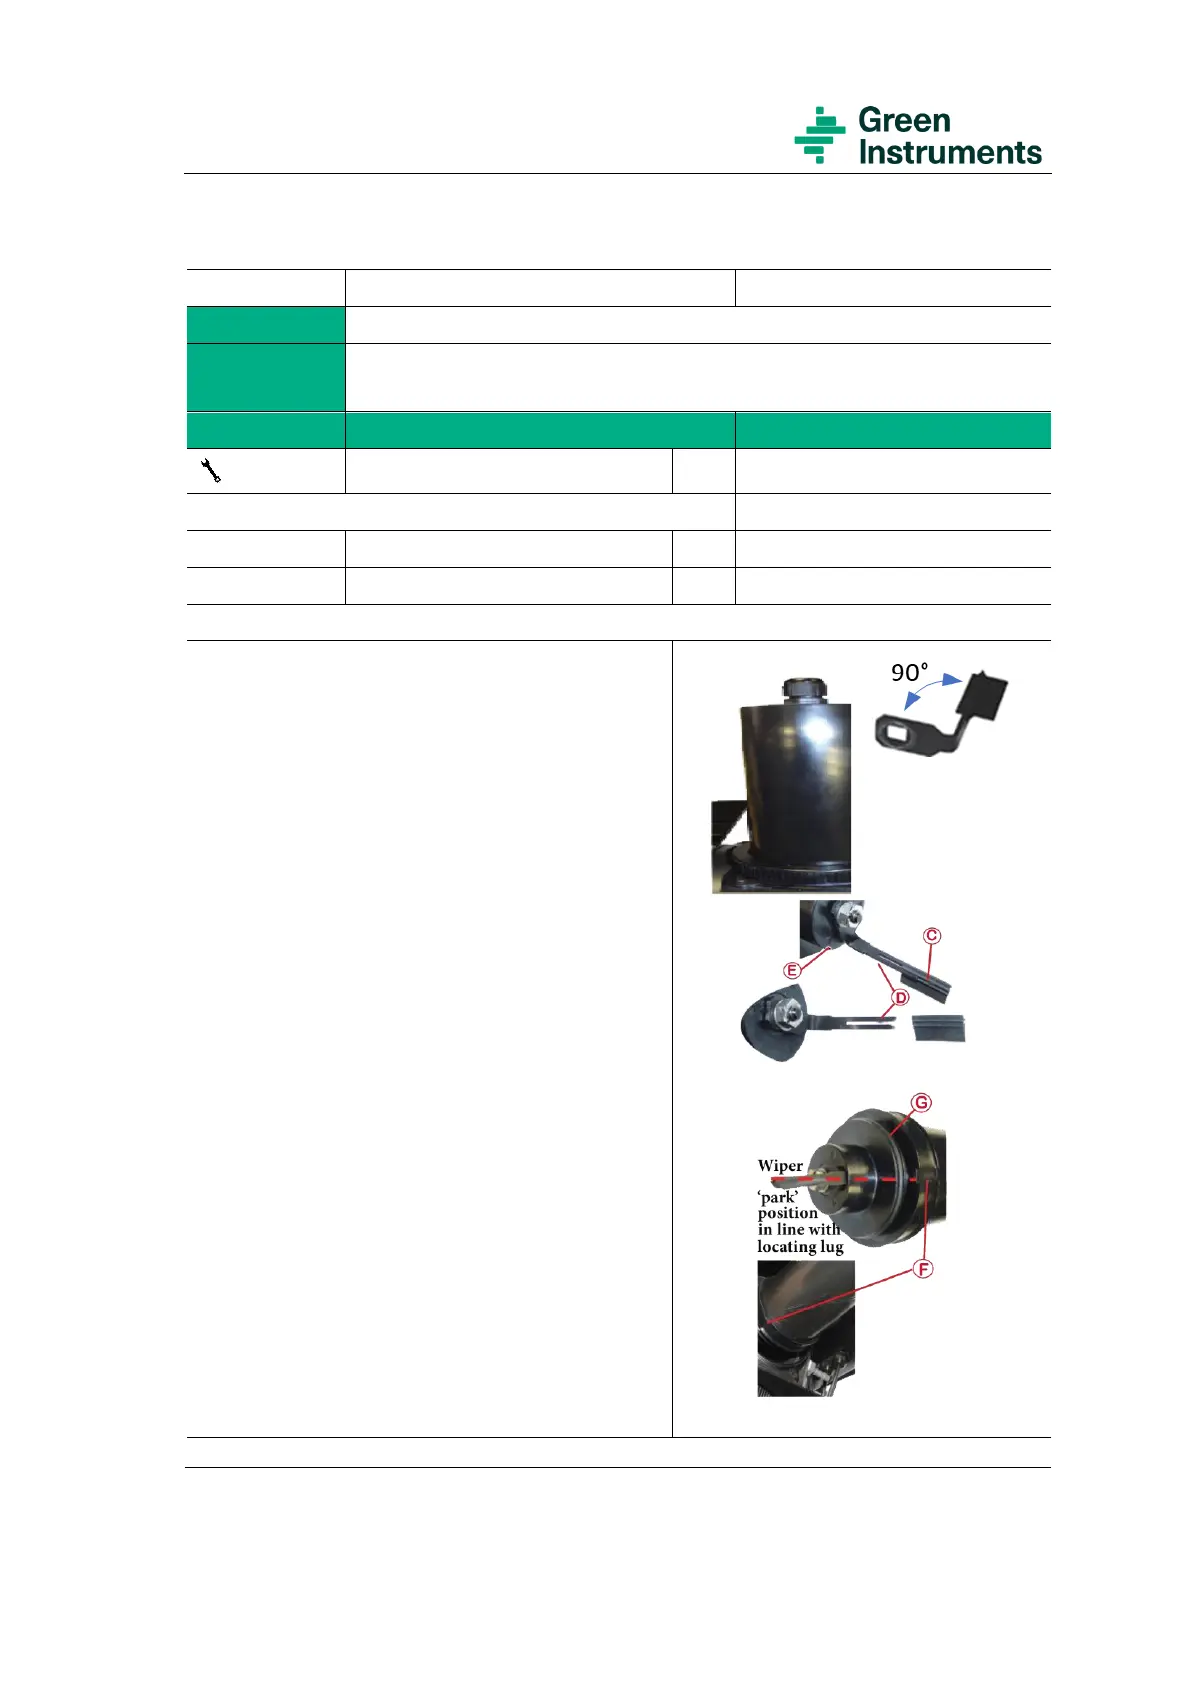
4. Loosen the black union nut (A) on the top and remove
the wiper unit (B) – park it.
5. Pull wiper blade (C) out of slot (D) in wiper arm (E) and
discard the wiper blade
6. Ensure wiper arm is undamaged & at a 90
0
angle to the
bottom surface of the wiper unit. Ensure slot (D) is straight
and parallel.
7. Taking care not to damage the new wiper blade, slide it
into the wiper arm slot (D), ensuring blade edge is facing
outwards.
8. Turn ON the turbidity sensor by switching ON all
automatic fuses.
9. Observe the wiper arm (E) rotating and stopping at the
cut-out position(F).
10. Ensure that the O-ring (G) is undamaged and
positioned correctly.
11. Refit the wiper unit (B) making sure that it is orientated
at the cut-out position (F) and tighten the black union (A)
by hand.
12. Turn VALVE 3 to Run position and VALVE 2 to Run
position for WM units. Turn INTERNAL VALVE to RUN
position & OPEN the BALL VALVE for WMRTU units.
 Loading...