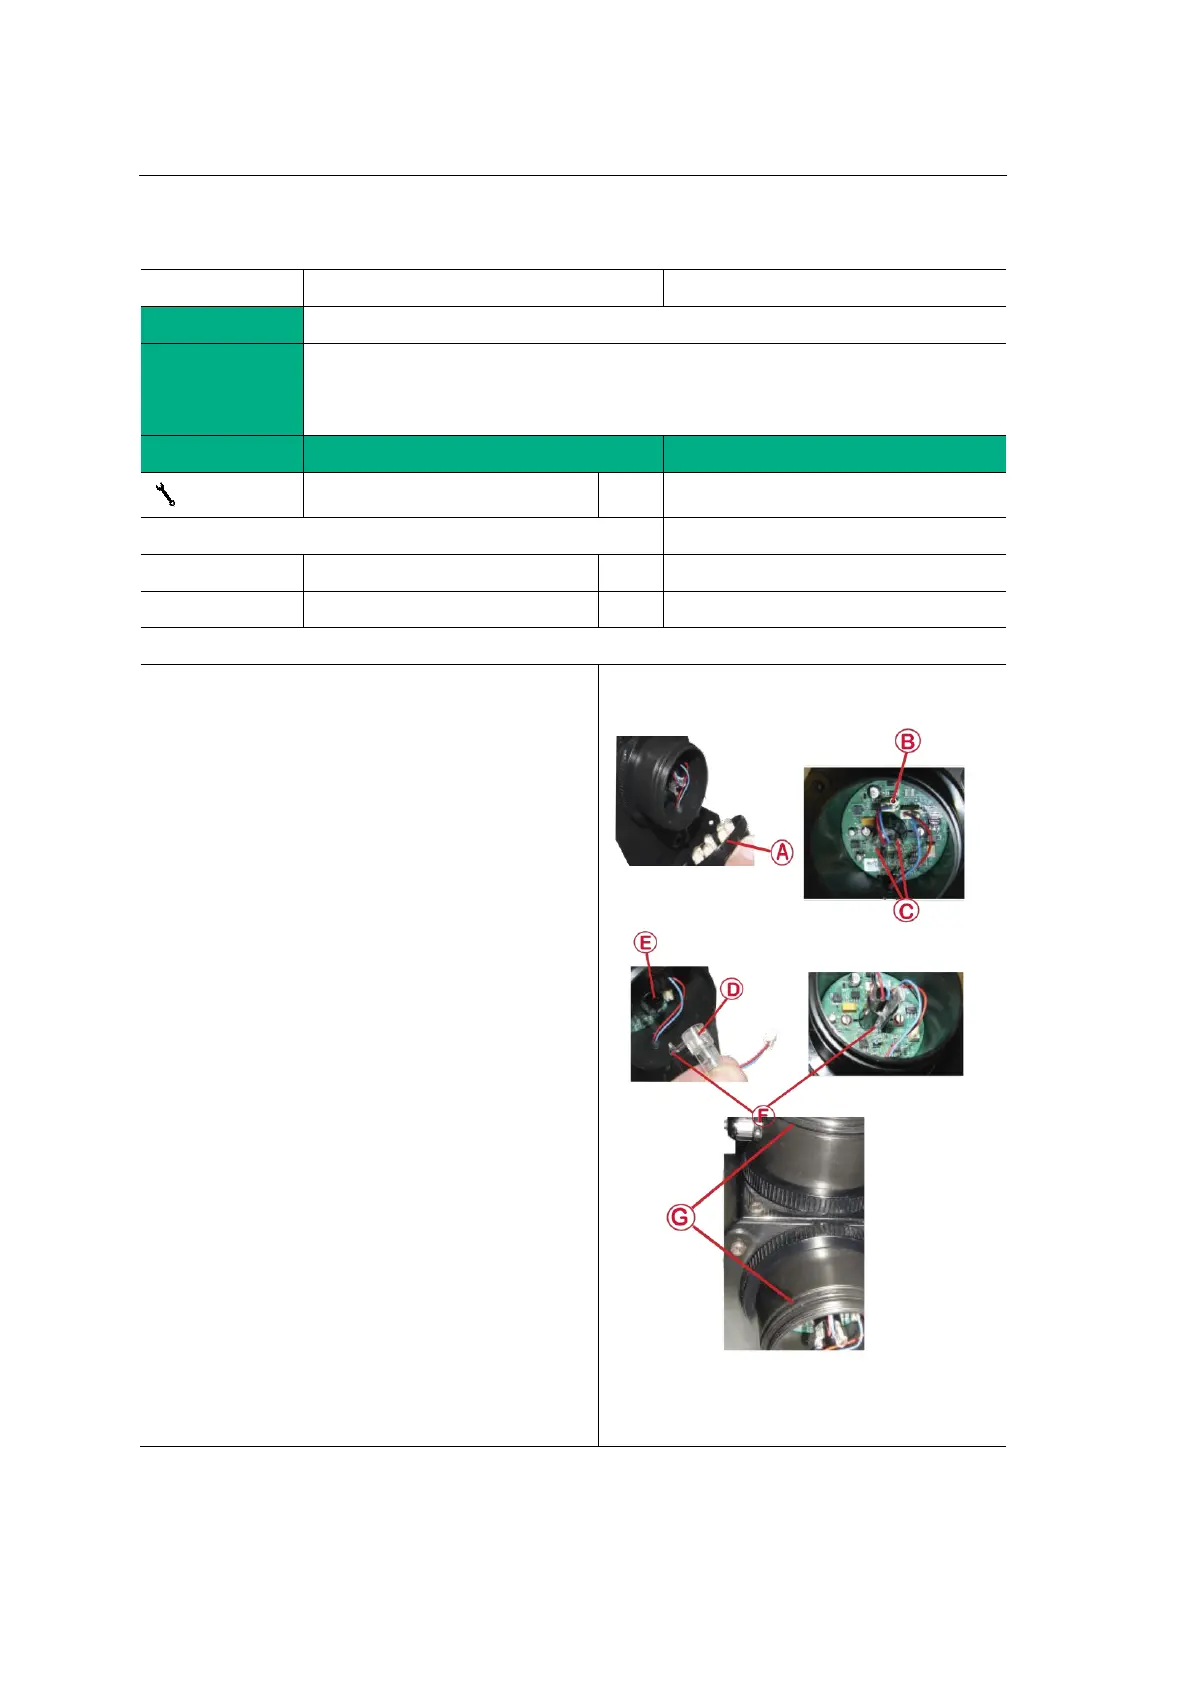
1.Turn OFF the turbidity sensor by switching OFF
all automatic fuses.
2.Loosen the black end cover on the emitter (A)
3.Disconnect the emitter light source connector
(B) from receptacle J2 on the print.
4.Gently squeeze the retaining tabs (C) together
and pull to withdraw the light source (D) from its
housing (E).
5.Carefully remove the replacement light source
from its packaging – be careful not to touch the
light bulb itself.
6.Insert replacement light source (D) into the
housing (E). Ensure the tab on the light source (F)
enters the slot in the housing. Press until the light
source clicks into place.
7.Connect the light source connector (B) to
receptacle J2 on the print – make sure the
connector tap is orientated correctly
8.Ensure that the end cap O-rings (G) are
undamaged and in correct position.
9.Refit end caps on emitter and receiver.
10.Now a calibration procedure must be
performed – please follow the calibration
instructions in the operation manual.
 Loading...