5
OPERATION
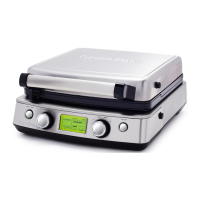
Power Operation
1. Ensure the waffle plates are correctly placed
within the appliance.
2. Ensure your Waffle Maker is plugged
directly into a grounded wall outlet.
3. Do not use an extension cord.
4. You will hear a beep and the Waffle Maker
will enter standby mode when plugged in
(display will remain off), it is now ready
for use.
5. After plugging in the unit, pressing the Start/
Stop button wakes up the LCD with previous
selected setting.
6. If no action is taken at any time, the Waffle
Maker will go to sleep after 10 minutes
of inactivity.
Programmed Operation
1. Turn setting dial to select the type of waffle.
The waffle types scroll among the choices.
For best results, be sure that the correct
plates are used with the appropriate setting.
2. Turn Light/Dark dial to select shading.
Turning clockwise increases shading and
turning counterclockwise decreases shading.
3. Press Texture button to scroll among the
levels of texture from 1 to 3.
4. As soon as the selection is done, press start/
stop button to begin the preheat mode,
“PREHEAT” appears on the display. When
preheat is complete, a beep will sound and
the time digits will start to blink.
5. Add batter to the plate and close the lid.
Cooking will begin automatically. The
digits will stop blinking and countdown
will begin. In the rare case that cooking
does not automatically begin (such as when
making less than a full plate of waffles), the
Start/Stop button can be used to initiate the
cooking cycle.
6. Shading can be adjusted during the cooking
cycle as long as the new shading setting is
the same or longer than the elapsed time.
7. When cooking finishes, the crunch cycle
starts, indicated by the blinking crunchiness
bar. When time elapses to zero, three beeps
sound, indicating the end of the complete
cooking cycle.
8. Remove the waffle using heat-resistant, non-
scratch utensils or tongs.
9. If cooking more than one waffle, new batter
can be added immediately.
10. When done, unplug the Waffle Maker and
allow to cool before cleaning.
IMPORTANT: Do not lock upper and
lower housing while cooking waffles.
Custom Operation
1. Turn setting dial to “Custom”
2. Turn the light/dark dial to adjust the
cooking time in increments of 15 seconds.
3. Press the Texture button to accept the
cooking time.
4. Now, turn the light/dark dial to
adjust the shade.
5. Press the Texture button to accept
the shade.
6. The texture setting itself is not available
during Custom Operation.
7. To begin the preheat mode, press the
Start/Stop button.
8. When preheat is complete, a beep will
sound and “PREHEAT” is no longer
on the display.
9. Add batter to the plate and close the lid.
Cooking will begin automatically, the digits
will stop blinking and countdown will
begin. In the rare case that cooking does
not automatically begin (such as when
making less than a full plate of waffles),
the Start/Stop button can be used to
initiate the cooking cycle.
10. When time elapses to zero, three beeps
sound, indicating the end of the
cooking cycle.
11. Remove the waffle using heat-resistant,
non-scratch utensils or tongs.
12. If cooking more than one waffle, new
batter can be added immediately to repeat
the program.
13. When done, unplug the Waffle Maker and
allow to cool before cleaning.
RECIPE
SUGGESTION
QUICK AND EASY WAFFLE BATTER
2 cups all-purpose flour
2 tablespoons sugar
1 tablespoon baking powder
½ teaspoon salt
1 ¾ cups reduced fat milk
¹�
³
cup vegetable oil
2 eggs
Place ingredients in a large mixing bowl.
Stir until smooth and allow to rest for 5 minutes
before pouring on preheated waffle plates.
Makes 4-6 Belgian and 6-8 Classic waffles.
 Loading...