1. Run water supply line to the unit and install
1
/2 inch N.C. Water Supply Solenoid Valve (A) in this line as
close to the water source as
possible.
2. Install
1
/
4 inch N.O. Drain
Solenoid Valve (B) in the supply
line as indicated in Figure 13.
From the outlet on the drain valve,
run line to a suitable drain
location.
3. Run an unobstructed drain line
from the sump overflow to the
drain as shown in Figure 13.
4. Install
3
/4 inch N.O. Sump Drain
Solenoid Valve (C) in the drain
line from the sump as indicated in
Figure 13. From the outlet on this
drain valve, run a line to a suitable
drain location.
Note: Water Supply Solenoid Valve
(A) is not the same as the Drain
Solenoid valves (B) and (C). Make sure to use the proper valve for each location. Each valve indicates
direction of water flow and the rated pressure capacities not to exceed. Check your local code
requirements for proper installation of this type of system. Additional drain and supply plumbing may be
needed to meet your local code.
Caution: All solenoid valves A, B, and C must be installed below the roof to protect the supply water line from
freezing. If these valves cannot be installed below the roof, an alternate method must be used to protect these
lines from freezing.
29
5. The water bleed-off rate will now need to be
adjusted. This measurement is 3 to 6 percent of
the media flow rate. The recommended media flow
rate is 1
1
⁄2 to 2 GPM per square foot of media pad
top area. After the unit has been installed and
running for approximately two weeks the unit
should be checked for mineral deposits. If there
are deposits, the bleed-off rate needs to be
increased. Some areas of the country have water
with greater amounts of mineral deposits which
then require a higher bleed-off rate.
6. Saturate the media without any air flow through
the unit. A jumper wire is required on the terminal
strip to provide power to the evaporative cooler
pump. See the wiring diagram for the proper
location. This saturation process will break-in the
media and eliminate the odors associated with the
media. The media’s break-in period should be no
less than 20 minutes. When the process is
complete, remove the jumper wires in the control
center.
Note: Evaporative media may foam for a short
period following the initial start-up. Leave the
bleed-off valve fully open until the foaming
stops.
7. After the media break-in period, the water flow rate
over the media needs to be checked. The pumps
should provide enough water to saturate the media
in 45 to 60 seconds. If adequate flow rate is not
achieved, consult with the factory.
8. Verify that both airflow and system static pressure
are in agreement with the specifications. If these
conditions are met, check for water carry over
from the discharge side of the media. If carry over
is observed, check the distribution header for
holes or tears.
9. After all final adjustments are made, remove the
jumper wires and replace all access panels. The
unit is now ready to be put into operation.
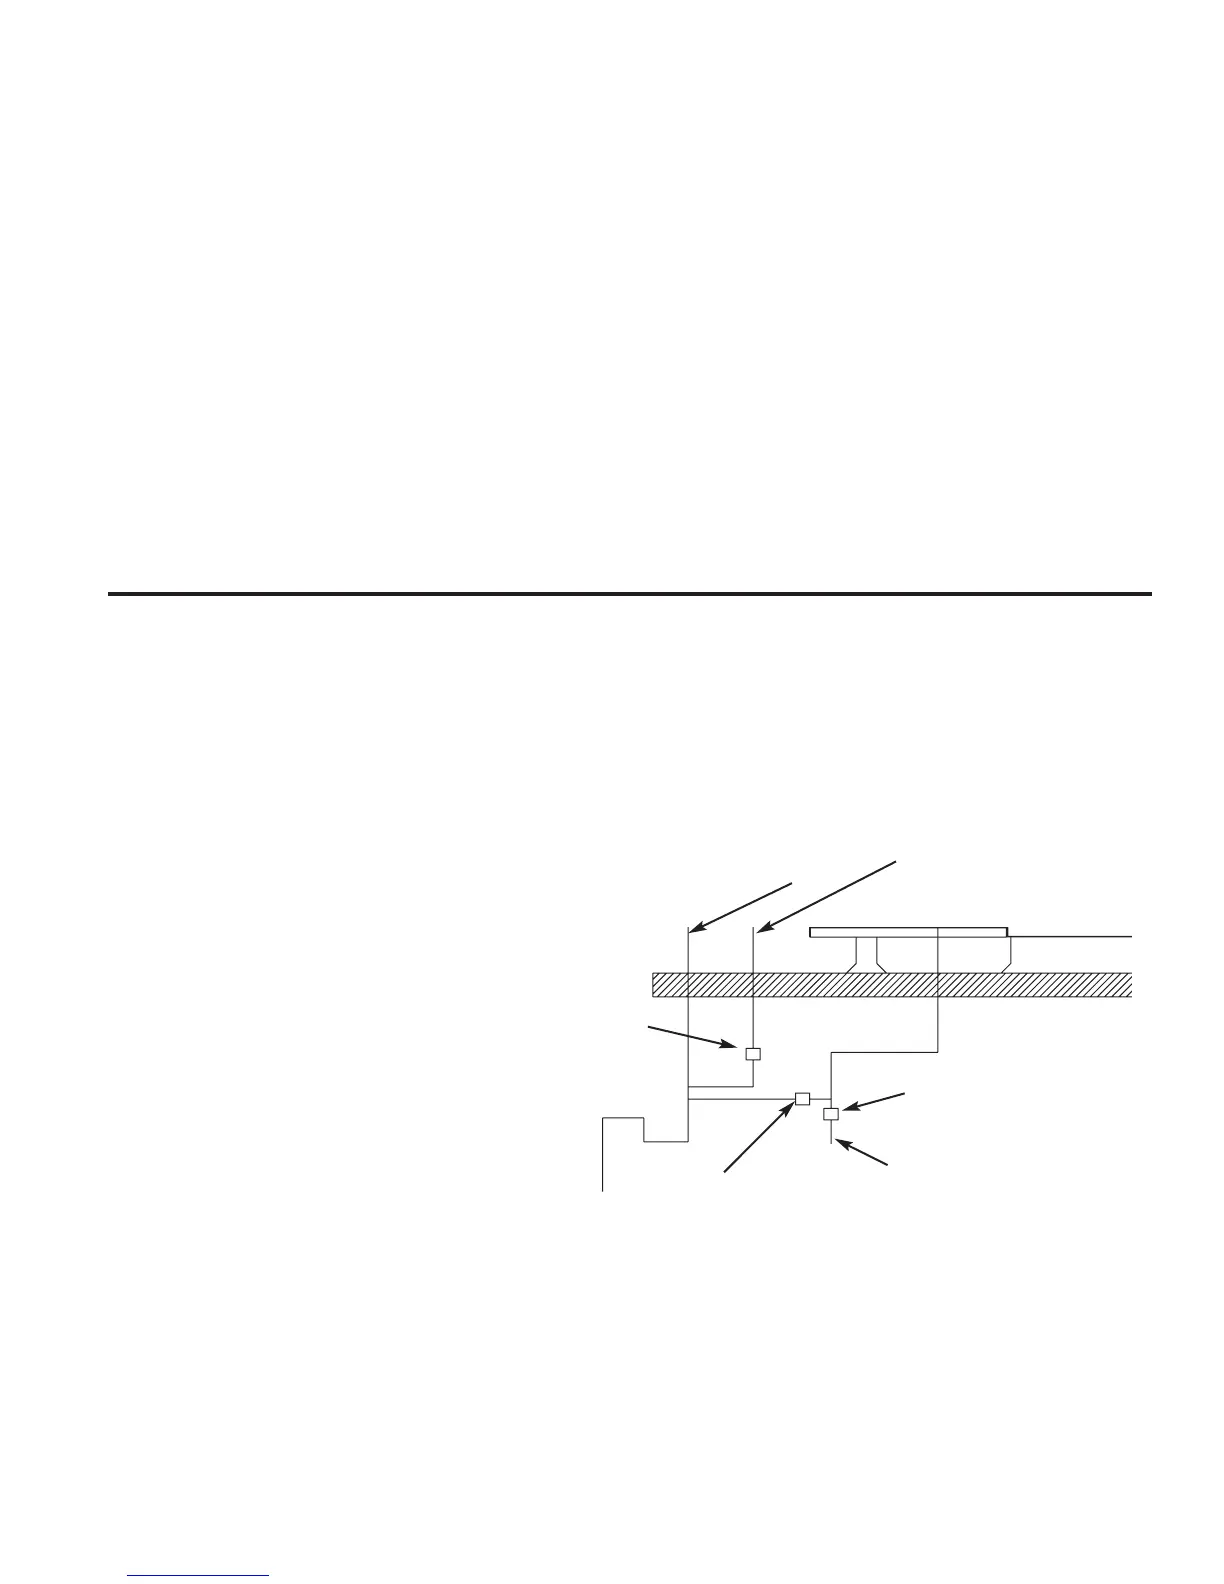
1
/2 inch N.C.
Solenoid
Valve (A)
Roof Line
Figure 13: Auto Drain and Fill
Sump overflow pipe
Sump drain pipe
3
/4 inch N.O.
Solenoid
Valve (C)
Trap
Drain Line
1
/4
inch N.O.
Solenoid
Valve (B)
Supply Line
Optional Auto Drain and Fill with Freeze Protection Plumbing Instructions
The drain and fill flushes mineral build-up and debris from the sump. An auto-flush system drains the sump at
field adjustable intervals, typical once every 24 hours. The freeze protection shuts down the cooling module
when out door temperature falls below auto-freeze thermostat set point. Factory supplied solenoid valves shut
off supply water and drain all water lines. When outdoor temperature rises above the set point, (suggested
setting 45°to 50° F) evaporative operation is restored.