Paint or wallpaper the Interior of the tower, if desired. The
slots in the center of each panel Indicate the division
between first and second floor.
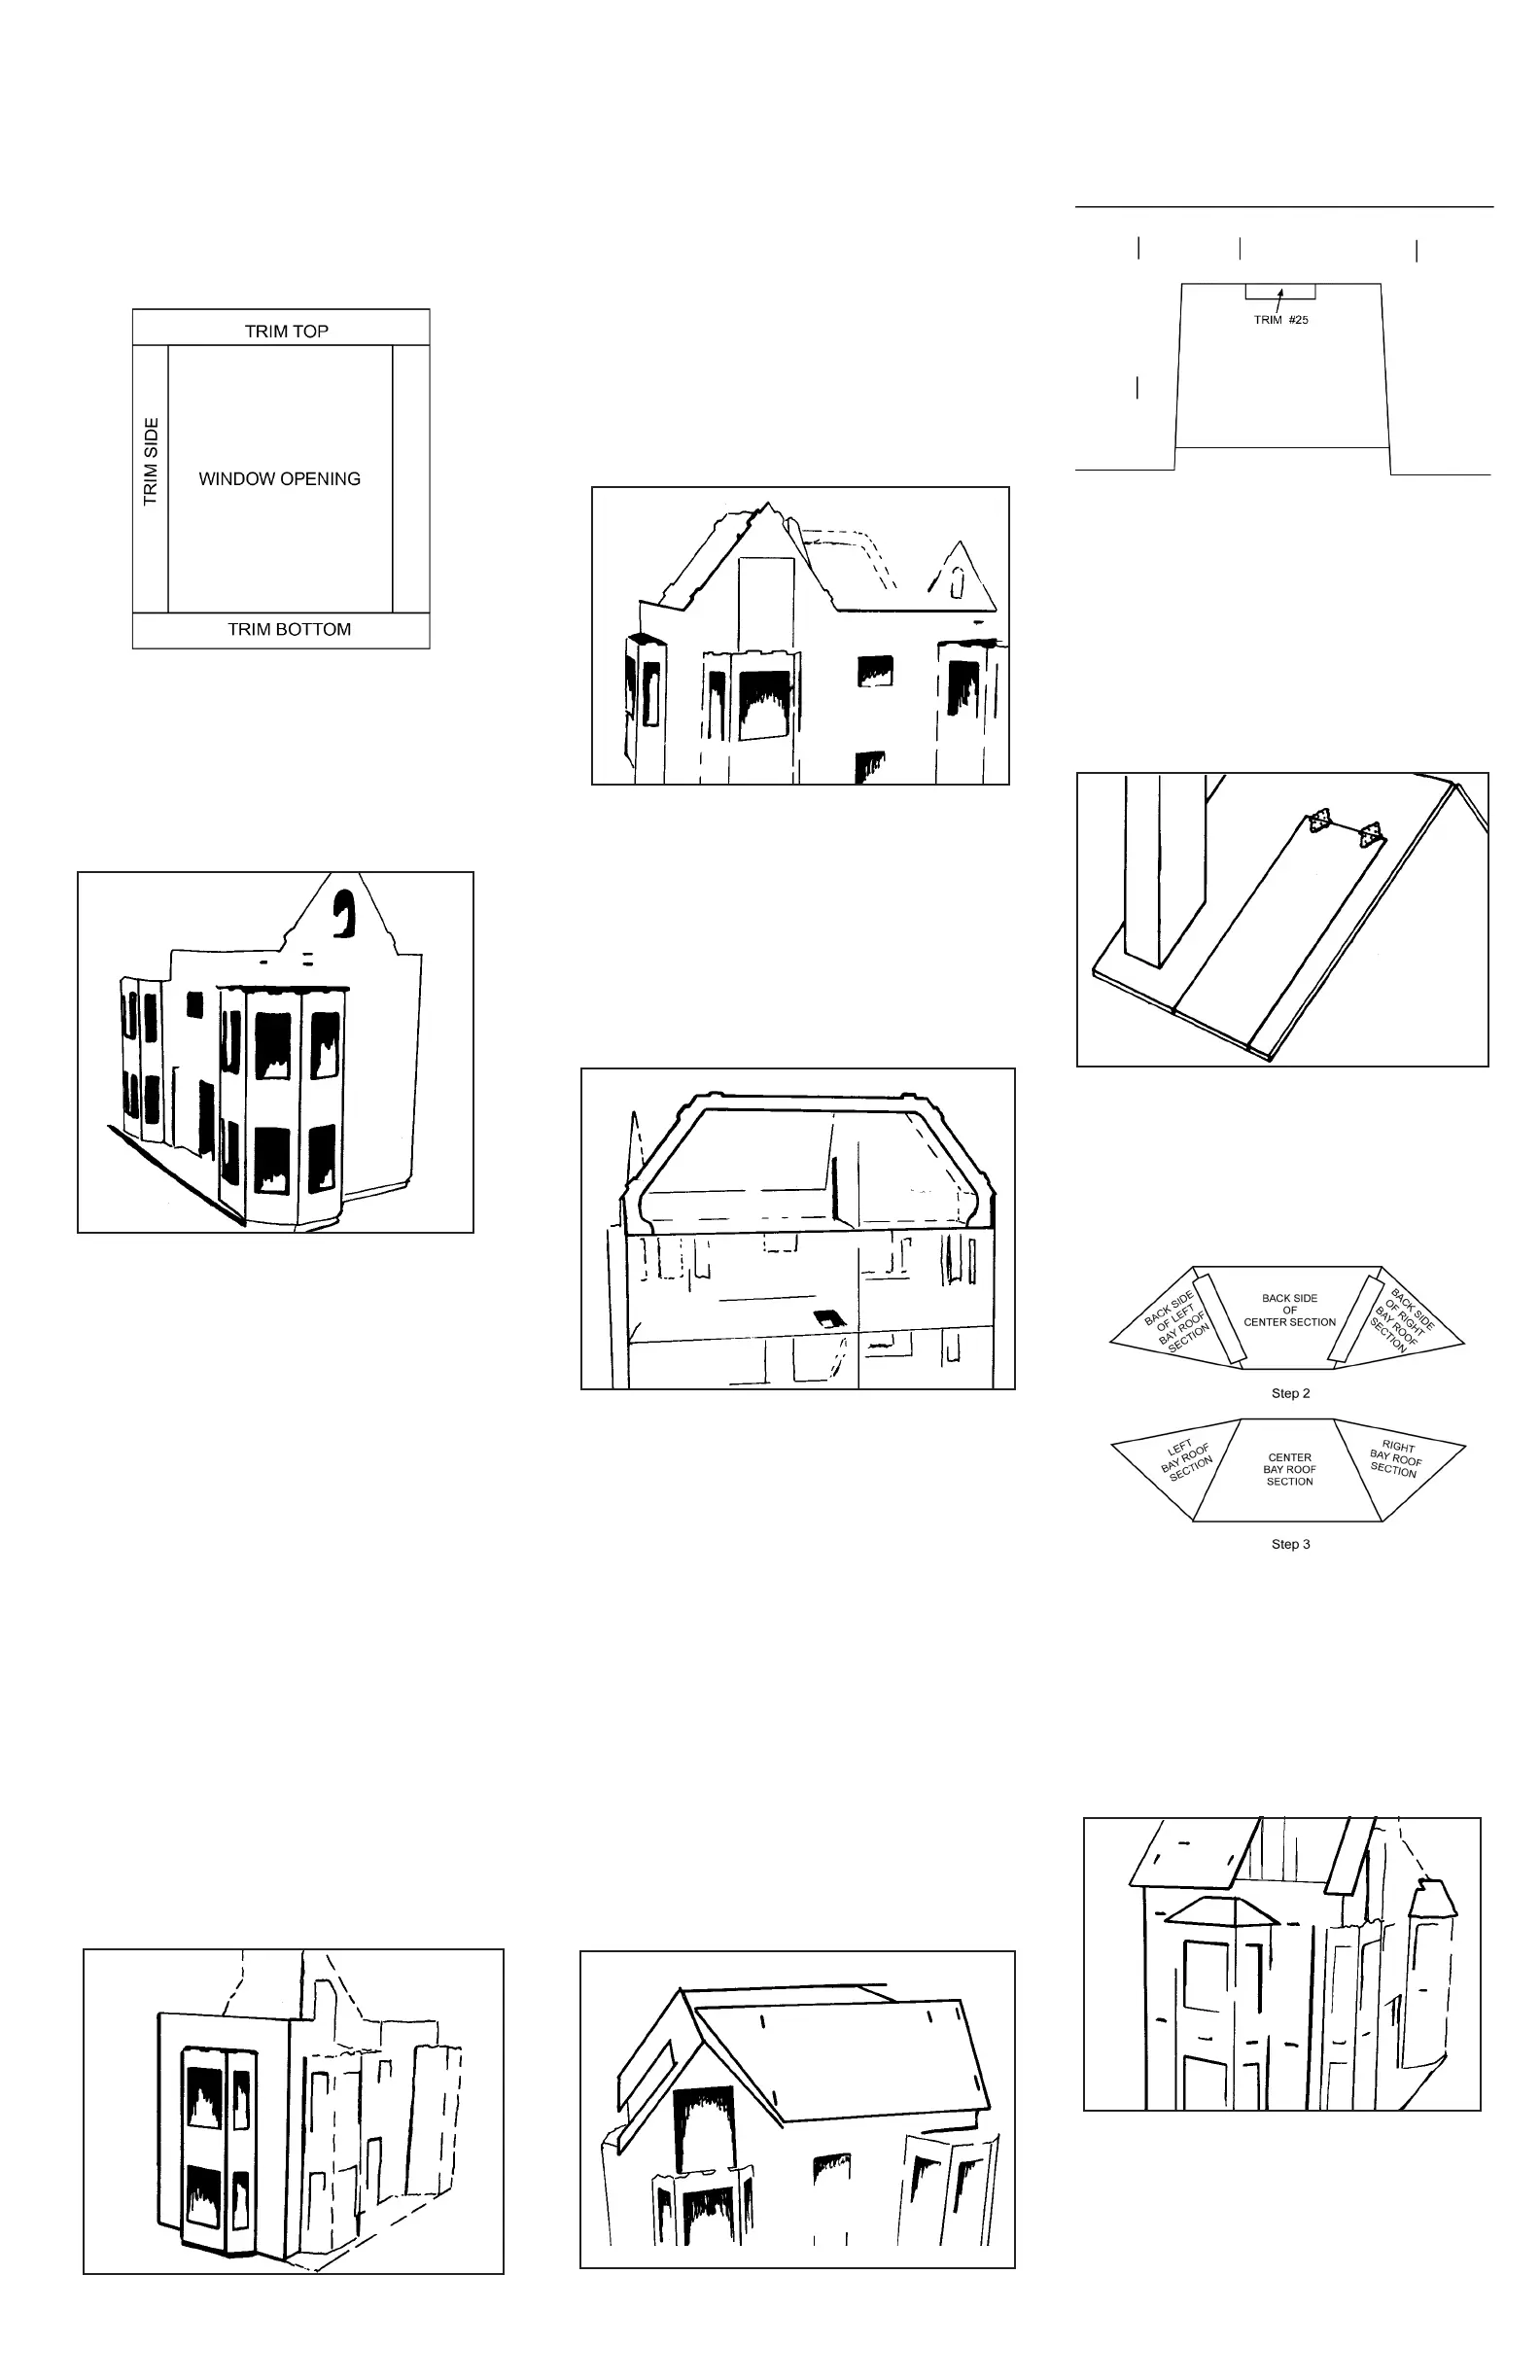
2. Remove and prepare 20 INTERIOR TOWER WINDOW
TRIM SIDES from Sheet 18a and 20 INTERIOR TOWER
WINDOW TRIM TOPS AND BOTTOMS from Sheets 18a
and 18b. Glue these INTERIOR WINDOW TRIM pieces to
the Interior side of the TOWER SIDES as illustrated. If you
haven’t painted the TOWER pieces, the interior is the
unfinished rough side of the wood.
3. REMEMBER throughout this step which end of each
TOWER SIDE points up towards the THIRD FLOOR. If
you've erased your markings, note that the space between
the window opening and top (THIRD FLOOR) edge is
narrower than the same space between the other window
opening and the bottom (FIRST FLOOR) edge.
4. One at a time, glue the completed TOWER SIDES to the
FIRST FLOOR slots, then SECOND FLOOR tabs and the
THIRD FLOOR slots.
D. BAY WINDOWS
1. Remove and prepare all BAY WINDOW SIDES from
Sheets 9a and 9b.
Paint or wallpaper the interior sides of the BAY sections, if
desired. The interiors are the unfinished, rough sides of the
wood.
2. Remove and prepare 22 INTERIOR BAY WINDOW TRIM
SIDES from Sheet 18b and 2 from Sheet 18a.
3. Remove and prepare 16 INTERIOR SMALL BAY WINDOW
TRIM TOPS AND BOTTOMS and all 8 INTERIOR LARGE
BAY WINDOW TRIM TOPS AND BOTTOMS from Sheets
18a and 18b.
4. Glue the INTERIOR WINDOW TRIM to the window opening
of the interior BAY SIDES, corresponding the trim to the
large and small windows.
5. While the TRIM is drying, remove and prepare the 3 DAY
SUPPORTS from Sheets 1 and 6. Glue to LEFT SIDE of
house, making sure that they are in the proper positions
(top, middle and bottom), lining up tabs in slots.
6. Then assemble the 4 narrow BAY SIDES to the FRONT and
LEFT SIDE of house, lining up tabs and slots on all three
floors on the FRONT, they'll need to bend slightly to slide
into the top and bottom floor slots. Remember which end of
the BAY SIDE should point up to top.
7. Glue the 2 larger BAY SIDES to the FRONT and LEFT
SIDE of house, lining up tabs and slots.
8. Remove and prepare the two BAY WINDOW SEATS FROM
Sheet 5 and the two that were set aside in section B, step 5
from Sheet 4. Test each for fit and positioning in the bay
windows. When situated in a level position, glue in place.
E. THIRD FLOOR
1. Remove and prepare both THIRD FLOOR PARTITIONS
from Sheet 10 The two doors in one of the partitions can be
removed and discarded or sanded, painted and hinged in
place.
2. Glue both PARTITIONS in place lining up the tabs and slots
on the THIRD FLOOR.
3. Then glue both PARTITIONS to each other, lining up the
single tab and slot near the top.
4. Remove and prepare GABLE from Sheet 10 and glue to
HOUSE FRONT'.
This is a good time to stain the base of the house assembly
and paint the outside with white texture sand paint, if
desired. Remember not to paint over edges or unassembled
tabs and slots.
F. ROOF
1. Remove and prepare REAR SUPPORT from Sheet 13. Line
up tabs with slots and notch in THIRD FLOOR PARTITION
and glue ONLY where the tabs go into the THIRD FLOOR.
2. Remove and prepare ROOF C from Sheet 10, ROOF B
from Sheet 12 and ROOF A, D, E and F from Sheet 11.
3. Remove and prepare two ROOF TRUSSES from Sheet 5
and the one ROOF TRUSS set aside earlier from Sheet 5
in section B, step 4.
4. Glue the ROOF pieces to the house assembly in
alphabetical order beginning with ROOF A, along the right
side of the front GABLE. Next glue ROOF B beside it along
the front of the house.
5. From the underside of the ROOF, insert one triangular
ROOF TRUSS into the slot of ROOF A and the other
triangular ROOF TRUSS into the slot of ROOF B.
6. Glue ROOF C and D in place.
7. Glue tab D of the remaining curved ROOF TRUSS into
ROOF D from the underside (tab E should be pointing up).
8. Then glue ROOF E in place to the top of the house, lining
up tabs and slots of REAR SUPPORT, ROOF TRUSS and
THIRD FLOOR PARTITION.
9. Remove the LIFT OFF SECTION from ROOF F and
save. Glue ROOF F in place.
10. Remove TRIM pieces 25 and 26 from Sheet 17.
Glue TRIM 25 to the underside of the top edge of
the opening in ROOF F, as illustrated, so it extends
out partially.
11. Then put the LIFT-OFF SECTION back in place on
ROOF F (do not glue). Reach in from the front
opening in the GABLE and glue TRIM 26 flat
against the LIFT-OFF SECTION so It prevents It
from sliding off the house (glue trim strip to this
section just above where side of house meets the
roof). DON'T GLUE the TRIM of strip to the ROOF
section or the wall of the house.
12. The LIFT-OFF SECTION of ROOF F may also be
attached to ROOF F at the top edge with hinges, so
it can be lifted, as illustrated.
G. BAY WINDOW ROOF
1. Remove and prepare three BAY WINDOW ROOF
pieces from Sheet 7.
2. Turn them face down and line them up, as
illustrated. Make sure their position is correct. Tape
them together where the edges meet.
3. Flip the taped roof assembly over so the smooth
finished sides face you. Gently place the BAY
WINDOW ROOF over the top of the bay window on
the LEFT SIDE of house.
4. Make sure that the top edges of the assembly are
flush with and fully touching the left side of the
house. Remove assembly and apply glue to the top
edges of the BAY WINDOW SIDES Set the
assembly back in position, adjusting to make sure
all proper edges are in contact with the LEFT SIDE
of house and BAY WINDOW SIDES.
5. When in the proper position, run a line of glue along
the top edge of BAY WINDOW ROOF where it
meets the LEFT SIDE wall.
Copyright 2019 Greenleaf Dollhouses
All rights reserved
Made and printed in the USA
see what's new and find accessories to go with your dollhouse... visit us at shop.greenleafdollhouses.com
 Loading...