8
GRILLCHEF
General Information for Successful
Assembly
Please read the assembly instructions carefully and
follow the safety precautions. Allow sucient time
for assembly. Before starting assembly, clear an area
measuring approximately two to three square metres.
Remove the set from the packaging! Lay out all parts
and any necessary tools so that they are within easy
reach.
Please note: Only tighten all of the screw
connections rmly when you have nished assembly.
Otherwise this can result in unwanted tension.
Parts List
A. Shelf Slat, short 3
B. Windbreak left 1
C. Windbreak, centre 1
D. Grill 1
E. -
F. Windbreak, right 1
G. Handle 1
H. Handle bracket, short 2
I. Standing leg 2
J. Shelf Slat, long 5
K. Supporting rods 2
L. Wheel 2
M. Axle 1
N. Wheel leg 2
O. Fire bowl 1
P. Locking device 2
Q. Shelf support, long 2
Preparing Assembly
Please use the following list and drawing to check
that all parts are present. Lay out all parts and any
necessary tools so that they are ready for assembly.
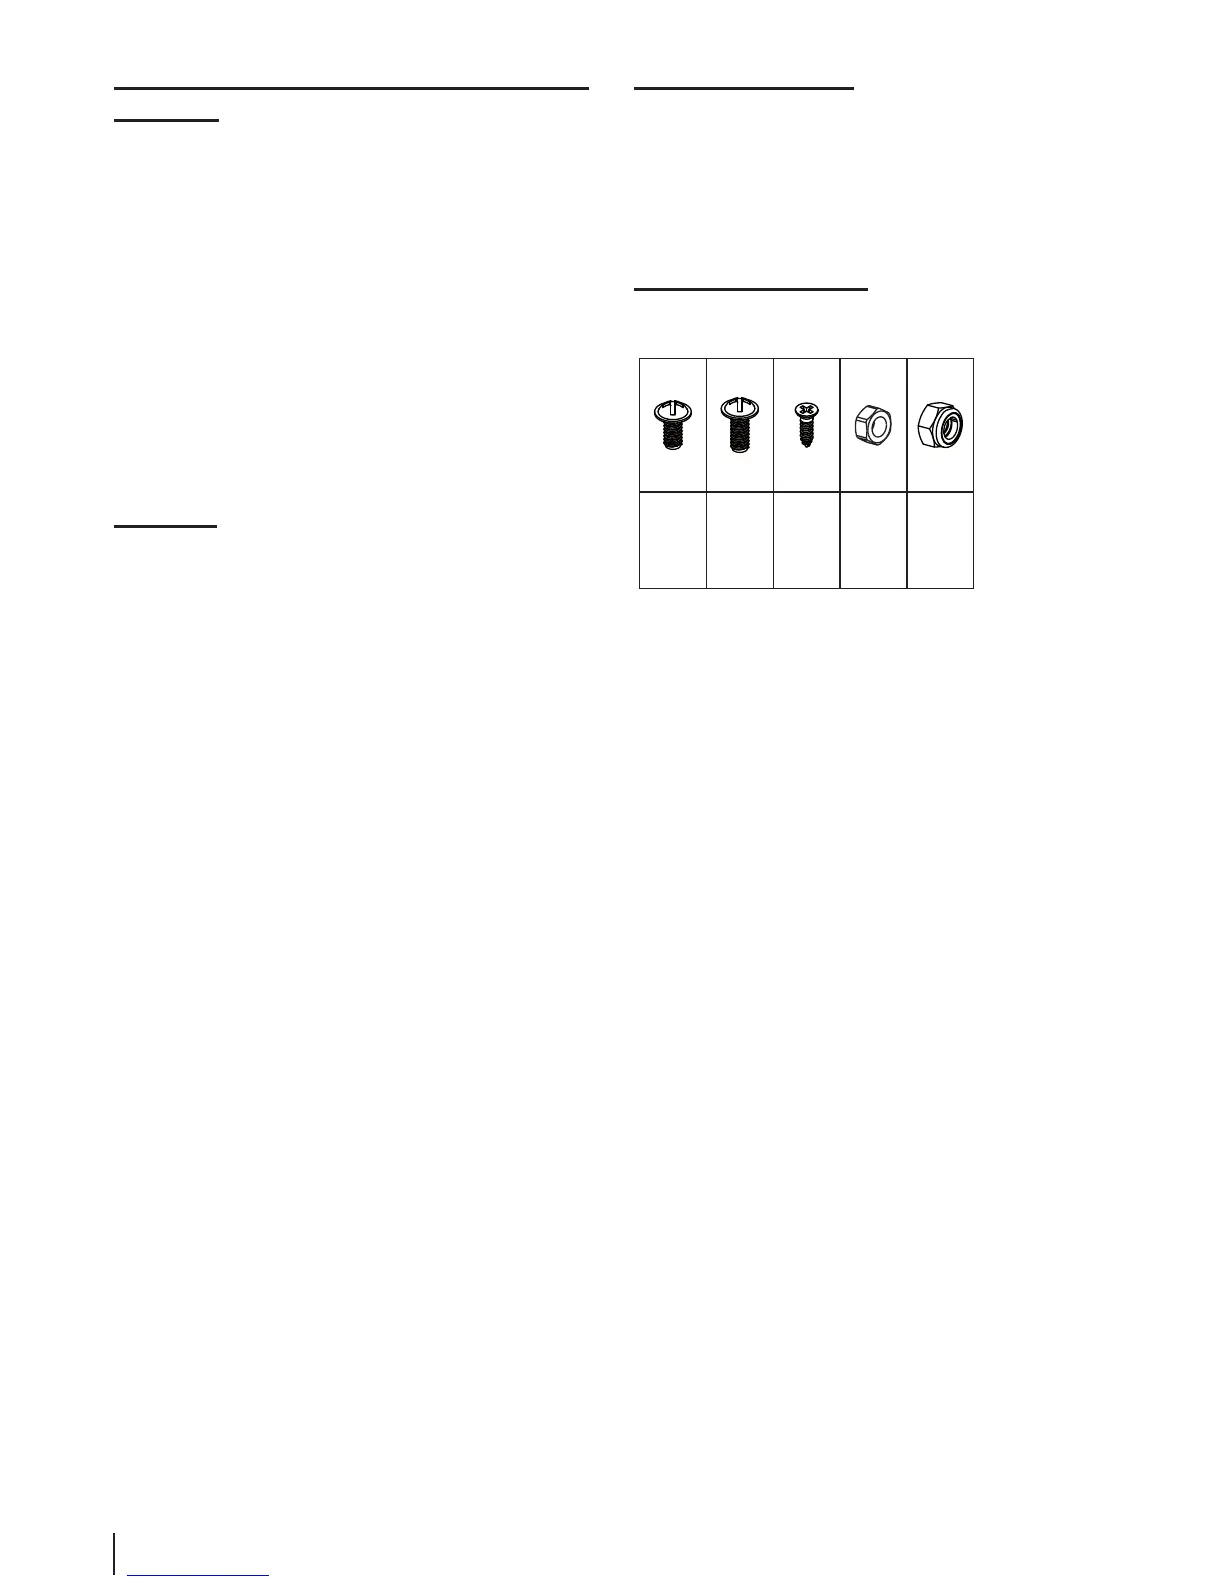
Connection Elements