Note: When changing sharpening stones of different thicknesses, control the angle of
sharpening of the knife. It should remain unchanged. Every time a sharpening stone is
changed the procedure for measuring the sharpening stone (between the thickness
compensator and the pivot) described in section 4.2. should be repeated. If the
sharpening stones are of the same size/thickness, there is no need to measure again.
After you clamp the pivot with the thumb screw, the sharpening stone can be removed.
The distance you get between the thickness compensator and the pivot is to
compensate for the variance in sharpening angle created by the sharpening stone. Now,
the sharpening angle is set with the utmost precision.
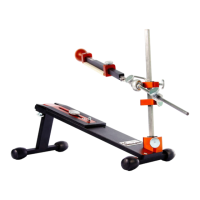
4 3 . .Attaching the sharpening stone
The sharpening stone should be fastened on the horizontal shaft in the stone holder.
Because sharpening stones can be of different lengths, the clamp with the xing screw is
movable. It moves along the entire length of the horizontal shaft and this allows a
sharpening stone of any length to be attached.
With two ngers press the nearest side of the stone holder through the spring and get it
as close as you can to the wooden handle. Put the sharpening stone into the stone
holder and fasten it with the thumb screw.
www.gritomatic.com
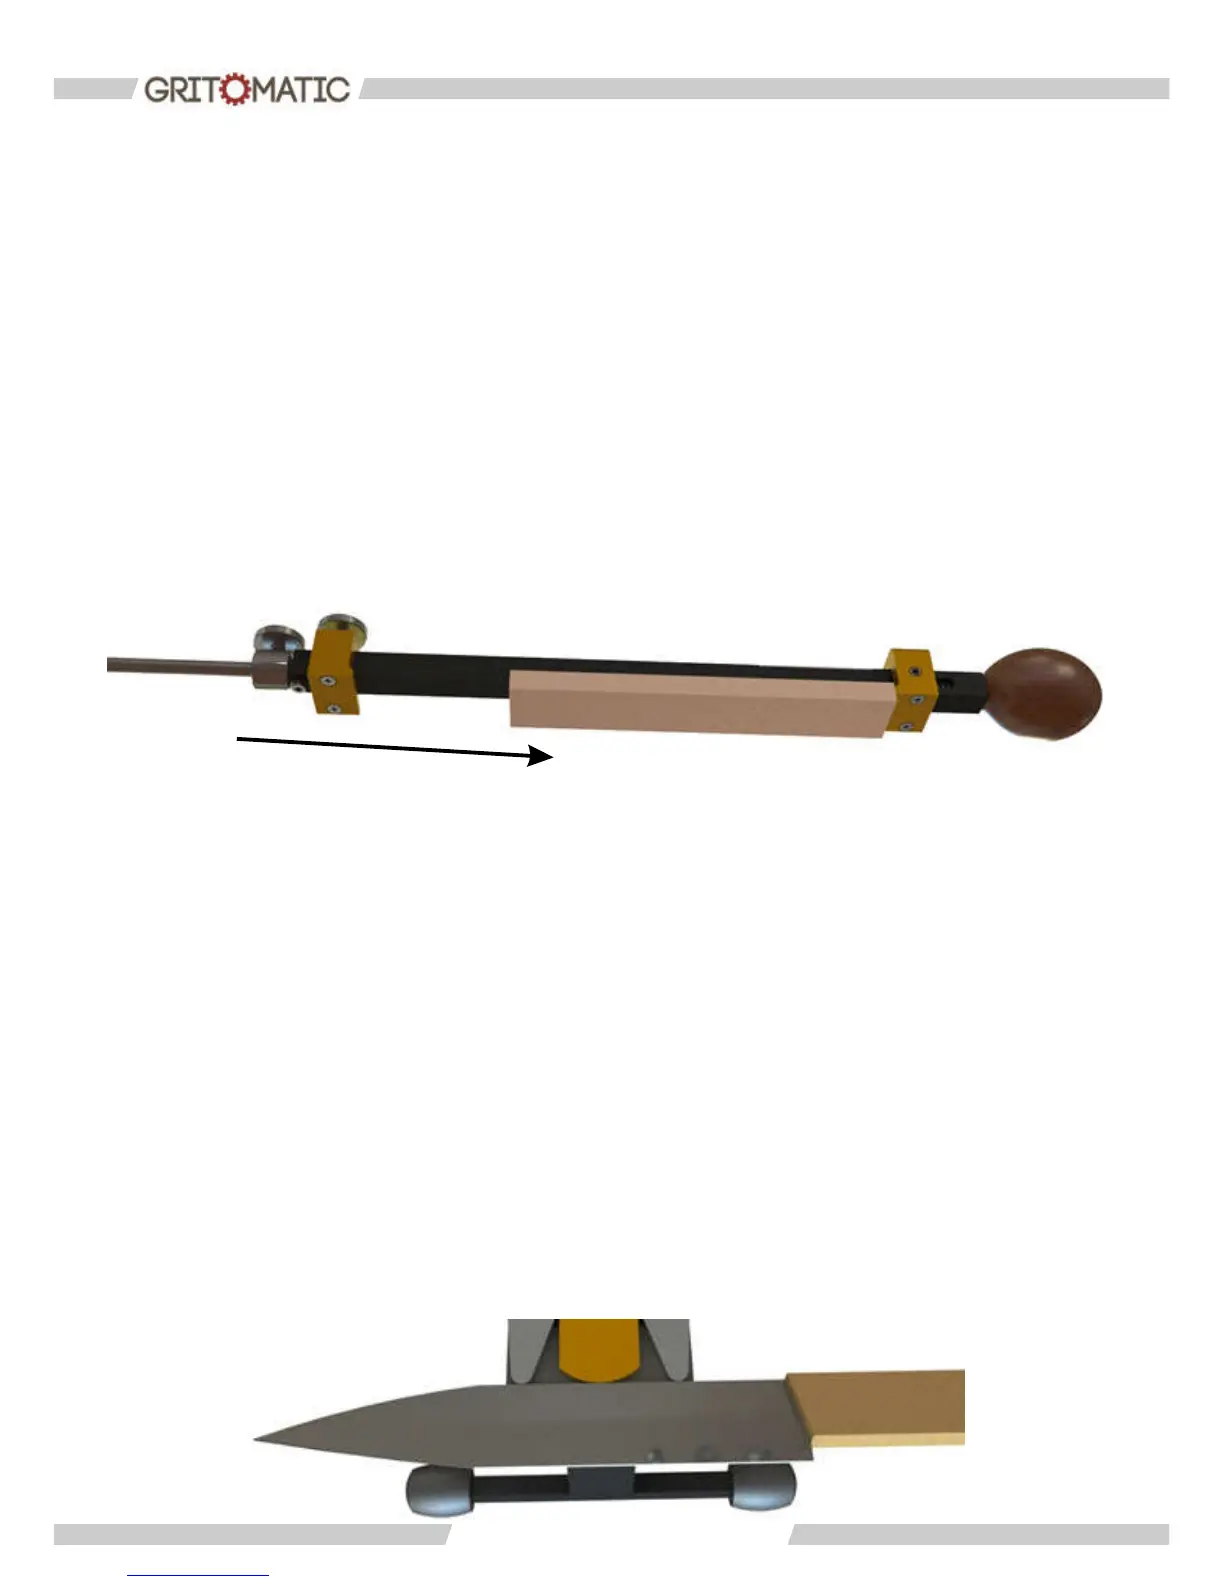
4 4 . .Fastening the knife
Position the knife on the rubber mat at the base of the knife sharpener. The edge of a
knife with a blade should be directed outwards (towards you). You will immediately feel
the magnet located in front part of the base. The cutting edge of the knife must slightly
overlap the edge of the base (approximately 1-3 mm). Attach the three point guide
tightly to the knife and secure it with the large thumb screw. The three-point guide
allows the knife to be precisely positioned on the working plate – both before and after
being ipped over – ensuring a smooth and symmetrical cutting edge. You need not
worry about the safety of your blade, because the guide is made of aluminum. For
additional protection, you can cover the blade with protective tape.
 Loading...